
2026-08-14
Outdoor LED Strip Lights: The Ultimate Buyer's Guide
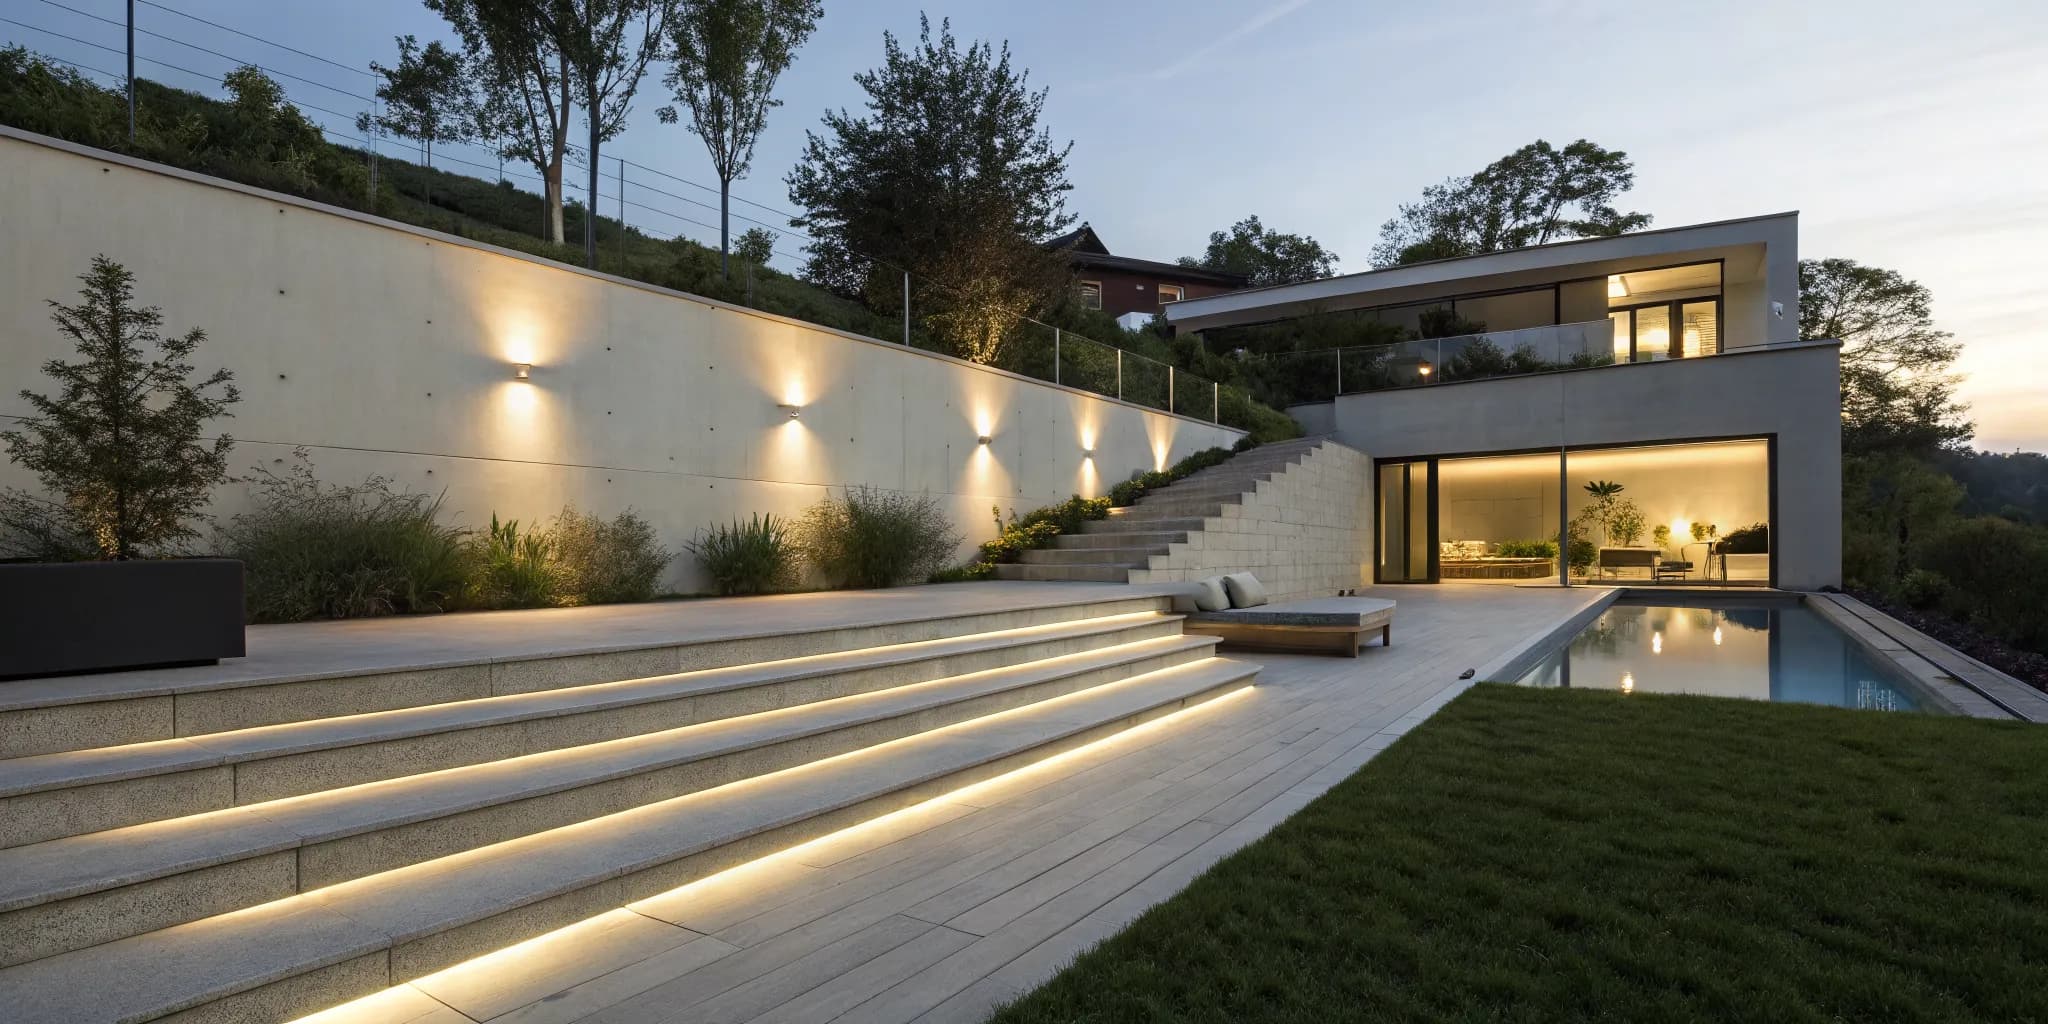
Your outdoor space has so much potential, but after the sun goes down, does it just fade into the dark? Extending your living area outside is about creating a place you want to be, day or night. The right lighting can completely transform a simple patio or garden into an inviting retreat. That’s where outdoor led strip lights come in. These flexible, durable lights are the perfect tool for adding a modern glow to railings, pathways, and architectural features. This guide is your complete roadmap, showing you how to choose the right products, avoid common mistakes, and install them for a professional finish that lasts.
Key Takeaways
- Choose lights with the right outdoor specs: For your lights to last, select a waterproof rating of at least IP65, consider a 24V system for longer installations to maintain brightness, and find strips with UV protection to prevent them from yellowing in the sun.
- Seal every connection point against moisture: Any cut or connection is a potential weak spot where water can get in. Use waterproof connectors and marine-grade heat-shrink tubing to protect these points and ensure your lights survive the elements.
- Vet brands to ensure long-term reliability: Look beyond the price tag and check for strong warranties, read recent customer reviews on multiple platforms, and confirm the product has safety certifications like UL or ETL to get the best value for your money.
What Are Outdoor LED Strip Lights?
Outdoor LED strip lights are flexible, durable lighting solutions made to bring life to your exterior spaces. Think of them as long ribbons lined with tiny light-emitting diodes (LEDs). Unlike their indoor counterparts, these strips are specifically designed to withstand weather conditions like rain, dust, and temperature changes. This makes them perfect for adding a beautiful glow to patios, gardens, walkways, and decks. They offer a modern and efficient way to brighten your outdoor areas without a complicated setup.
When you're ready to showcase your beautifully lit outdoor space, you can create a stunning online gallery in minutes. The Airo AI Builder from lit-365.com lets you go from idea to live site quickly, giving you a perfect platform to share your projects.
Outdoor vs. Indoor Strips
The biggest difference between outdoor and indoor LED strips is their construction. Outdoor strips are encased in a protective, waterproof sleeve, while indoor strips are often bare, leaving the electronics exposed. Using an indoor-rated strip outside is a common mistake that can lead to short circuits, damage, and even safety risks from moisture. On the other hand, LED lights for outdoor use are built to last and perform well in exterior conditions, giving you a smart way to brighten your space safely and efficiently. Always check the packaging for an outdoor rating before you buy to ensure you have the right product for the job.
The Essential Parts of an LED Strip
An outdoor LED strip light system has a few key parts you'll need to know. First is the strip itself, which you can often cut to your desired length. However, remember that every cut or connection is a potential weak spot where moisture can get in. The strip is only fully waterproof along its uncut length. To join pieces or connect the strip to power, you'll need waterproof connectors and marine-grade heat-shrink tubing to create a durable seal. Finally, you'll need a compatible power supply to provide the correct voltage and wattage for your lights to shine brightly and safely.
How to Choose the Best Outdoor LED Lights
Picking the right outdoor LED strip lights can feel like a big task, but it really comes down to a few key features. Once you know what to look for, you can confidently choose a set that perfectly matches your vision and holds up to the elements. Think about where you’ll be placing the lights and what kind of atmosphere you want to create. From there, you can use these factors to find the perfect fit for your project.
Understanding Waterproof (IP) Ratings
When you’re shopping for outdoor lights, you’ll see "IP ratings" mentioned a lot. This isn't just technical jargon; it’s your guide to how waterproof the lights are. Outdoor LED strip lights typically come with ratings like IP65 and IP67. An IP65 rating means the lights can handle strong jets of water, making them great for areas that might get hit by sprinklers or heavy rain. If you need lights for a pool area or a spot that might get temporarily submerged, look for an IP67 rating. This indicates they can be underwater for short periods without damage. Choosing the right rating ensures your lights will last, no matter the weather.
Finding the Right Brightness
You want your lights to be bright, but not blinding. Brightness is measured in lumens, but it’s not always as simple as picking the highest number. One of the most common LED strip light problems is a drop in brightness over long distances, known as a voltage drop. This can make the end of your strip dimmer than the beginning. To avoid this, consider using shorter runs or choosing a higher voltage strip (more on that next). Also, make sure your power supply is strong enough for the total length of your lights to ensure a consistent, beautiful glow from end to end.
Picking Your Perfect Color Palette
This is where the fun really begins. Do you want a warm, cozy white light for your patio, or do you want to be able to change colors for a party? Single-color strips are great for a classic, consistent look. But if you want flexibility, look for RGB (Red, Green, Blue) strips. These let you create millions of different colors with a remote or an app. Many brands offer outdoor LED strip lights that are durable, weatherproof, and can change colors, giving you total control over your outdoor ambiance. Just imagine setting your garden lights to a festive red and green for the holidays!
Matching the Power Supply (12V vs. 24V)
LED strips typically run on low-voltage power, either 12 volts (12V) or 24 volts (24V). So, which one should you choose? For shorter runs, like accenting a planter or a small set of stairs, a 12V system works perfectly fine. However, if you’re planning a longer installation, like lining your entire deck or a long pathway, a 24V system is the better choice. It can carry power over a longer distance with less voltage drop, which means your lights will stay consistently bright. Many kits come with a matching power supply, but if you're buying them separately, double-check that your strip’s voltage matches the power source.
Checking for Durability and UV Protection
Outdoor lights have to withstand a lot more than just rain. They’re exposed to sun, temperature changes, and dust. Look for strips with a high-quality protective coating. A good option is a special silicone coating that’s designed to be flexible and durable. This type of material won't crack in the cold or turn yellow after a few seasons in the sun. UV protection is especially important because it prevents the sun's rays from degrading the strip and causing it to become brittle over time. Investing in durable lights from the start means you’ll spend less time on maintenance and more time enjoying your beautifully lit space.
Common Mistakes to Avoid
Starting a new lighting project is exciting. It’s easy to get caught up in the creative vision of how amazing your space will look and want to jump straight to the finish line. But with outdoor LED strips, a few small oversights during the planning phase can lead to big headaches later on. The last thing you want is for your beautifully lit patio to flicker out after the first rainstorm or for your colors to look all wrong. Taking a moment to double-check the details will save you time, money, and the frustration of having to redo your work.
Think of this section as your friendly pre-flight checklist. We’ll walk through the most common slip-ups people make when choosing and installing outdoor LED lights. These aren't complicated technical details, just simple points that are easy to miss when you're focused on the final result. From picking strips that can’t handle the weather to miscalculating your power needs, we’ve got you covered. By keeping these points in mind, you can approach your project with confidence and make sure your outdoor lighting looks fantastic and lasts for years to come. After all, a successful project is all about getting the foundation right.
Forgetting to Check the IP Rating
One of the most frequent mistakes is buying LED strips without the right weather protection. Every outdoor light needs an Ingress Protection, or IP, rating. This two-digit number tells you exactly how well the strip is protected against solids (like dust) and liquids (like rain). For a covered porch, a water-resistant rating might be fine. But for lights that will be fully exposed to the elements, you’ll need a higher, waterproof rating. Purchasing a strip with the wrong IP rating for an outdoor project is a recipe for disappointment, as moisture will quickly ruin the electronics. Always check the IP rating and match it to your specific installation environment.
Picking the Wrong Vibe (Color Temperature)
It’s a common myth that the only thing that matters with outdoor lighting is brightness. While you certainly want your lights to be bright enough, the color temperature is what truly sets the mood. Color temperature is measured in Kelvins (K) and determines if the light appears warm or cool. A warm white light (around 2700K-3000K) creates a cozy, inviting glow perfect for patios and seating areas. A cool white light (4000K and up) produces a crisp, modern, and energetic feel that works well for security lighting or accenting architectural lines. Before you buy, think about the atmosphere you want to create.
Underestimating Your Power Needs
Your LED strips need a steady, sufficient power source to shine their best. A common misstep is pairing a long run of LED strips with an underpowered driver or power supply. This not only causes the lights to appear dim or flicker, but it can also be a safety hazard. Running your lights too hot will drastically shorten their lifespan and cause their brightness to fade over time. Before you purchase a power supply, calculate the total wattage your strip will require (the product specifications usually list watts per foot). It’s always a good idea to choose a power supply with a slightly higher wattage capacity than you need to ensure longevity and performance.
Ignoring Where You'll Install Them
Where you plan to mount your lights matters just as much as which lights you choose. Different surfaces require different installation methods. While many LED strips come with an adhesive backing, it may not be strong enough for rough or porous surfaces like brick or wood, especially outdoors. For a clean, professional look and better heat dissipation, consider installing your strips inside an aluminum channel. These channels protect the strip and diffuse the light for a smoother glow. Always measure your planned route carefully and ensure the surface is clean and dry before you begin the installation.
Where to Use Outdoor LED Strip Lights
Once you have the right lights, the fun part begins: deciding where to put them. Outdoor LED strip lights are incredibly versatile, letting you add a touch of magic to almost any part of your home’s exterior. They can create a cozy atmosphere for entertaining, improve safety by lighting up dark spots, and make your home stand out. Here are a few popular ideas to get you started.
Light Up Patios and Decks
Your patio or deck is the perfect place to start with outdoor lighting. Installing LED strips under railings, along stair treads, or beneath the overhangs of your deck can completely change the space. This approach provides a soft, ambient glow that’s ideal for relaxing evenings or entertaining guests. Instead of harsh overhead lights, you get a warm and inviting atmosphere. Plus, lighting up steps and edges is a simple way to improve safety and prevent trips after the sun goes down.
Illuminate Pools and Fountains
If you have a pool, fountain, or other water feature, waterproof LED strips are a fantastic way to make it a centerpiece of your yard. Running lights around the edge of a pool can create a stunning visual effect, making nighttime swims feel a bit more luxurious. For fountains and ponds, submersible LEDs can light up the water from within, highlighting the movement and adding a dynamic quality to your landscape. Using high CRI, waterproof LED strips ensures the colors look vibrant and the installation is safe for water-filled environments.
Highlight Gardens and Pathways
Bring your garden to life at night by using LED strips to highlight pathways and plant beds. You can install them along the sides of a walkway for a subtle, runway-like effect that guides visitors to your door. This not only makes your paths safer to use in the dark but also adds a decorative touch to your landscape. Tucking lights behind planters or along the border of a garden bed can also create beautiful depth and dimension, showcasing your favorite plants and flowers long after sunset.
Accent Your Home's Architecture
Use outdoor LED strips to play up your home’s best features. You can install them under the eaves of your roofline, around window frames, or along porch columns to create dramatic uplighting. This technique, often called architectural lighting, adds a professional and polished look to your home's exterior. It’s a great way to accentuate the architectural features you love, making your house look just as impressive at night as it does during the day.
How to Vet LED Light Brands
With so many brands out there, it can be tough to figure out which ones are worth your money. A little homework now can save you from the disappointment of dim, failing lights a few months down the road. The quality of LED strips can vary wildly, so it’s smart to look past the flashy marketing and dig into what makes a brand reliable. When you’re comparing options, focus on three key areas: what other customers are saying, what kind of promises the company makes, and whether the products are certified to be safe. Taking the time to check these things will help you find lights that not only look great but are also built to last.
Read Customer Reviews
Before you click “buy,” spend some time with customer reviews. I’m not just talking about the star rating on a product page. Dive into the actual comments to see what people are saying about the light’s performance over time. Look for reviews on different platforms, like forums and Reddit threads, where you can find unfiltered opinions. Video reviews are also fantastic because you can see the lights in action. Pay attention to comments about the build quality, brightness consistency, and how easy the strips were to install. Reading what trusted publications and real users have to say will give you a much clearer picture of the product’s long-term reliability.
Check Warranty and Support Policies
A company’s warranty and support policies speak volumes about how much they stand behind their product. A strong warranty (at least one year, but longer is better) shows that the manufacturer is confident in its quality. Just as important is accessible customer support. Imagine you’re halfway through an installation and run into a problem. Will you be able to get help? Look for brands that offer support through phone, chat, or email. Some companies, like HitLights, even provide 24/7 assistance, which can be a lifesaver when you’re working on a project over the weekend. A brand that invests in helping its customers is usually a brand you can trust.
Look for Safety Certifications
Safety should always be your top priority, especially with outdoor electronics. Before purchasing any LED strip lights, check for safety certifications like UL or ETL markings on the product or packaging. These symbols mean the product has been tested by a third-party organization and meets specific safety standards. This is non-negotiable. For outdoor use, also make sure any connectors you use are rated for outdoor conditions (IP67 or higher) to prevent water damage and electrical shorts. While LED lights are generally safe, poorly made or incorrectly installed products can pose a serious fire hazard. Verifying these safety credentials gives you peace of mind that your beautiful lighting setup is also a safe one.
Understanding Efficiency and Lifespan
One of the best things about switching to outdoor LED strip lights is how much you'll save in the long run. They're not just a pretty addition to your space; they're a smart investment. Let's break down what that means for your energy bill and how long you can expect them to last.
How Much Energy Do They Use?
LED strip lights are incredibly energy-efficient, which is great news for your electricity bill. Compared to old-fashioned incandescent bulbs, they can use up to 85% less power to produce the same amount of light. Most strips use between 4 to 14 watts per meter, depending on their brightness. To put that in perspective, running a 10-meter strip light around the clock would only add a few dollars to your monthly bill. This low power consumption makes them a fantastic choice for anyone wanting to add beautiful lighting without worrying about high energy costs. You get all the ambiance with a fraction of the power draw.
How Long Do They Last?
Tired of constantly changing lightbulbs? You'll love the lifespan of LED strips. While a traditional incandescent bulb might give you about 1,000 hours of light, a quality LED strip can last anywhere from 25,000 to 50,000 hours. That’s several years of continuous light before you even have to think about a replacement. This impressive longevity means less time spent on maintenance and fewer bulbs ending up in the landfill. It’s a durable, set-it-and-forget-it lighting solution that keeps your outdoor spaces looking great year after year. You can install them with confidence, knowing they’re built to last.
Calculating Your Long-Term Savings
When you think about cost, remember to look beyond the initial price tag. The real savings with LED strips come from their low running costs over time. To get a rough idea, you can calculate the electricity usage based on the strip's wattage and how many hours you'll use it daily. You can save even more by using a dimmer to adjust the brightness. For the best value, look for high-quality strips that offer more lumens (brightness) per watt. Investing in a more efficient strip upfront means you'll spend less on electricity over the light's entire lifespan, making it a smarter financial choice in the long run.
How Much Do Outdoor LED Lights Cost?
Figuring out your budget is a great first step before you start shopping for outdoor LED strip lights. The price can swing quite a bit depending on the length, brightness, color options, and durability of the lights. You can find a great solution whether you’re looking for a simple setup or a professional-grade system. Let's break down what you can expect to pay.
Budget-Friendly Kits
If you're just starting out or have a small project in mind, you don’t need to spend a fortune. Budget-friendly kits are perfect for adding a simple glow to a patio railing or balcony. These options usually include a single-color light strip and the basic components needed to get them running. While they might not have all the bells and whistles, they are an excellent entry point into outdoor lighting. You can find reliable outdoor LED strip lights that provide great ambiance without a hefty price tag, making it easy to experiment with your design.
Mid-Range Setups
For a little more investment, you can get a lot more features. Mid-range setups are the sweet spot for most homeowners, offering a fantastic balance of performance and price. This is where you’ll find color-changing (RGB) options, better waterproofing, and increased durability. These kits often come with remote controls or even app integration, giving you the power to change the mood with the tap of a button. Look for durable outdoor LED strips that are specifically designed to handle the elements while giving you creative control over your lighting scheme.
High-End Systems
When you want the best of the best, high-end systems deliver professional quality and longevity. These are ideal for large-scale projects, permanent installations, or anyone who wants maximum performance and reliability. You can expect superior brightness, exceptional color accuracy, and top-tier waterproofing that can even be submerged in some cases. Many premium brands offer all-in-one waterproof kits that simplify installation by including everything you need, from the power supply to connectors, ensuring a seamless and long-lasting result for your home.
How to Find the Best Deals
Finding the best deal isn’t just about finding the lowest price; it’s about getting the best value for your money. A cheap, non-waterproof strip light will fail quickly outdoors, making it a wasted investment. Always prioritize the IP rating to ensure your lights are built for outdoor conditions. An IP65 rating is good for splash resistance, while IP67 or IP68 is necessary for areas with heavy rain or potential submersion. By focusing on sturdy lighting options with the right specs, you’ll invest in a product that looks great and lasts for years.
How to Install Outdoor LED Strip Lights
Ready to bring your outdoor lighting vision to life? Installing LED strip lights is a straightforward project you can tackle in an afternoon. The key is to work methodically and make sure every component is properly sealed against the weather. Follow these four steps to get a professional-looking and long-lasting result.
Step 1: Plan and Measure
Before you buy anything, grab a measuring tape. Figure out exactly where you want your lights to go and measure the total length you’ll need. It’s a good idea to add a little extra to your measurement, just in case. For tricky corners or curves, you can use a piece of string to trace the path first and then measure the string. This simple step ensures you purchase the right length of strip lighting from the start, saving you time and preventing waste. A solid plan is the foundation of any great DIY project.
Step 2: Mount Your Lights
For a clean, professional look, install your LED strips inside aluminum channels. These channels protect the lights from bumps and scrapes, help distribute heat, and diffuse the light for a smoother glow. You can attach the channels to surfaces using screws for a secure hold or a strong, weatherproof adhesive for a no-drill option. As you install them, use a level to make sure your lines are perfectly straight. A crooked light strip can be distracting, so taking a moment to get the mounting right makes all the difference in the final look.
Step 3: Waterproof Your Connections
This is the most important step for making your lights last. Any place where you cut and reconnect the LED strip, known as a splice connection, is a potential weak spot. You must make it waterproof. The easiest way is to use waterproof connectors specifically designed for outdoor use (look for an IP67 rating or higher). If you prefer to solder your connections for a stronger bond, be sure to cover the joint completely with marine-grade heat-shrink tubing. Add a dab of silicone at both ends of the tubing to create a perfect seal against moisture.
Step 4: Connect to Power
Your LED strip’s power supply, or driver, is not waterproof and needs to be protected from the elements. House the driver inside a weatherproof junction box to keep it safe from rain, sprinklers, and sun. These boxes are rated for outdoor use; look for a NEMA 3R rating at a minimum. Run your wiring through a proper conduit to protect it from damage. Never leave the power driver exposed. If you’re not comfortable working with electrical wiring, it’s always best to hire a qualified electrician for this final step to ensure everything is safe and up to code.
How to Maintain Your Outdoor LED Lights
You’ve picked the perfect lights and installed them beautifully, so now what? Thankfully, outdoor LED strips don’t ask for much. A little bit of maintenance a few times a year is all it takes to keep them shining bright and working perfectly for years. Think of it as a quick check-up to protect your investment and keep your outdoor space looking its best. Following a few simple steps ensures your lights continue to create the perfect atmosphere season after season.
Keep Them Clean
Over time, your outdoor lights will collect a layer of dust, pollen, and grime. This buildup can make your lights look dim and less vibrant, affecting their overall brightness. To restore their glow, a simple cleaning is all you need. Gently wipe the strips with a soft, damp cloth. If they’re extra dirty, you can use a bit of mild soap and water, but be sure to avoid harsh chemical cleaners that could damage the protective coating. Making this a part of your seasonal outdoor cleanup routine will ensure your lights always perform their best. Proper care for LED lights is a simple way to extend their lifespan.
Watch for Signs of Wear
Your outdoor LED strips are built to be tough, but the elements can still take a toll. Periodically give your setup a quick visual inspection, paying close attention to connection points. Every spot where you cut or connect a strip is a potential entry point for moisture, so check that all your waterproof seals are still intact and secure. Look for any signs of cracking, discoloration, or flickering lights, as these could indicate a problem. Also, make sure the lights have proper ventilation and aren't covered by debris, which can cause them to overheat. Catching these small issues early is the best way to prevent bigger problems down the road and is a key part of installing LED strip lights outdoors correctly from the start.
Find the Perfect Lights for Your Project
Okay, you've got the vision for your outdoor space, but the sheer number of LED strip options can feel like a lot. Let's cut through the noise. Finding the perfect lights isn't about getting lost in technical specs; it's about knowing what to look for to bring your idea to life. By focusing on a few key areas, you can confidently choose a set of lights that will look great and last for years. It’s all about matching the product to your project.
Prioritize Quality Over Price
It's so easy to get drawn in by a super low price tag, but this is one of the biggest pitfalls when buying LED strips. Many people make the mistake of only looking at the price, which often leads to disappointment when the lights fail after one season. Instead of sorting by "price: low to high," focus on product quality. This means checking the construction materials and reading recent customer reviews to see how the lights actually hold up over time. A slightly higher initial investment in a well-made product often saves you the headache and cost of replacing cheap, faulty strips down the road.
Match the Lights to Your Space
Think about exactly where these lights will live. Will they be tucked under a covered patio, or will they be fully exposed to rain along a garden path? This is where the IP rating comes in. A strip with a low rating, like IP20, is only meant for indoors and will fail quickly if it gets wet. For most outdoor projects, you'll want something rated IP65 or higher to ensure it's protected from dust and water. Getting this right means you can confidently illuminate walkways or accent a deck without worrying about every storm that rolls through.
Plan for Installation and Upkeep
Before you click "buy," consider the installation process. Most outdoor LED strips are designed for DIY projects, often featuring a simple peel-and-stick adhesive backing. You'll want to make sure you have a clean, dry surface for them to stick to for the best results. Also, check that you can easily cut the strips at the marked points to get the perfect length for your project. And remember, a little upkeep goes a long way. A quick wipe-down a few times a year will keep your lights shining bright and help them last for seasons to come.
Frequently Asked Questions
Can I cut my outdoor LED strips to a specific length? Yes, you can. Most LED strips have designated cut marks, usually every few inches, where you can safely trim them. However, remember that every cut you make creates a new point that needs to be waterproofed. The original, uncut strip is fully sealed, but your new connections will be vulnerable to moisture unless you properly seal them with waterproof connectors and marine-grade heat-shrink tubing.
My lights are bright at the start but get dimmer at the end. What's wrong? This is a classic case of voltage drop, and it's very common with long runs of LED lights. It happens because the electrical current loses a bit of power as it travels down the strip. To fix this, you can use a higher voltage system, like 24V instead of 12V, for longer installations. Another solution is to power the strip from both ends or run a separate power wire alongside the strip to inject power further down the line.
Is it safe to use indoor LED strips on a covered porch? I would strongly advise against it. Even on a covered porch, your lights will be exposed to humidity, condensation, and temperature swings, which can quickly ruin an indoor-rated strip. Indoor strips lack the protective silicone or plastic sleeve that shields the electronics from moisture. It's always best to choose a strip with at least an IP65 rating for any outdoor area, covered or not, to ensure safety and longevity.
Do I really need to put the power supply in a special box? Absolutely. The power supply, or driver, is the heart of your lighting system, but it is not waterproof. Leaving it exposed to the elements is a major safety risk and will cause it to fail. You must house it in a weatherproof junction box (look for a NEMA 3R rating) to protect it from rain and moisture. This is a critical step for a safe and durable installation.
What's the single most important thing to check before buying? If you only check one thing, make it the IP rating. This number tells you exactly how waterproof the lights are, which is the most critical factor for any outdoor project. An IP65 rating is suitable for areas that get splashed, while an IP67 rating is better for places exposed to heavy rain. Choosing the right IP rating from the start will save you from the disappointment of failed lights after the first storm.