
2026-08-11
Low Voltage Landscape Lighting: A Complete Guide
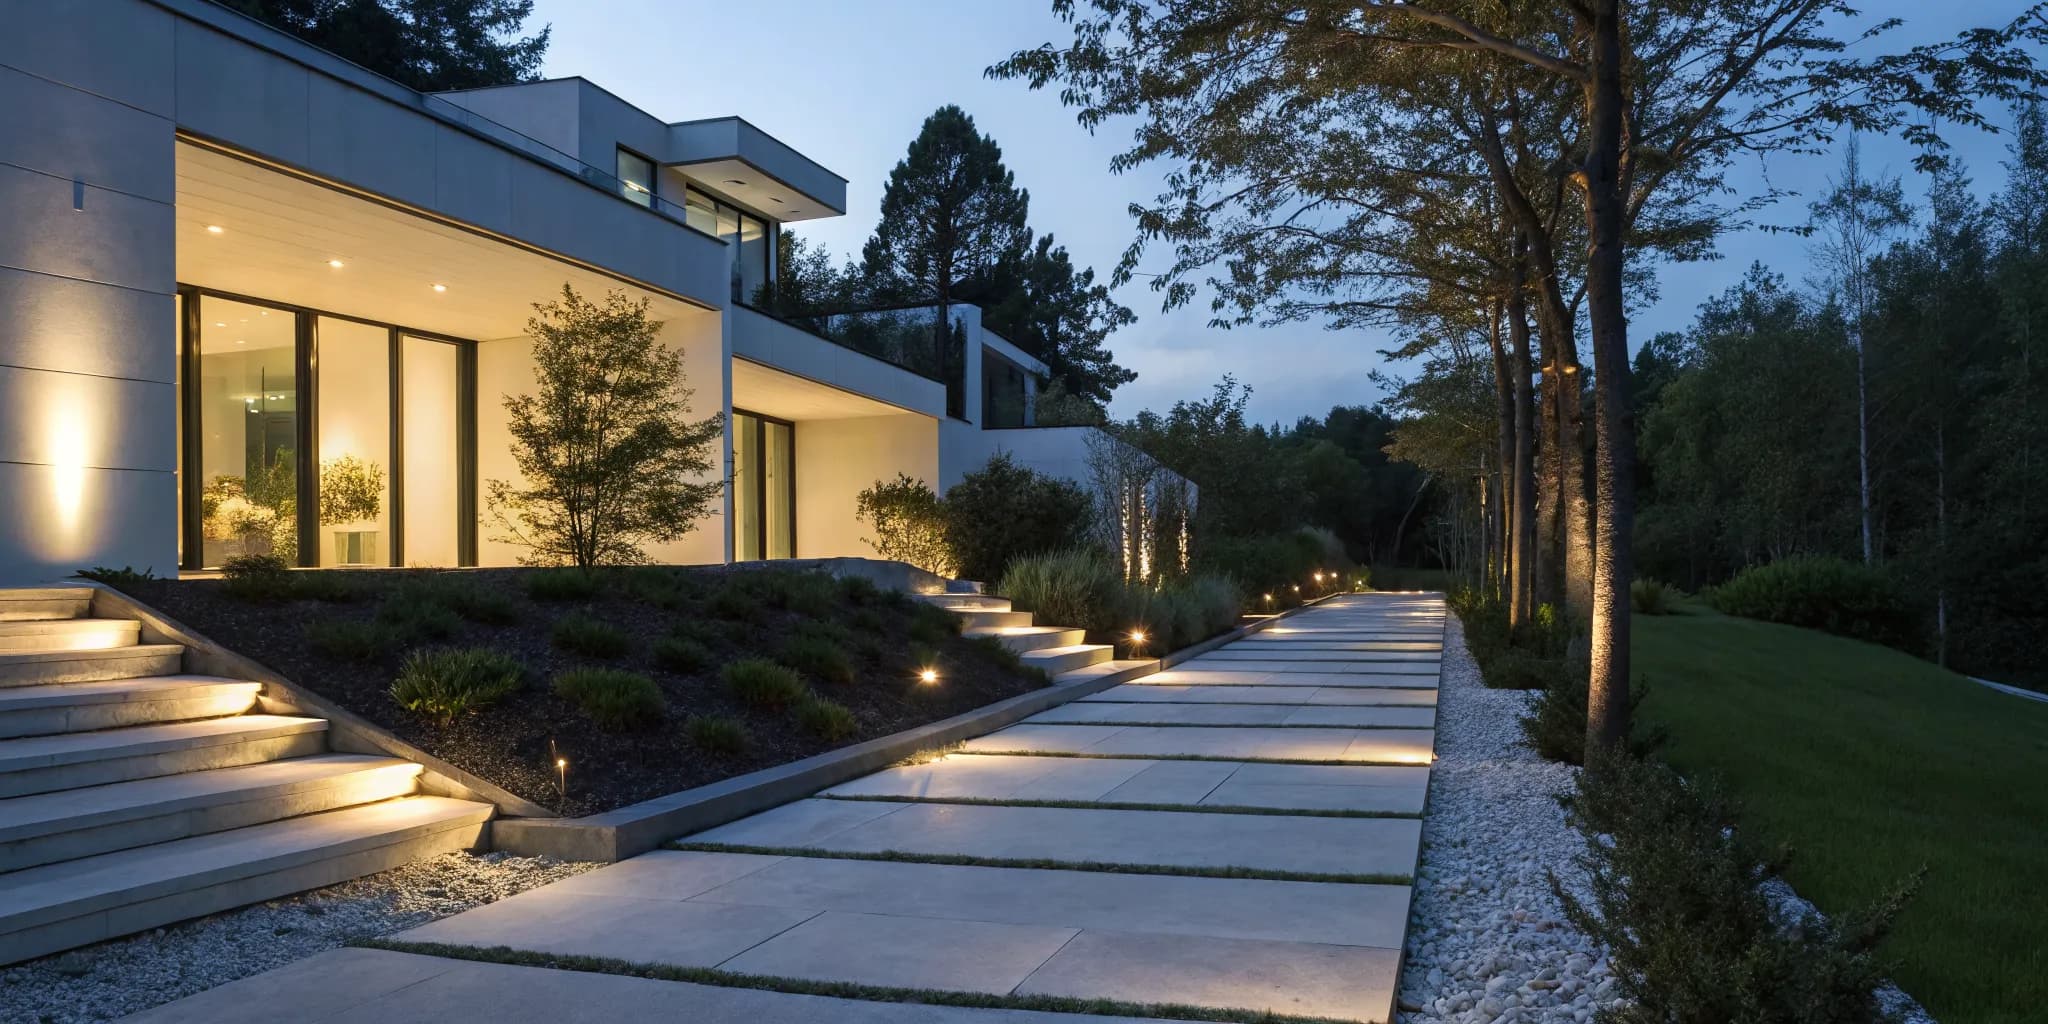
Many home improvement projects require calling in a professional, but low voltage landscape lighting is a satisfying exception. This is a project you can confidently tackle yourself over a weekend. The system is designed for safety and simplicity, using a transformer to convert your home's standard power to a harmless 12 volts. This means you don't need to be an electrician to work with the wiring or install the fixtures. It puts you in complete control of your home's curb appeal. We'll provide the clear, step-by-step guidance you need to design a beautiful layout and bring it to life, from choosing the right fixtures to avoiding common installation mistakes.
Key Takeaways
- Start with a plan, not a shopping cart: Before buying anything, sketch a map of your property to identify key features and functional areas. This simple blueprint helps you create a cohesive design, calculate power needs, and avoid common mistakes.
- Choose low voltage and LED for the best results: A 12-volt system is the safest and most DIY-friendly choice for home projects. Pairing it with energy-efficient LED bulbs saves you money on electricity and means you will not be replacing bulbs for years.
- Prioritize quality materials and simple upkeep: Your lights live outdoors, so invest in durable fixtures made of brass, copper, or powder-coated aluminum. Performing simple seasonal maintenance, like cleaning lenses and checking connections, will protect your investment and keep your system running perfectly.
What Is Low Voltage Landscape Lighting?
If you're looking to add a touch of magic to your outdoor spaces, low voltage landscape lighting is one of the easiest and most effective ways to do it. Think of it as the perfect finishing touch for your home’s exterior, highlighting your favorite features after the sun goes down. This type of lighting is a popular choice for homeowners because it’s safe, energy-efficient, and surprisingly simple to install yourself. It’s ideal for illuminating garden beds, lining pathways, lighting up a deck, or adding a soft glow to a water feature.
The system works by taking your standard home electricity (120 volts) and converting it to a much lower, safer level (usually 12 volts) using a device called a transformer. This significant drop in power is what makes it so DIY-friendly. You don't need to be a master electrician to work with it, and the risk of electric shock is minimal. This safety and simplicity make it the go-to for most residential projects, allowing you to create a professional-looking lighting design without the professional price tag. It provides both the functional light you need for safety and the beautiful ambiance you want for curb appeal.
How Low Voltage Lighting Works
The secret behind low voltage lighting is a simple but brilliant setup. It all starts with a transformer, which is a small box that you plug into a standard outdoor GFCI outlet. This transformer is the heart of the system, and its job is to "step down" your home's 120-volt electrical current to a safe 12 volts. From the transformer, a low voltage cable runs out into your yard to power the light fixtures. Because the voltage is so low, the cable can be buried just a few inches underground or even hidden under mulch, making installation a breeze. Most modern low voltage fixtures use LED technology, which is incredibly efficient and long-lasting.
Low Voltage vs. High Voltage: Which Is Right for You?
When you're planning your outdoor lighting, you’ll see two main options: low voltage (12V) and high voltage (120V). For almost every home project, low voltage is the clear winner. Its safety and ease of installation make it the perfect choice for homeowners. You can adjust, move, and add lights to the system without needing to hire an electrician for every little change. High voltage lighting, on the other hand, is the kind of powerful system used for commercial properties, sports fields, and large public areas. It requires deep trenching, conduit, and professional installation. Using the wrong voltage can cause major headaches, from flickering lights to a drastically shortened fixture lifespan, so it's crucial to choose the right system for your needs.
Your Guide to Low Voltage Light Fixtures
Once you have a plan, it’s time for the fun part: choosing your light fixtures. Think of this as decorating a room. Each light has a specific job, and the combination you choose will define your outdoor space’s look and feel. Some lights are built for safety, making sure you can see where you’re walking, while others are all about creating a mood and highlighting the features you love most about your yard. The fixtures themselves also contribute to your landscape's daytime aesthetic, so consider materials like brass, copper, or powder-coated aluminum that will age well and complement your home's style.
The key is to layer different types of light to create a scene that has depth, interest, and character. You don’t need to use every type of fixture available, but understanding your options will help you make smart choices that bring your vision to life. A well-lit landscape often uses a mix of broad, soft light for general illumination and focused, directional light to draw attention to key elements. From lighting up walkways to making a statement with a beautifully lit tree, the right fixtures are essential. Let’s walk through the most common types of low voltage lights and what they do best.
Path Lights
Path lights are the workhorses of landscape lighting. Their main job is to illuminate walkways, driveways, and garden paths to make them safer to use after dark. But beyond their practical function, they add a beautiful, welcoming glow to your landscape. They come in a variety of styles, from classic mushroom and hat designs to modern bollards, so you can easily find an option that complements your home’s architecture and your garden’s style. When placing them, aim for a gentle, staggered pattern to create soft pools of light rather than a harsh, runway-like effect.
Spotlights and Floodlights
If you want to add a touch of drama to your yard, spotlights and floodlights are your go-to fixtures. While they look similar, they perform two different jobs. Spotlights cast a narrow, focused beam of light, perfect for highlighting a specific feature like a favorite tree, a statue, or an interesting architectural detail on your home. This technique is often called uplighting. Floodlights, on the other hand, provide a much wider beam, washing a large area with light. They’re great for illuminating the side of a house for security or lighting up a broad garden bed.
Well Lights
Well lights are the secret agents of landscape lighting. These fixtures are installed directly into the ground, so they sit flush with your lawn or garden bed, making them virtually invisible during the day. Their discreet design makes them perfect for lighting features from below without a visible fixture getting in the way or becoming a tripping hazard. You can use well lights to cast a dramatic upward glow on the trunk of a large tree, a stone wall, or the columns of your porch. Just be sure they are installed with proper drainage to protect them from water damage.
Deck and Step Lights
Deck and step lights are all about combining safety with ambiance. These small, compact fixtures are designed to be built directly into your outdoor structures. You can recess them into the vertical risers of your stairs to light up each step, mount them on deck posts, or tuck them under railings to cast a soft, downward glow. They make your deck and patio areas much safer to use at night while also creating a cozy, intimate atmosphere that’s perfect for relaxing or entertaining. Using them to outline the perimeter of a deck can also make the space feel more defined and inviting.
How to Plan Your Landscape Lighting System
A great lighting plan is the difference between a yard that simply has lights in it and one that truly shines. Before you buy a single fixture, taking the time to create a thoughtful plan will save you headaches and help you achieve a professional, polished look. Think of it as creating a blueprint for your outdoor space. A little strategy goes a long way in preventing common mistakes like harsh glare or awkward dark spots. By mapping out your design, you ensure every light has a purpose, contributing to a cohesive and beautiful final result.
Map Your Outdoor Space
First things first, grab a pencil and paper and sketch a map of your property. You don’t need to be an artist; a simple bird's-eye view will do. Mark the key features you want to highlight, such as trees, flower beds, statues, and architectural elements of your home. Also, note the functional areas that need illumination, like pathways, stairs, and your patio or deck. This visual guide is your most important tool. It helps you create a detailed lighting plan that ensures even spacing and prevents over-illumination, turning a potentially chaotic installation into a straightforward project.
Layer Light to Create Depth
To give your yard a rich, dimensional feel, think in layers. Just like in interior design, layering light outdoors involves using different types of fixtures for different jobs. Start with broad, soft light for general ambiance, then add task lighting to guide you safely along paths and steps. Finally, place accent lights to draw attention to your favorite features, like a beautiful oak tree or a stone wall. This technique creates visual interest and depth. By positioning floodlights for balanced coverage and spacing path lights correctly, you can design a landscape that feels both magical and expertly planned.
Choose the Right Color Temperature
The color of your light, known as its temperature and measured in Kelvin (K), sets the entire mood. For a warm, inviting glow that feels like a cozy indoor lamp, look for bulbs in the 2700K to 3000K range. This is perfect for seating areas and general landscape lighting. Cooler, bluer light (around 4000K to 5000K) creates a crisp, modern look and can be effective for security lighting or highlighting water features. There’s no single right answer, but as a general rule, warm, amber-toned light tends to complement natural landscapes and make outdoor living spaces feel more comfortable and welcoming.
Calculate Your Power Needs
Now for a little math, I promise it’s easy. To figure out how much power you’ll need, simply add up the wattage of every bulb you plan to use. For example, if you have ten 5-watt path lights and two 15-watt spotlights, your total is (10 x 5) + (2 x 15) = 80 watts. This number is crucial because it determines the size of the transformer you’ll need. Getting this right is important, as an incorrect voltage selection can cause your lights to flicker or burn out prematurely. Always double-check your fixture specifications to find the correct wattage for each one.
Select the Right Transformer
The transformer is the heart of your low voltage system, converting your home's standard 120-volt electricity to a safe 12 volts. Using your total wattage from the previous step, choose a transformer that can handle the load. A good rule of thumb is to select a transformer with a capacity that’s slightly higher than your total wattage, but you should never load it to more than 80% of its capacity. This gives you a safe buffer and leaves room to add more lights later. Investing in high-quality transformers and connectors from the start will ensure your system runs reliably for years to come.
Understand Voltage Drop
Have you ever seen a string of lights where the ones at the end are noticeably dimmer? That’s voltage drop. It happens when electricity loses power as it travels along a long wire. In low voltage lighting, this can cause fixtures farthest from the transformer to appear weak or yellowish. To avoid this, you can use a thicker gauge wire for longer runs, split your lights into multiple shorter runs, or use a transformer with multiple voltage taps. Understanding the basics of voltage drop is key to ensuring all your lights shine at the same, consistent brightness, no matter where they are in your yard.
How Energy-Efficient Is Low Voltage Lighting?
When you hear "low voltage," it’s easy to assume it means low energy use, and you’d be right. Low voltage landscape lighting is incredibly energy-efficient, but the real savings come from the type of bulb you choose. For years, halogen bulbs were the standard for outdoor lighting. While they worked, they consumed a fair amount of power and burned out relatively quickly. Today, the game has completely changed thanks to LED technology, making your outdoor lighting project more sustainable and affordable than ever.
Modern low voltage systems are designed around LEDs, which have revolutionized how we light our outdoor spaces. The difference in energy consumption isn't just small, it's significant. By pairing a 12-volt system with LED fixtures, you get beautiful, brilliant light without the shock of a high electricity bill. This combination makes your landscape lighting both an aesthetic and a financially smart upgrade for your home. It’s a win-win: your garden looks amazing, and your energy costs stay low. You can create stunning effects, highlight your favorite trees, and safely light up your walkways, all while using a fraction of the power you would with older systems.
LED vs. Halogen: Which Bulb Is Better?
When it comes to choosing between LED and halogen bulbs for your landscape lighting, the choice is clear: LED is the superior option. The primary reason is energy efficiency. LED lights use at least 75% less energy than their halogen counterparts. This massive reduction in power consumption means you can run more lights on a single transformer or simply enjoy a much lower electricity bill.
Beyond energy savings, the performance and convenience of LEDs are unmatched. Most modern landscape lighting kits now come standard with LED bulbs because they are simply more reliable and cost-effective. While you might still find halogen bulbs on the market, opting for LED technology from the start will save you money and maintenance headaches down the road.
Understanding Lifespan and Long-Term Savings
The long-term benefits of choosing LEDs are just as impressive as the immediate energy savings. A typical LED bulb can last for 25,000 to 50,000 hours. Compare that to an old-style halogen bulb, which usually burns out after about 1,000 hours. This means you might replace a halogen bulb dozens of times before you ever have to think about replacing a single LED.
This extended lifespan translates directly into lower maintenance and replacement costs. Plus, quality LED garden lights are built to handle tough weather, from heavy rain to summer heat, making them perfect for outdoor use. They also run much cooler than halogens, so they are safer to use near plants and mulch. Over time, the combination of lower electricity bills and fewer replacements makes LED lighting a smart investment for any homeowner.
What Does Low Voltage Landscape Lighting Cost?
Figuring out the cost of a low voltage lighting system is a bit like planning any home project; the final price tag depends on your vision and the materials you choose. The total cost is a combination of three main things: the light fixtures, the power components like the transformer and wiring, and whether you decide to install it yourself or hire a professional. A small, simple setup for a front walkway will naturally cost less than an elaborate design that illuminates your entire backyard.
The good news is that you have a lot of control over the budget. By planning your layout and choosing your components wisely, you can create a stunning effect without breaking the bank. Think of it as an investment that not only enhances your home’s curb appeal but also extends your living space into the evening hours. Just as you can quickly launch a website with the right tools, you can light up your yard affordably with a solid plan. We’ll break down each cost component so you can build a budget that works for you.
Breaking Down Fixture Costs
The light fixtures themselves will likely be the most significant part of your budget. Prices can range from budget-friendly options to high-end, architectural-grade pieces. The cost often comes down to the material, with solid brass or copper fixtures typically costing more than aluminum ones due to their superior durability and longevity.
When selecting fixtures, it’s smart to choose modern LED lights. While older halogen bulbs are still around, LEDs are the clear winner for long-term value. They save about 75% more energy and can last up to 25 times longer, meaning you’ll spend less on electricity and won't be changing bulbs constantly. The initial investment in quality LED fixtures pays for itself over time.
Factoring in Transformer and Wiring Costs
Every low voltage system needs a transformer and wiring, but these components are usually quite affordable. The transformer is the power source that plugs into an outdoor outlet and safely "steps down" your home's 120-volt electricity to a safe 12-volt current. The size of the transformer you need depends on the total wattage of all your lights.
A good rule of thumb is to add up the wattage of every bulb in your plan and then add an extra 25% as a buffer. For example, a 150-watt transformer can easily power 15 to 30 typical LED path lights. This extra capacity, or "headroom," ensures the system runs efficiently without being overworked. The low voltage cable that runs from the transformer to the lights is also inexpensive and sold in various lengths.
Professional Installation vs. DIY Costs
One of the biggest advantages of low voltage lighting is how easy it is to install, which gives you a great opportunity to save money. Because the system runs on a safe, low current, you don’t need to be an electrician to set it up. Most homeowners find that installing landscape lighting is a manageable weekend project. Going the DIY route completely eliminates labor costs, which can cut your total project cost by half or more.
Of course, you can always hire a professional landscaper or lighting specialist. This adds to the overall cost but can be a great option if you have a very large or complex design in mind, or if you simply prefer to have an expert handle it. This is in sharp contrast to high voltage (120V) systems, which legally require a licensed electrician for installation.
Top Low Voltage Landscape Lighting Brands
Once you have a plan, it’s time for the fun part: shopping for fixtures. Finding the right brand often comes down to your specific needs, budget, and style preferences. To help you get started, let's look at a few popular options that homeowners and professionals trust for their quality and performance. Each of these brands offers something unique, whether you're a dedicated DIYer or someone looking for a specific aesthetic.
VOLT®
If you're planning a DIY installation, VOLT® is a brand you'll want to check out. The company specializes in low voltage landscape lighting designed specifically for homeowners. Because 12V systems are safer to work with than high voltage ones, their products are created with easy installation in mind. This focus makes them a go-to choice for adding curb appeal and security to your property without needing a professional. They offer a complete range of fixtures, so you can build a cohesive system for your entire yard.
Best Pro Lighting
Best Pro Lighting strikes a great balance between quality and affordability. They offer a wide selection of low voltage LED products that are both energy-efficient and built to last. If you're looking for durable fixtures that won't break the bank, this brand is an excellent starting point. Their goal is to help you find the perfect lights to create an outdoor space that is both beautiful and safe. Their variety ensures you can find fixtures that match your home’s style while staying on budget.
Sunbright Lighting
When durability is a top priority, Sunbright Lighting is a strong contender. They are known for their low voltage aluminum path lights, which are built to withstand harsh weather conditions year after year. These fixtures are perfect for illuminating garden beds and sidewalks, adding both beauty and function to your landscape. By using robust materials like heavy-duty cast aluminum, Sunbright ensures their products can handle everything from heavy rain to winter snow, making them a reliable long-term investment.
How to Choose a Quality Brand
With so many options available, how do you pick the best one for you? Start by looking for a trusted company with a reputation for well-made, durable products. Reading customer reviews and checking warranties can give you a good sense of a brand's quality. As Best Pro Lighting notes, you want high-quality, long-lasting products. Consider the fixture material (brass and aluminum are great choices) and whether the brand offers the styles you need to bring your lighting plan to life. A little research will ensure you invest in a system you'll love for years.
How to Install Low Voltage Landscape Lighting
With your lighting plan in hand, it’s time for the most rewarding part: the installation. While it might seem like a big project, installing a low voltage system is surprisingly straightforward and makes for a great weekend DIY. You just need the right tools and a clear set of steps to follow. This process puts you in complete control of the final look, ensuring your yard looks exactly how you envisioned it.
Gather Your Tools and Materials
Before you start digging, get all your supplies ready. This will make the process go much smoother and prevent you from having to stop and start. You don’t need a professional-grade workshop, just a few key items. Make sure you have a good wire stripper for making clean electrical connections and a shovel or trenching tool for the wiring. A stake installer is also helpful for securing your light fixtures firmly in the ground. Having everything laid out and ready to go lets you get into a good workflow and focus on getting the job done right.
Your Step-by-Step Installation Guide
Ready to bring your design to life? Following a methodical process is the key to a successful installation. This detailed step-by-step guide breaks it down, but here are the essentials:
- Mark your space: Before digging, locate and mark any underground utility lines to avoid damage.
- Assemble fixtures: Put your lights together, installing bulbs and any necessary mounts.
- Place the lights: Position your fixtures according to your plan.
- Mount the transformer: Install it on a wall near an outdoor outlet, at least one foot off the ground.
- Lay the wire: Dig shallow trenches (about 6 inches deep) and run the main wire from the transformer to your lights.
- Connect everything: Attach the main wire to the transformer and then connect each light fixture to the main wire.
- Test the system: Turn it on to make sure every light works before burying the wires.
- Bury the wires: Once everything is working, bury your wires and set your timer.
Common Landscape Lighting Mistakes to Avoid
A great lighting plan can fall flat if you stumble into a few common installation traps. It’s easy to get excited about the creative side of things and overlook the technical details, but getting the foundation right is what makes your design shine. Taking a little extra time to plan for power, wiring, and materials will save you from the headache of troubleshooting a brand-new system that isn’t working correctly. Let’s walk through the most frequent missteps so you can sidestep them like a pro.
Underestimating Your Power Needs
One of the most common issues is choosing the wrong size transformer. Think of the transformer as the heart of your system; it converts your home's standard voltage to the low voltage your lights need. If it’s too small, it can’t pump enough power to all your fixtures. This leads to overloaded circuits and dim, flickering, or completely dead lights. To avoid this, you need to calculate your power needs before you buy. Add up the total wattage of all the bulbs you plan to install. Then, choose a transformer that can handle that total load with about 20% to 30% of extra capacity to spare for future additions.
Ignoring Voltage Drop
Have you ever seen a string of landscape lights where the ones closest to the house are bright, but the ones at the end of the yard are disappointingly dim? That’s voltage drop in action. It happens when electricity loses power as it travels along a wire, and it’s a surefire way to get an uneven, unprofessional look. Fixtures at the end of a long run will always glow dimmer than those near the transformer if you don't plan for it. You can prevent this by using a thicker gauge wire for longer distances, designing shorter wiring runs, or using a hub wiring method where wires branch out from a central point. Some transformers also have multiple voltage taps to help you compensate for voltage drop.
Skipping a Test Run Before Burying Wires
After you’ve planned your layout and bought your gear, it’s tempting to start digging trenches right away. But before you bury a single wire, you absolutely must do a test run at night. Lay out all your fixtures and wiring on the ground, connect them to the transformer, and wait for darkness. This is your chance to see exactly how the light will look. You can check for dim spots caused by voltage drop, adjust the angle of spotlights, and move path lights for perfect spacing. It’s crucial to test your system before making final adjustments. This simple step lets you fix any problems while it’s still easy, saving you from having to dig everything up later.
Choosing Materials That Don't Suit Your Climate
Your landscape lights live outside 24/7, so they need to be tough. Using the wrong light fixtures for your environment can lead to rust, corrosion, and cracked housings in just a season or two. Make sure you select high-quality materials that can withstand your local weather conditions. Solid brass and copper are excellent choices because they are durable and develop a beautiful natural patina over time. Powder-coated aluminum is another great, corrosion-resistant option. Avoid cheap plastic fixtures, which can become brittle and break in extreme heat or cold. Also, check the fixture’s IP rating, which tells you how well it’s sealed against dust and water, ensuring a longer life for your investment.
Smart Lighting Features to Consider
Adding smart features to your landscape lighting system is where things get really fun. It’s the difference between a system that simply turns on and off and one that intelligently responds to your life and environment. These features not only add a layer of convenience but also improve your home’s security and energy efficiency. Just as modern tools like the Airo AI Builder let you create a website with incredible speed and ease, smart lighting controls allow you to manage your outdoor ambiance with the tap of a button. Let’s look at a couple of popular options that can make a huge impact.
Motion Sensors and Timers
Automating your lighting is one of the simplest and most effective upgrades you can make. Most low voltage transformers come equipped with options for timers or photocells. A timer allows you to set a specific schedule, like having your lights turn on at dusk and off at midnight, which helps conserve energy. Photocells are even smarter, as they automatically detect the level of natural light and switch your system on or off accordingly. Motion sensors add another layer of security and function, lighting up a pathway when you walk by or illuminating your driveway when a car pulls in. This ensures light is only used exactly when and where it’s needed.
Smart Home Integration
If you love controlling everything from your phone, you’ll want to explore smart home integration. Many modern lighting systems can connect to your Wi-Fi, allowing you to manage them through a smartphone app or a home automation system like Amazon Alexa or Google Home. This gives you an incredible amount of flexibility. You can adjust brightness levels, set complex schedules, and even change the color of your lights to match a holiday or party theme, all without leaving your couch. This level of control lets you customize your outdoor atmosphere for any occasion, making your yard a true extension of your living space.
How to Choose the Right Lights for Your Yard
Picking the right lights for your yard is about more than just grabbing a few fixtures from the hardware store. It’s about thinking through your goals and choosing hardware that will last. When you match the right light to the right purpose and prioritize quality materials, you create a beautiful and durable system that you can enjoy for years. Think of it as setting a strong foundation, just like you would for any other project. A little planning upfront saves you from headaches and extra costs down the road, ensuring your outdoor space looks exactly how you envisioned it.
Match Fixtures to Your Landscaping Goals
Before you buy a single light, it’s smart to have a plan. The goal is to add beauty and function, not to create blinding glare or uneven bright spots. Start by walking through your yard and thinking about what you want to accomplish. Do you want to light up a walkway for safety? Highlight a beautiful tree? Create a soft, ambient glow for your patio? Your answers will determine which fixtures you need.
By creating a detailed lighting plan, you can map out where each light will go and what its job will be. This helps you avoid common issues, like using fixtures with different power needs on the same circuit, which can cause some lights to appear dim. A clear plan ensures every light works together to create a cohesive and balanced look.
Prioritize Material Quality and Weather Resistance
Outdoor lighting has to stand up to everything nature throws at it, from rain and snow to summer heat. That’s why material quality is so important. While plastic fixtures might be cheaper upfront, they often become brittle and fail quickly. Instead, look for lights made from durable materials like brass, copper, or powder-coated aluminum that can withstand the elements.
You should also check the fixture’s IP rating, which tells you how well it’s sealed against dust and water. For most landscape lighting, an IP65 rating is the recommended minimum. Remember, your system is only as strong as its weakest link, so investing in high-quality transformers and waterproof connectors is just as crucial as choosing good fixtures.
How to Maintain Your Landscape Lighting System
Once your landscape lighting is installed, a little routine maintenance will keep it looking beautiful and functioning perfectly for years. Think of it as a quick check-up for your yard’s best features. Spending just a little time on upkeep each season prevents small issues from turning into bigger headaches. These simple steps will ensure your outdoor space remains safe, inviting, and perfectly illuminated.
Clean and Inspect Fixtures Regularly
Over time, your light fixtures will collect dirt, dust, and water spots, which can dim their glow and make your lighting look dull. A few times a year, take a soft cloth and gently wipe down the lenses and housings. While you’re cleaning, give each fixture a quick inspection. Check for any signs of damage, loose parts, or moisture inside the lens. This is also a great time to replace any bulbs that have burned out. Keeping your fixtures clean is one of the easiest ways to maintain bright, consistent light and avoid common lighting mistakes that can detract from your home’s curb appeal.
Check Your Wiring and Transformer
Your transformer and wiring are the heart of your lighting system, so it’s important to make sure they’re in good shape. At the start of each season, open your transformer box to confirm all connections are tight and secure. Next, take a walk along your property and inspect any visible wiring for cuts, frays, or damage, which can happen from weather or gardening tools. Catching these top landscape lighting issues early prevents failures and keeps your system running safely. Also, double-check that your timer settings are still accurate, especially after a power outage or as the daylight hours change.
Adjust for Seasons and Plant Growth
Your landscape is a living, breathing space, and your lighting needs to adapt along with it. As your plants, shrubs, and trees grow, they can start to block light or create unwanted shadows. Take a walk through your yard at night to see how everything looks. You may need to trim back a few branches or reposition a spotlight to keep highlighting your favorite tree. Fixtures can also get bumped by lawnmowers or shift as the ground settles. Taking a moment to straighten a path light or re-aim a fixture is a simple fix that corrects common landscape lighting design mistakes and keeps your design looking intentional and polished.
Frequently Asked Questions
Is installing low voltage lighting a project I can actually do myself? Yes, absolutely. This is one of the biggest benefits of a low voltage system. Because the transformer reduces your home's electricity to a safe 12 volts, the risk of shock is minimal, and you don't need to be a licensed electrician to do the work. With a good plan and the right tools, most homeowners find it's a very manageable and rewarding weekend project.
What's the most important thing to get right when planning my layout? The most critical step is to test your entire system at night before you bury any of the wires. Lay all your fixtures and cables on the ground according to your plan and turn them on after dark. This is your only chance to see exactly how the light will look, allowing you to adjust fixture placement and aiming to prevent harsh glare or awkward dark spots.
Why are some of my lights dimmer than others, and how can I fix it? This is a classic sign of "voltage drop," which happens when electricity loses power over a long cable run. To ensure all your lights have a consistent brightness, you can design your system with shorter wiring runs. Using a thicker gauge wire for longer distances or splitting your lights into several zones connected to a central hub can also solve the problem.
Are LED fixtures really that much better than the older halogen ones? They truly are, and for two main reasons: energy savings and lifespan. LED lights consume about 75% less power than halogens, which makes a noticeable difference on your electricity bill. They also last incredibly long, often for 25,000 hours or more, so you won't be constantly buying and changing bulbs.
Can I add more lights to my system in the future? You definitely can, as long as you plan for it from the start. The key is to choose a transformer that can handle more power than your initial design requires. A good guideline is to select a transformer with a capacity that is about 20% greater than the total wattage of your current lights. This extra headroom gives you the flexibility to easily expand your system later.