
2026-09-01
LED Recessed Ceiling Lights: A Complete Buying Guide
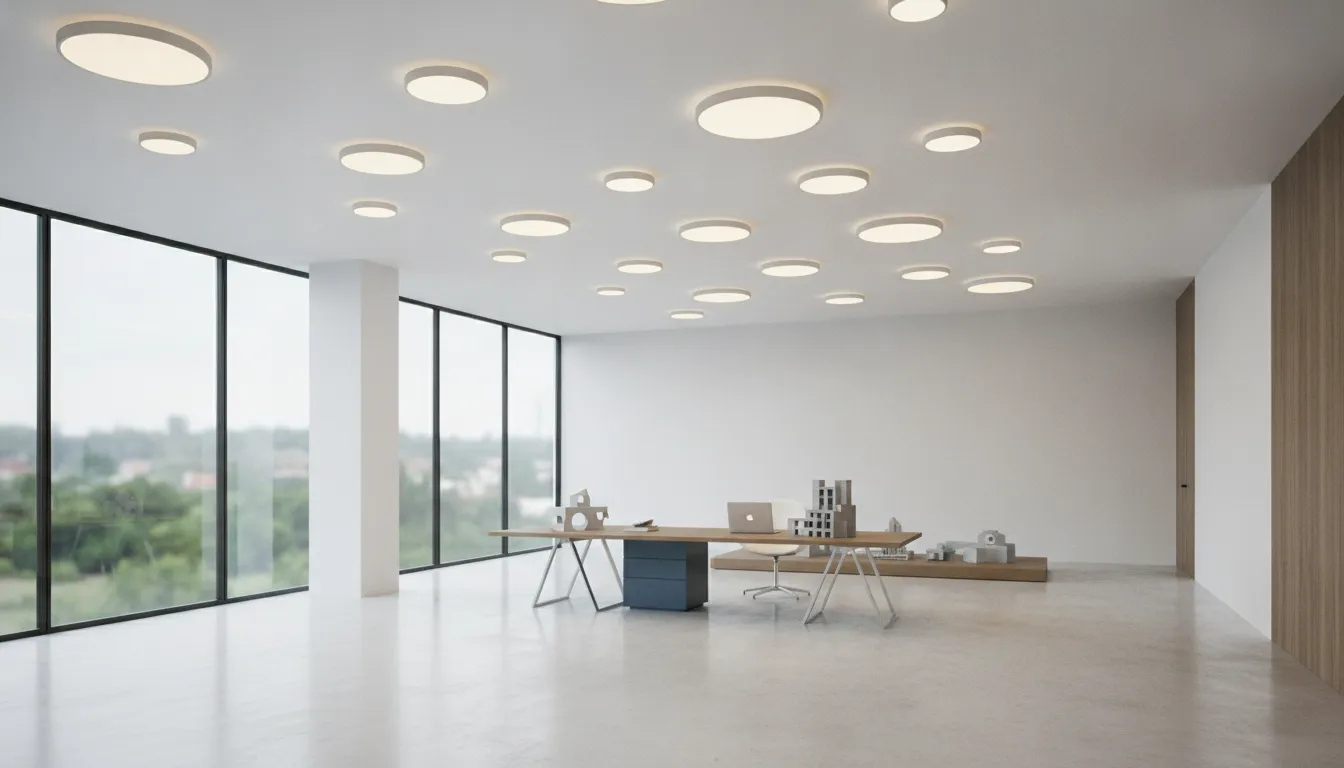
The best LED recessed ceiling lights do more than brighten a room. They help customers see products accurately, give employees comfortable working conditions, and support safer movement through corridors and shared areas. To achieve those results, you need a lighting plan built around the space, not just the fixture’s appearance. Start with the room’s function, ceiling height, target light levels, and existing electrical setup. Then review lumens, efficacy, CRI, CCT, beam spread, glare control, certifications, controls, and warranty coverage. This guide walks through each decision, so you can choose fixtures with confidence and avoid expensive installation mistakes.
Key Takeaways
- Match the fixture to the space: Consider ceiling depth, room function, mounting height, lumen output, beam angle, color temperature, CRI, and required safety ratings.
- Compare the full ownership cost: Review energy use, controls, glare performance, certifications, warranty coverage, replacement parts, installation labor, shipping, and rebate eligibility.
- Plan the project and present products clearly: Use photometric data, verify wiring and dimming compatibility, consult a qualified electrician, and create an organized catalog with Airo AI Builder on lit-365.com.
LED Recessed Ceiling Light Types and Components
LED recessed ceiling lights come in several designs, and the best option depends on your ceiling structure, installation access, lighting goals, and maintenance plan. A shallow renovation ceiling may need a slim canless wafer light, while an open commercial ceiling can accommodate a larger housing with a dedicated driver and adjustable trim.
Before comparing products, separate the fixture into two systems: the light source and the installation hardware. The light source may be an integrated LED board, a replaceable LED module, or a lamp installed inside a housing. The hardware may include a housing, junction box, driver, trim, lens, and mounting clips. Each part affects installation, appearance, dimming, heat management, and future repairs.
It also helps to identify whether you need general or directional lighting. Fixed downlights spread light across floors and work surfaces. Gimbal, adjustable, and wall-wash fixtures aim light toward displays, artwork, signs, or architectural features. Reviewing different recessed lighting configurations can help you compare fixture styles before planning a commercial lighting layout.
For each product, check the cutout size, ceiling depth, insulation rating, junction-box requirements, driver location, and compatibility with your control system. These details matter just as much as brightness and appearance, especially when you are specifying lights for multiple rooms or a large facility.
Compare canless wafer and can-based designs
Canless wafer lights use a slim LED panel and typically do not need a traditional recessed housing. Their shallow profile works well when joists, ductwork, or insulation limit the available ceiling space. They are also practical for many remodels because the light and junction box fit into a relatively small opening.
Can-based lights install inside a separate housing, often called a can. The housing supports the light source, protects wiring, and determines which trims or modules are compatible. This design provides more flexibility if you may want to change the trim, beam spread, or light engine later.
Choose canless fixtures when a low-profile appearance and compact installation are priorities. Choose can-based fixtures when you want interchangeable components or need to match an existing commercial housing system. Confirm compatibility before mixing parts from different manufacturers.
Choose retrofit, remodel, or new-construction fixtures
Retrofit fixtures update an existing recessed housing. They often attach to the old can with clips, springs, or an adapter, allowing you to replace an older lamp or trim without removing the housing. This option can reduce ceiling damage and shorten installation time.
Remodel fixtures are designed for finished ceilings where there is little or no access from above. Their mounting clips secure the fixture to the ceiling material. New-construction fixtures are installed before the ceiling is closed, allowing the housing to attach directly to joists or framing members.
As this recessed lighting installation guide explains, new-construction housings suit open-frame installation, while remodel housings fit existing ceilings. Check the fixture’s cutout size, ceiling thickness, housing depth, and mounting method before ordering.
Compare integrated LEDs and replaceable modules
Integrated LED fixtures contain the LED board inside the light assembly. They do not need a separate screw-in bulb, which lets manufacturers create thinner profiles and distribute light evenly across the lens. Integrated designs are common in canless wafer lights and modern commercial downlights.
Their main limitation is maintenance. If the LED board or driver fails, you may need to replace a component or the entire fixture, depending on the product design. Review the warranty, replacement-part availability, and expected service life before installing integrated fixtures where access is difficult.
Replaceable LED modules provide more flexibility. You can change the light engine, trim, or lamp without removing the entire housing. This can simplify repairs and make it easier to update the color temperature or light output later. These integrated LED recessed designs show how combining the light source with the fixture can reduce parts while keeping the profile compact.
Select fixed, gimbal, adjustable, or wall-wash trims
Fixed trims point straight down and provide consistent general lighting. They work well in offices, corridors, classrooms, and other spaces where even coverage matters more than aiming flexibility. Choose a trim with a suitable beam angle to cover the area without creating harsh bright spots.
Gimbal and adjustable trims let you tilt or rotate the light. They are useful for sloped ceilings, retail displays, artwork, signage, and accent lighting. A gimbal fixture can direct light where it is needed without changing the fixture location.
Wall-wash trims spread light across a vertical surface. They can make product displays, shelving, textured walls, and architectural details more visible. Look for glare control and a distribution pattern designed for wall coverage. When comparing gimbal and adjustable recessed lights, check the adjustment range and whether aiming changes the beam shape.
Compare recessed downlights and surface fixtures
Recessed downlights sit inside the ceiling, creating a clean, built-in appearance with minimal visual clutter. They are a good fit when the ceiling cavity has enough room for the housing, junction box, and driver. The tradeoff is that installation may require ceiling cuts, framing access, and coordination with insulation or ductwork.
Surface-mount disk fixtures attach directly to the ceiling instead of sitting inside it. They are useful when the ceiling cavity is too shallow for a recessed fixture or when joists and other obstructions make recessed installation difficult. They can also simplify installation in concrete ceilings and other hard surfaces.
Surface fixtures remain visible, but many have a slim, low-profile design. Compare the fixture’s height, diameter, beam spread, and junction-box requirements with the room’s ceiling design. Surface-mount disk downlights offer a practical alternative when a recessed cutout is not suitable.
Understand housings, modules, drivers, boxes, trims, and lenses
A housing supports the recessed fixture and separates it from surrounding ceiling materials. An LED module, also called a light engine, produces illumination. The driver converts incoming electrical power into the current the LEDs need. In some canless fixtures, the driver sits inside a separate junction box above the ceiling.
The junction box contains wiring connections and must meet the fixture’s installation requirements. The trim forms the visible edge around the opening, while the lens shapes and softens the light. Together, these parts affect the finished appearance, glare, beam spread, and maintenance process.
Pay close attention to insulation ratings. IC-rated fixtures can safely contact approved ceiling insulation, while non-IC fixtures require clearance to prevent excess heat buildup. Airtight models can also reduce air leakage through the ceiling. Confirm these requirements in the product specifications, and have a qualified electrician review the installation when wiring or code requirements are unclear.
Why Use LED Recessed Ceiling Lights in Commercial Spaces?
Commercial lighting affects more than visibility. It influences energy bills, maintenance schedules, employee comfort, customer experience, and the appearance of the space. LED recessed ceiling lights are a practical choice for offices, retail stores, restaurants, healthcare facilities, schools, and other commercial settings because they provide consistent overhead illumination without taking up visual space.
Their value depends on proper planning. The best fixture is not always the brightest or least expensive option. You also need to consider energy use, light quality, ceiling conditions, controls, heat management, installation costs, and long-term maintenance. A fixture that looks affordable at checkout may cost more to operate or replace if it has poor efficiency, limited compatibility, or an unreliable driver.
LED recessed lighting can also support a cleaner ceiling design. Low-profile fixtures sit close to or within the ceiling, while adjustable trims and different beam angles make it easier to direct light where it is needed. With the right layout, they can provide comfortable ambient lighting, highlight displays, and reduce dark areas without relying on bulky fixtures.
Compare efficiency, efficacy, wattage, and lifecycle costs
Wattage shows how much electricity a fixture uses, but it does not show how much useful light it produces. Compare wattage with lumens and efficacy. Lumens describe light output, while efficacy indicates how efficiently the fixture converts electricity into light. A lower-wattage fixture with stronger output may perform better than a higher-wattage model.
The purchase price is only one part of the cost. Include energy consumption, operating hours, maintenance labor, replacement frequency, installation, controls, and disposal when comparing products. This lifecycle approach is especially important in buildings that keep lights on for long periods. naturaLED’s commercial lighting guidance recommends evaluating lifecycle cost instead of focusing only on the initial fixture price.
Reduce replacements with long service life and lumen maintenance
LED recessed lights generally require fewer replacements than older fluorescent and incandescent systems. That can reduce service calls, lift rentals, labor costs, and interruptions to daily operations. In a retail store, hotel, or office, replacing fewer fixtures also means less disruption for employees, customers, and guests.
Review more than the advertised lifespan. Check lumen maintenance, which describes how well a fixture preserves its light output over time. Strong lumen maintenance helps maintain more consistent illumination throughout the product’s useful life. Also review the driver warranty, warranty exclusions, and availability of replacement components. NuWatt’s recessed LED lighting collection explains how LED systems can reduce energy use, utility expenses, and maintenance demands.
Create clean ceilings with low-profile, even lighting
Recessed fixtures sit within the ceiling plane, giving commercial interiors a streamlined appearance. Their low-profile design works well in modern offices, retail environments, hospitality spaces, and public areas where visible equipment could distract from the architecture or merchandise.
A thoughtful layout can also create even illumination across the room. Multiple fixtures with the right spacing may reduce harsh bright spots and dark gaps more effectively than a few high-output lights. Choose the aperture, lumen output, beam angle, and trim based on the ceiling height and room dimensions. Warehouse Lighting’s commercial recessed lighting selection includes low-profile options for new construction, remodels, and retrofit projects.
Add dimmers, occupancy sensors, daylight controls, and smart systems
LED recessed lights can work with controls that adjust brightness according to occupancy, daylight, schedules, or user preferences. Dimmers can reduce brightness during presentations or quiet periods. Occupancy sensors can turn lights off when rooms are empty, while daylight controls can reduce artificial light near windows when sunlight provides enough illumination.
Check compatibility before purchasing fixtures. Drivers may support TRIAC, ELV, 0–10V, DALI, sensor-based, or smart control systems, but these options are not interchangeable. An incompatible system can cause flicker, limited dimming, humming, or unreliable operation. naturaLED’s lighting recommendations include occupancy sensing, daylight harvesting, and scheduling as useful control strategies.
Reduce glare and flicker while managing heat and color consistency
Energy efficiency does not guarantee visual comfort. Poorly designed fixtures can create glare or visible flicker, particularly in offices, classrooms, healthcare facilities, and work areas where people look toward the ceiling for extended periods. Look for suitable diffusers, deep-regressed optics, glare-control trims, and beam distributions that match the room.
Heat management also affects performance and service life. Make sure the fixture is suitable for the ceiling cavity and insulation conditions. For color quality, CRI 80 is a practical minimum for general commercial spaces, while CRI 90 or higher is preferable in retail, galleries, salons, and medical environments where accurate color matters. Jarvis Lighting’s retrofit troubleshooting guide covers CRI, flicker, heat, and other factors that affect lighting quality.
Avoid overlighting, poor color temperature, and low-quality fixtures
More light is not automatically better. Overlighting can waste energy, increase glare, and make a room feel harsh. Start with the space’s purpose, ceiling height, surface colors, available daylight, and target illuminance before selecting fixture output. A lighting plan can help determine fixture quantity and spacing instead of relying on guesswork.
Color temperature also influences the atmosphere of a commercial space. Warm white may suit restaurants and hospitality areas, while neutral or cool white often works well in offices, retail stores, and healthcare settings. Adjustable CCT fixtures can provide flexibility, but only if their settings match the project requirements. Avoid products with vague specifications, inconsistent color, weak warranties, or limited driver information. SunMe’s commercial recessed lighting guide explains how unsuitable fixtures and installation choices can lead to poor results.
How Do You Choose the Best LED Recessed Ceiling Lights?
The best LED recessed ceiling light depends on how the room is used, how high the ceiling is, and how much light the space needs. A fixture that works well in a quiet office may feel too dim in a retail display area or too harsh in a healthcare setting. Start with the room’s lighting goals, then compare brightness, size, spacing, color quality, beam spread, glare control, and trim design.
Review the fixture’s photometric data before placing an order. An IES file shows how a light distributes illumination across a space. It can help you identify whether a product will provide even coverage or create bright spots and dark areas. If you are comparing several fixtures, request their IES files and use the same room layout for each photometric calculation.
Match room function, ceiling height, and target foot-candles
Room function should guide your target light level. Foot-candles describe the amount of light reaching a surface, such as a desk, sales counter, floor, or examination table. Offices and corridors generally need less illumination than retail counters, classrooms, workshops, or healthcare spaces. A lighting designer or electrical contractor can recommend suitable targets based on the room’s use and applicable local requirements.
Ceiling height also affects performance because light spreads as it travels. A fixture designed for an eight-foot ceiling may not provide enough usable illumination from a 12-foot ceiling. For taller spaces, consider higher-lumen fixtures, narrower beams, or a combination of recessed lights and pendants. Place task lighting where people read, work, inspect products, or complete detailed activities instead of relying on uniform overhead lighting alone.
Compare lumens, wattage, and mounting height
Lumens indicate how much light a fixture produces, while wattage indicates how much electrical power it uses. Comparing both figures helps you assess efficiency. Two downlights may use the same wattage but produce different lumen outputs because their LED chips, optics, and drivers differ. The Department of Energy’s LED lighting guide explains why wattage alone does not tell you how bright a fixture will be.
Mounting height affects usable brightness as well. A 1,000-lumen fixture may feel bright beneath a low ceiling but insufficient in a high-ceiling application. Review lumen output alongside the beam angle and photometric report. Avoid automatically choosing the highest-output model, since excessive brightness can create glare, uneven illumination, and unnecessary energy use.
Choose 4-, 5-, 6-inch, or larger lights
Four-inch, five-inch, and six-inch recessed lights are common choices for commercial interiors. Four-inch fixtures create a discreet appearance and work well in corridors, offices, and areas that need focused coverage. Five-inch models offer a practical middle ground, while six-inch fixtures can provide broader ambient light for larger rooms or higher ceilings.
Two-inch and three-inch fixtures are useful for accent lighting, display cases, artwork, and architectural details. Larger fixtures can deliver more output and wider coverage, but they may look oversized in a compact room. Check the ceiling construction and required cutout size before selecting a fixture. If you are replacing existing lights, measure the current opening instead of relying on the nominal fixture size. The fixture diameter and cutout diameter are not always the same.
Plan spacing, rows, perimeter clearance, and coverage
A well-planned layout provides consistent illumination without obvious bright spots or gaps. As a starting point, many designers place recessed lights about half the ceiling height apart, then adjust the spacing after reviewing the fixture’s beam pattern. A six-inch fixture may work well at wider spacing than a four-inch model, but the correct distance depends on lumen output, optics, ceiling height, and the room’s finishes.
Keep the first row far enough from walls to prevent harsh scalloping, especially in offices and corridors. For wall displays, artwork, or merchandise, move fixtures closer to the wall and select a suitable wall-wash or adjustable optic. The IES lighting standards provide a useful reference for professionals planning illumination levels and distribution. Confirm the final layout with a reflected ceiling plan or photometric calculation before cutting the ceiling.
Select a color temperature from warm white to daylight
Color temperature, measured in Kelvin, affects the mood and appearance of a space. Warm white light around 2700K to 3000K feels comfortable and inviting, making it a common choice for restaurants, hotels, lounges, and reception areas. Neutral white light around 3500K to 4000K provides a balanced appearance for offices, classrooms, retail spaces, and clinics.
Cooler light from 4000K to 5000K can suit workshops, warehouses, healthcare work areas, and spaces that require strong visual detail. However, a cooler CCT is not automatically better for productivity or visibility. Consider the finishes, daylight exposure, brand identity, and existing fixtures. If a building includes several connected spaces, keep color temperatures consistent unless the transition is intentional. Adjustable-CCT fixtures can help simplify decisions during a renovation, but confirm that the selected setting remains consistent across the installation.
Compare CRI, 90+ CRI, R9, and color consistency
The Color Rendering Index, or CRI, indicates how accurately a light source reveals colors compared with a reference source. A CRI of 80 or higher works for many general commercial applications. Choose 90+ CRI when accurate color matters, such as in clothing stores, salons, galleries, medical spaces, design studios, and food displays.
R9 is a separate value that focuses on saturated red tones, which standard CRI calculations do not emphasize. Strong R9 performance can make skin tones, food, wood, and certain products look more natural. Do not judge a fixture by CRI alone. Review its R9 value, color consistency, and manufacturer testing details. The ENERGY STAR lighting criteria can also help you compare verified performance information when evaluating qualifying products.
Evaluate beam angle, distribution, glare, and wall coverage
Beam angle determines how broadly a fixture spreads light. Narrow beams concentrate illumination for artwork, products, or architectural features. Wider beams provide more even ambient lighting in offices, classrooms, corridors, and open commercial areas. A wide beam can reduce the number of fixtures needed, but spacing still matters because the edges of each beam should overlap enough to prevent dark patches.
Glare depends on more than beam angle. Lens design, trim depth, fixture brightness, ceiling height, and viewing position all play a role. Look for lower-glare optics, baffles, regressed lenses, and shielding when occupants will frequently look toward the ceiling. For screens and workstations, review the fixture’s glare information and test a sample in the actual space. Wall coverage requires a different approach, so use wall-wash or adjustable fixtures when the walls are part of the visual design.
Match trims, apertures, output, and ceiling design
Trim affects both appearance and performance. Baffle trims absorb stray light and can soften the fixture’s look, while clear or specular trims may provide a sharper, brighter appearance. Recessed trims place the light source deeper inside the opening, which can reduce the visible LED and help manage glare. Adjustable and gimbal trims let you aim light toward displays, signage, artwork, or task areas.
The aperture should suit the ceiling and the scale of the room. A small aperture creates a subtle architectural look, while a larger opening may deliver more output and feel proportional in a high or expansive ceiling. Match the trim finish to the ceiling, especially when using white, black, or metallic details throughout the space.
Before finalizing the order, confirm the cutout, trim diameter, lumen output, dimming method, and driver compatibility. Also check whether the fixture is suitable for the ceiling type and installation environment. A fixture that looks right but does not fit the ceiling system can create costly installation problems. Save the product specifications with your project records so replacements match the original output, color temperature, and trim style.
Which LED Recessed Ceiling Light Type Fits Your Project?
The best LED recessed ceiling light depends on the ceiling, the room’s purpose, and the level of control you need. Start by checking the available ceiling depth, framing, insulation, plenum space, and mounting height. A shallow remodel may need a canless wafer light, while a new commercial build-out may allow dedicated housings and interchangeable trims.
Next, consider how the space will be used. Offices and corridors typically need comfortable, even illumination with controlled glare. Retail stores and galleries may need adjustable fixtures that direct light toward displays. Restaurants, hotels, and healthcare facilities may require several lighting layers, along with specific color temperatures, dimming systems, or emergency operation.
It is also worth thinking about future maintenance. Integrated fixtures can create a clean appearance, but replacement may require changing the entire light engine. Fixtures with replaceable modules or standard housings may offer more service flexibility. Before selecting a product, compare its lumen output, beam angle, color rendering, dimming method, certifications, warranty, and installation requirements. A lighting layout based on actual photometric data is more reliable than choosing fixtures by appearance alone.
Use retrofit lights with existing housings
Retrofit lights work well when a ceiling already contains recessed housings. A typical kit includes an LED module, trim, and adapter that connect to the existing socket. This allows you to replace older incandescent or fluorescent lamps without cutting a larger ceiling opening.
Measure the housing diameter and confirm compatibility before ordering. Check the fixture’s insulation rating, dimmer compatibility, color temperature, lumen output, and connector type. Retrofit lighting can simplify an upgrade, but an old, damaged, or poorly placed housing may still affect performance. Review the manufacturer’s recessed lighting collection for product dimensions and installation details.
Choose canless wafer lights for shallow ceilings and remodels
Canless wafer lights, also called slim or ultra-thin recessed lights, combine the LED module and junction box in a compact design. Because they do not require a traditional recessed can, they fit spaces where joists, ductwork, or limited ceiling depth leave little room above the drywall.
These lights are convenient for remodels because installers can cut a ceiling opening and secure the fixture with spring clips. The remote driver and junction box still need proper clearance, support, and access. Check the cutout diameter, driver location, insulation rating, and wiring method before installation. Canless lights suit offices, corridors, retail areas, and other spaces that need a low-profile ceiling with consistent illumination.
Install new-construction housings in open ceilings
New-construction housings are installed before drywall or another ceiling material covers the framing. They attach to joists or mounting bars, creating a stable position for the fixture and allowing wiring to be completed while the ceiling remains accessible.
This option suits new buildings, major renovations, and commercial projects with exposed framing. Select the housing and trim as a compatible system, then verify the aperture size, ceiling thickness, insulation rating, and required output. Planning the housing early can also make future service work more manageable. This recessed lighting installation guide explains the main differences between new-construction and remodel applications.
Use IC-rated and airtight fixtures in insulated ceilings
If insulation may touch the fixture, choose an IC-rated recessed light. IC means insulation contact, and the rating indicates that the fixture is designed to operate safely in that condition. A non-IC fixture generally needs clearance from insulation, which can be difficult to maintain in some commercial ceilings.
Airtight construction also matters because it limits air movement through the ceiling assembly. This can reduce conditioned air loss and help prevent air from escaping into an attic or plenum. Check the product label and installation instructions instead of relying on the fixture’s appearance. The light must suit the ceiling assembly, insulation type, and installation location. A qualified electrician can confirm whether the selected fixture meets the project requirements.
Choose gimbal and adjustable lights for directional lighting
Fixed downlights send light directly toward the floor, while gimbal and adjustable fixtures let you aim light at walls, displays, signs, work surfaces, or architectural details. Gimbal trims pivot within the aperture, while other adjustable designs may provide a wider range of tilt or rotation.
These fixtures suit galleries, showrooms, restaurants, salons, and retail spaces where displays may change. Compare the aiming range, beam angle, lumen output, and trim design. A narrow beam creates focused accent lighting, while a wider beam provides softer coverage. Position adjustable lights carefully to avoid glare on computer screens or in the eyes of seated customers. The fixture’s aiming flexibility should support the room’s layout, not compensate for poor spacing.
Use wall-wash lights for displays and architectural features
Wall-wash fixtures distribute light across a vertical surface instead of concentrating it in a small spot on the floor. They can make a lobby appear more open, draw attention to merchandise, and highlight artwork, textured walls, signs, or shelving.
For even coverage, install the fixtures at a consistent distance from the wall and follow the manufacturer’s spacing recommendations. Surface color and texture affect the result. Light walls reflect more illumination, while dark or textured materials may need additional output. Wall-wash fixtures should work alongside ambient or task lighting, not replace it in areas where people need to read, work, or move safely. A practical LED retrofit troubleshooting guide can help diagnose uneven output, glare, and compatibility problems.
Select fixtures with adjustable CCT and wattage
Adjustable CCT fixtures let installers select a color temperature, such as warm white, neutral white, or cool white. This flexibility helps when one product will serve offices, retail areas, corridors, and customer-facing spaces with different lighting preferences.
Adjustable wattage settings can also support different ceiling heights and room functions. However, selecting a lower or higher setting may affect lumen output, efficacy, dimming behavior, or certification details. Record the chosen CCT and wattage for each area so future replacements match the installed fixtures. Avoid mixing settings randomly within one room, since inconsistent brightness or color can make the ceiling appear uneven. Confirm that the selected setting meets the lighting plan before installation.
Consider tunable-white and emergency-lighting options
Tunable-white fixtures allow the color temperature to change through a compatible control system. They may suit offices, healthcare facilities, classrooms, and hospitality spaces that use different lighting scenes. Before specifying them, confirm compatibility between the fixture, driver, controls, wiring, and communication protocol.
Emergency-lighting versions may include a battery backup, emergency driver, test switch, or remote battery pack. They form part of the building’s life-safety system and should not be added as an afterthought. Review local requirements for emergency illumination, testing, battery duration, and egress routes. The U.S. Department of Energy’s lighting controls guidance provides useful background on control strategies, though project-specific emergency requirements should come from the applicable codes and authorities.
Add high bays or pendants for high ceilings
Recessed downlights may not be the most suitable choice for ceilings above approximately 12 feet. As the mounting height increases, more light is lost before it reaches the work plane. Using many small recessed fixtures may raise installation and maintenance costs without delivering the right distribution.
High-bay fixtures suit warehouses, gyms, workshops, and other tall spaces because they provide concentrated output from greater mounting heights. Pendants can work well in lobbies, dining areas, reception desks, and open offices where the fixture can hang closer to the activity below. Use recessed lights for general or architectural illumination, then add high bays or pendants where height requires greater output. A recessed lighting spacing guide can help compare mounting height, spacing, and coverage before finalizing the layout.
What Ratings and Certifications Should Commercial Lights Have?
Commercial LED recessed ceiling lights need to meet more than basic brightness requirements. The right fixture must suit the ceiling assembly, electrical system, room conditions, fire-safety plan, and applicable building codes. A product may look ideal on paper but still be unsuitable if it cannot operate near insulation, fit inside a plenum, connect to your control system, or provide the required emergency output.
Start by reviewing the fixture’s specification sheet and installation instructions. Look for housing ratings, location ratings, fire-resistance information, certifications, photometric files, control compatibility, and warranty terms. Confirm the requirements with the project’s electrician, lighting designer, architect, or local code official before ordering in bulk.
Certifications can confirm that a product has been tested to recognized standards, but they do not replace project-specific code review. Offices, healthcare facilities, retail stores, and restaurants may have different requirements for glare, color quality, emergency lighting, sanitation, and controls. Use the checklist below as a starting point, then verify every detail for your location and installation.
Follow IC-rated, non-IC, and airtight installation requirements
Insulation contact, or IC, rating indicates that a recessed fixture can be installed in direct contact with approved ceiling insulation. This matters when lights are installed below an insulated attic, roof deck, or exterior ceiling. An IC-rated fixture is designed to manage heat in that enclosed environment, while a non-IC fixture generally requires a specific clearance from insulation and other materials.
Airtight construction can reduce air leakage through the ceiling. Check whether the product is marked airtight and whether that designation applies to the complete assembly, including the housing, trim, gasket, and junction box. Cans and Fans’ recessed lighting guide explains why IC and non-IC housings require different clearances.
Do not assume a slim canless fixture is automatically safe for every insulated ceiling. Confirm the product’s listing, installation depth, insulation requirements, and maximum operating conditions before installation.
Check damp-, wet-location, and IP ratings
Choose a location rating based on where the fixture will operate, not simply on whether the room is indoors. Damp-location fixtures are intended for areas exposed to moisture, such as covered exterior ceilings, bathrooms, locker rooms, and some commercial kitchens. Wet-location fixtures are designed for areas where water may reach the fixture directly, although the installation must still follow the manufacturer’s instructions.
An IP rating provides another way to describe protection from solid objects and moisture. The first digit addresses solids, while the second addresses water. A higher water-protection rating may suit washdown areas or exposed installations, but it does not automatically satisfy every local requirement.
Review the exact listing and mounting instructions before selecting a product. The Home Depot recessed lighting buying guide offers a helpful overview of IC housings and location considerations. For demanding environments, ask whether the rating applies to the complete installed fixture.
Choose fire-rated or two-hour fire-rated assemblies
A recessed light can create an opening in a ceiling that forms part of a fire-resistance-rated assembly. In that situation, the fixture and any protective enclosure must preserve the required performance of the ceiling. A standard fixture may not be acceptable simply because it fits the cutout.
Fire-rated recessed fixtures are tested as assemblies, so examine the rating period and installation conditions. A two-hour-rated ceiling may require a fixture or enclosure approved specifically for a two-hour assembly. Pay attention to the ceiling material, thickness, joist spacing, insulation, junction box location, and any required fire-rated accessories.
Do not combine unrelated components and assume the finished installation carries the same rating. Use the manufacturer’s approved housing, cover, gasket, and mounting method. Commercial LED retrofit guidance also emphasizes selecting fire-rated assemblies when the ceiling design requires them. Have the architect, contractor, or code official confirm the rating before work begins.
Verify UL, ETL, DLC, and ENERGY STAR listings
Independent listings provide useful information about product safety, performance, and eligibility for certain programs. UL and ETL marks indicate that a product has been evaluated by a recognized testing organization for applicable safety standards. Check the listing number and product family, since a mark on a box or similar model may not cover every configuration.
DLC listing is especially relevant for commercial projects seeking utility rebates or efficiency incentives. Confirm that the exact model, lumen package, color temperature, and control option appear on the current DLC Qualified Products List. ENERGY STAR certification can provide another performance reference for products that meet the program’s requirements.
Look for certification information on the manufacturer’s website, product label, and specification sheet. Be cautious of vague statements such as “UL recognized components” when the complete fixture needs a certified listing. Your project may require a specific certification, so verify the requirement with the authority having jurisdiction before placing a large order.
Meet Title 24, plenum, and local electrical codes
Commercial lighting requirements vary by location, building type, and room function. California projects may need to meet California Title 24 requirements, including rules for lighting power, shutoff controls, dimming, daylight response, and occupancy sensing. Other jurisdictions may use different energy codes or local amendments.
Plenum spaces create additional concerns because air-handling areas may require materials and wiring methods that limit smoke and flame spread. Confirm whether the fixture, driver, cable, and junction box are approved for the plenum installation. A product that meets general electrical standards may still need a different configuration for an air-return ceiling.
Local electrical codes can also affect junction boxes, grounding, emergency circuits, disconnects, control wiring, and installation clearances. Give the electrician the complete product documentation instead of relying on a retailer’s short description. Code compliance depends on the entire installation, including the ceiling system and connected controls.
Provide emergency lighting, battery backup, and compliant egress
Emergency lighting helps occupants find exits and move safely when normal power fails. Depending on the building and local code, recessed fixtures may need an emergency driver, battery backup, inverter connection, or dedicated emergency circuit. Exit signs and egress lighting may have separate requirements from general room lighting.
Check the emergency output, rated duration, recharge time, test method, and battery replacement process. A fixture that remains illuminated is not necessarily providing enough light along the required egress path. Emergency mode must also work with the project’s controls and power distribution without being disabled by a wall switch or energy management command.
Use layout drawings to identify corridors, stairs, doors, changes in elevation, and other areas where emergency illumination may be required. Recessed lighting layout guidance can help with general planning, but a licensed professional should verify the final egress design. Test the system after installation and document the results for building records.
Review IES files, photometric data, and specifications
A product’s lumen rating does not tell you how evenly it will light a room or how much glare it may create. Request the manufacturer’s IES file, photometric report, and complete specification sheet. These documents show the fixture’s distribution, output, beam spread, spacing criteria, color data, power consumption, and sometimes glare metrics.
Lighting designers can import IES files into calculation software to model foot-candles, uniformity, wall illumination, and energy use before installation. Compare the modeled result with the needs of the space. A narrow beam may suit a display or accent area, while a broad distribution may work better over workstations or corridors.
Also review tested wattage, delivered lumens, color temperature tolerance, power factor, total harmonic distortion, dimming range, and ambient temperature limits. Photometric data should represent the complete fixture, not just the LED chip. LED retrofit performance guidance recommends reviewing IES files and specifications before selecting a product for a commercial project.
Compare warranties, lumen guarantees, parts, and support
A commercial fixture’s warranty should cover more than the LED package. Review the length of coverage, operating-hour limits, labor exclusions, driver coverage, finish coverage, and conditions that could void the warranty. Some warranties require professional installation, approved controls, or specific operating temperatures.
Look for a lumen-maintenance guarantee that states how much light the fixture is expected to produce after a defined period. Ask how the manufacturer handles driver failures, discontinued models, replacement trims, emergency batteries, and compatible control components. A low purchase price may become expensive if the entire fixture must be replaced because of a minor component failure.
Before ordering, request written answers about lead times, replacement parts, technical support, and warranty claims. Compare these details alongside efficacy and initial price, rather than focusing on the fixture’s sticker cost alone. Commercial recessed lighting product guidance can help you identify warranty and support questions to ask suppliers.
What Does LED Recessed Ceiling Light Installation Require?
Installing LED recessed ceiling lights involves more than cutting openings and connecting wires. Before selecting fixtures, inspect the ceiling assembly, confirm electrical requirements, and plan how each light will support the room’s layout and controls. The correct method depends on whether the ceiling is open, finished, insulated, shallow, or part of a commercial plenum.
Begin with the manufacturer’s installation instructions, product listings, clearance rules, and control requirements. A licensed electrician can identify hidden wiring, structural obstacles, circuit limitations, and code requirements before work begins. Careful planning also helps prevent uneven illumination, flicker, excess heat, and premature fixture failure. Sunme Lighting’s commercial guide explains why professional installation can improve both safety and fixture performance.
Assess ceiling depth, joists, insulation, and plenum space
Measure the available ceiling depth before choosing a fixture. Canless wafer lights work well in shallow spaces, while can-based fixtures need room for a housing, junction box, and driver. Locate joists, ducts, pipes, fire sprinklers, and existing cables so the layout does not interfere with structural or building systems.
Insulation also affects fixture selection. An IC-rated light is designed for contact with approved insulation, while a non-IC-rated model generally requires clearance. Commercial ceilings may include a plenum space used for air circulation, creating additional requirements for housings, wiring, and materials. Check the product listing and local code before installation.
Choose retrofit, remodel, or new-construction installation
Select a retrofit fixture when an existing recessed housing is in good condition and matches the LED module. Retrofit kits can reduce ceiling work, but the housing must have compatible dimensions, mounting clips, and electrical connections. Inspect older housings for damage or heat-related deterioration before reusing them.
Remodel fixtures are designed for finished ceilings and typically secure to drywall or ceiling panels with spring clips. New-construction housings are installed before the ceiling is closed, making them suitable for open framing or major renovations. This distinction matters because new-construction and remodel housings serve different conditions.
Plan layouts, spacing, circuit loads, and driver locations
Create the lighting layout before cutting the ceiling. Mark fixture centers, row spacing, perimeter distances, and areas that need stronger illumination, such as workstations, counters, displays, and corridors. Avoid placing lights directly over walls or too close to tall cabinets unless you want deliberate wall washing.
Add the wattage of every fixture and connected device to estimate the circuit load. Decide where remote drivers, junction boxes, and control components will sit, while keeping required service access in mind. High ceilings may need closer spacing or higher-output fixtures because light intensity decreases as the distance from the source increases. Use a recessed lighting layout guide to review mounting height and coverage.
Check voltage, junction boxes, housings, and wiring
Confirm the building voltage and fixture input requirements before ordering lights. Commercial products may use line voltage, low voltage, or a separate driver. Connecting a fixture to the wrong voltage can damage the equipment and create a safety risk.
Inspect existing junction boxes and housings for damage, compatibility, grounding, and available space. Check wire size, connectors, circuit capacity, and cable routing as well. Connections must remain accessible where required by code, and drivers need suitable operating conditions. PacLights’ installation guidance recommends checking electrical components carefully, particularly when replacing older fixtures.
Use cutout templates and proper installation tools
Use the cutout template supplied with the fixture instead of estimating the aperture. Trace the opening carefully, confirm the measurement twice, and check that the hole will not overlap a joist or another ceiling component. An oversized opening can leave visible gaps, while an undersized opening may damage the ceiling or prevent the trim from sitting flush.
Typical tools include a stud finder, tape measure, level, drill, drywall saw, hole saw, wire stripper, voltage tester, and suitable screwdrivers. Wear eye protection and use dust control when cutting overhead. Following the manufacturer’s template, as Cans & Fans recommends, helps produce a cleaner installation.
Manage ceiling cuts, tight access, wiring, and connectors
Finished ceilings can make access difficult when joists, ductwork, insulation, or existing wiring sits above the proposed opening. When possible, use a small inspection hole or access camera before making the full cut. This can reveal obstructions and reduce unnecessary ceiling repairs.
Avoid pulling, pinching, or sharply bending wires around framing edges. Use approved connectors, secure cables correctly, and leave enough conductor length for service connections. If the fixture includes a quick-connect plug, use it only as directed. Never force a housing, driver, or connector into a space that is too tight, since pressure can damage components or loosen electrical connections.
Prevent insulation-related thermal traps
Efficient LEDs still produce heat, and that heat needs to dissipate according to the fixture’s design. Do not cover a fixture or driver with insulation unless the product is specifically rated for that installation. An enclosed, unventilated housing can trap heat, shorten component life, cause flicker, or trigger thermal protection.
Use an IC-rated fixture where insulation will touch the housing, and choose an airtight model when the ceiling assembly requires reduced air leakage. Keep insulation away from components that require ventilation, following the listed clearances. Jarvis Lighting’s retrofit troubleshooting guide identifies insulation management and ambient temperature ratings as common sources of LED problems.
Coordinate TRIAC, ELV, 0–10V, DALI, sensor, and smart wiring
Choose the control method before installing the fixtures. TRIAC dimming is common in some line-voltage applications, while ELV dimming may suit specific electronic drivers. Commercial systems may use 0–10V, DALI, occupancy sensors, daylight controls, or networked smart controls.
The dimmer and driver must be compatible. A mismatch can cause flicker, buzzing, a limited dimming range, or lights that fail to turn off completely. Plan control wiring separately from power conductors when required, and confirm whether sensors need a neutral wire, low-voltage wiring, or a dedicated module. This commercial LED installation guide outlines wiring considerations for modern lighting systems.
Determine when permits or a licensed electrician are required
Permit requirements vary by location, building type, and project scope. Replacing a compatible retrofit module may involve less work than adding circuits, moving junction boxes, or installing controls throughout a commercial property. Contact the local authority having jurisdiction before beginning the project.
A licensed electrician should handle line-voltage wiring, circuit modifications, service-panel work, and complex commercial installations. Professional help is especially important when the ceiling includes fire-rated assemblies, plenum spaces, emergency lighting, or sensitive equipment. Before hiring a contractor, confirm who will handle permits, inspections, testing, and documentation.
Test brightness, glare, color, dimming, and controls
After installation, test the lights under normal operating conditions. Check for even brightness, suitable contrast, distracting shadows, and glare on screens or reflective surfaces. Confirm that the selected color temperature works with the room’s finishes, furnishings, and tasks.
Test every dimmer, sensor, daylight control, emergency function, and smart command. Watch for flicker at different dimming levels, and verify that fixtures turn on consistently. For offices, retail spaces, and other areas where color accuracy matters, consider at least 80 CRI, or 90+ CRI for color-critical applications. Jarvis Lighting’s guidance recommends evaluating CRI alongside the fixture’s overall performance, rather than judging the light by brightness alone.
Best Commercial Uses for LED Recessed Ceiling Lights
LED recessed ceiling lights suit many commercial environments, but the right fixture depends on how each space is used. An office needs comfortable, even illumination for computer screens and paperwork. A retail store may need high color quality and adjustable beams to present products accurately. A hotel lobby, clinic, or classroom often benefits from several lighting layers, including ambient, task, accent, and wall-wash lighting.
Start by assessing the room’s purpose, ceiling height, existing wiring, surface finishes, and available natural light. Then compare lumen output, color temperature, color rendering index (CRI), beam angle, glare control, dimming compatibility, and location ratings. As Sunme Lighting’s commercial recessed lighting guide explains, fixture selection affects a commercial space’s design, function, and energy performance.
A good layout rarely depends on one fixture type. Broad-beam downlights can provide general illumination, while adjustable fixtures highlight displays and wall-wash trims brighten vertical surfaces. Separating these fixtures into lighting zones gives staff more control and helps the space remain comfortable throughout the day.
Light offices, workstations, and conference rooms
Offices need consistent light for reading, computer work, collaboration, and video meetings. Use recessed downlights with a broad distribution across open work areas, and space them evenly to reduce bright spots and shadows. Low-glare trims and matte lenses can make long periods at a screen more comfortable.
Conference rooms benefit from separate lighting zones and compatible dimming controls. Keep general lighting bright enough for presentations and note-taking, then lower the output when a screen is in use. Adjustable fixtures can direct light toward a whiteboard or presentation wall without shining into attendees’ eyes. Neutral white light often creates a clean, professional appearance without feeling too cold.
Illuminate retail stores, displays, and showrooms
Retail lighting should help shoppers see products clearly and draw attention to priority displays. Use broad-beam recessed fixtures for general illumination, then add adjustable or gimbal lights above shelving, checkout areas, feature tables, and display cases. Wall-wash trims can spread light across vertical merchandise displays, making products easier to see from the aisle.
Color quality is especially important when customers evaluate clothing, paint, food, furniture, or artwork. Specify at least CRI 80 for general commercial areas, and consider CRI 90 or higher for displays where accurate color matters. This recommendation aligns with guidance in Jarvis Lighting’s LED troubleshooting guide. Review R9 performance as well when red tones, skin tones, or warm product colors need to appear natural.
Light restaurants, cafés, hotels, and hospitality spaces
Hospitality lighting needs to provide visibility while supporting the desired atmosphere. Restaurants and cafés often use warm white recessed lights above seating areas, with dimming controls that let staff adjust brightness during service. Narrower beams can highlight artwork, tables, or architectural details, while wider beams work well in aisles and circulation areas.
Hotels may need separate lighting plans for lobbies, reception desks, corridors, guest amenities, and meeting rooms. Choose fixtures with consistent color so guests experience a cohesive appearance as they move through the building. Tunable-white or circadian lighting may also suit areas where occupant comfort, alertness, and wellbeing are priorities. naturaLED’s commercial lighting guidance recommends considering these systems for spaces focused on human performance and comfort.
Support healthcare facilities, clinics, and examination rooms
Healthcare lighting should provide clear visibility without excessive glare, harsh shadows, or noticeable color variation. Examination rooms may require brighter, high-CRI fixtures so staff can assess skin tones, wounds, and other visual details accurately. Sealed or easy-to-clean trims may also be appropriate, depending on the facility’s cleaning procedures and hygiene requirements.
Corridors, waiting rooms, and patient areas typically need softer, even illumination. In some locations, indirect or indirect-direct fixtures can improve visual comfort by putting light on the ceiling and walls instead of directing every lumen straight down. This approach can be useful when replacing older HID systems, according to Jarvis Lighting’s commercial lighting guidance.
Brighten lobbies, corridors, classrooms, and shared areas
Lobbies and corridors are often the first areas visitors see, so consistent lighting can make a building feel more welcoming and easier to navigate. Use evenly spaced downlights for general illumination, then highlight reception desks, signs, artwork, or architectural details with adjustable fixtures. In classrooms, choose low-glare lighting that supports reading, writing, presentations, and screen use.
Ceiling height deserves close attention. Standard recessed downlights may not deliver enough useful illumination in rooms with ceilings higher than 12 feet. Amicolight’s recessed lighting layout guide recommends checking whether recessed fixtures alone can adequately light taller spaces. Larger apertures, higher-output fixtures, pendants, or high bays may provide better coverage.
Match lumens, CCT, CRI, beam angle, and ratings to each space
Select fixtures based on performance, not appearance alone. Lumens measure light output, while wattage measures energy consumption. A high-efficacy fixture can produce more light with less power, but the appropriate output still depends on room size, ceiling height, surface reflectance, furniture placement, and the work performed below the fixture.
Color temperature affects the room’s appearance. Warm white often suits restaurants, lounges, and hospitality spaces, while neutral or cool white may work better in offices, classrooms, clinics, and retail stores. Use CRI 80 or higher for most commercial applications, and choose CRI 90 or higher when accurate product colors or skin tones matter.
Beam angle should correspond to the ceiling height and lighting layout. Wide beams, often around 100 to 120 degrees, can distribute light evenly in rooms with standard 8- to 10-foot ceilings. Industrial Commercial Lighting’s downlight buyer’s guide provides a helpful reference for comparing beam spread and mounting height. Also verify IC, airtight, damp-location, wet-location, and fire-rating requirements before ordering.
Layer ambient, task, accent, and wall-wash lighting
Ambient lighting supplies a room’s general illumination, but it should not handle every lighting need. Add task lighting where people read, work, prepare food, examine patients, or complete detailed activities. Accent lighting can direct attention toward merchandise, artwork, signs, reception areas, and architectural features.
Wall-wash fixtures spread light across vertical surfaces, helping a room feel brighter and reducing the cave-like effect that can occur when every fixture points only at the floor. Use separate circuits, dimming zones, occupancy sensors, or daylight controls so each lighting layer can respond to the way the space is being used.
Before installation, review fixture spacing, aiming angles, control compatibility, and photometric data. A careful plan can also reduce glare, dark corners, and uneven brightness. Industrial Lighting Fixtures’ commercial installation guide notes that thoughtful fixture selection, layouts, and control strategies can prevent many common commercial lighting problems.
Compare LED Recessed Ceiling Light Brands and Products
Comparing LED recessed ceiling lights requires more than looking at price, wattage, or product photos. Two fixtures with the same aperture size may differ in delivered lumens, glare control, driver quality, dimming performance, certifications, and replacement options. Those differences affect both the appearance of your space and the cost of maintaining it.
Start by defining the project requirements before reviewing brands. Note the ceiling type, mounting height, room function, operating schedule, target light levels, control system, and local code requirements. Then create a comparison sheet for every product you consider. Record the model number, aperture size, delivered lumens, wattage, efficacy, CCT, CRI, beam angle, certifications, warranty, price, and expected lead time.
Use manufacturer documentation to verify every important claim. The DesignLights Consortium Qualified Products List can help you identify commercial LED products that meet established performance criteria. However, check the exact model number and configuration, since a listing may apply only to certain lumen packages, trims, or control options.
Shortlist commercial-grade manufacturers and product lines
Begin with manufacturers that publish complete technical information and support products designed for commercial environments. Look for detailed cut sheets, installation instructions, photometric files, warranty terms, replacement part information, and a technical support contact. A reliable manufacturer should explain how its fixtures perform under extended operating schedules.
Review the full product family, not just one fixture. A strong product line may include multiple aperture sizes, lumen packages, CCT options, trim styles, beam distributions, and control configurations. This flexibility helps when one project includes offices, corridors, retail displays, and rooms with different ceiling heights.
Check whether the manufacturer clearly identifies certifications, ratings, and efficiency listings. Confirm that the documentation applies to the exact fixture configuration you intend to purchase. If information is missing or difficult to obtain, treat that as a warning sign before requesting a bulk quote.
Separate commercial fixtures from residential alternatives
Residential recessed lights may suit homes, but they do not always meet the demands of a commercial installation. Commercial fixtures often provide higher output, stronger thermal design, more control options, longer operating-life data, and documentation required for permitting or rebate applications. They may also offer better glare control, emergency options, and compatibility with specific ceiling assemblies.
Do not assume that a higher wattage indicates better performance. Review delivered lumens, efficacy, rated operating conditions, switching capacity, and warranty exclusions instead. Confirm that the fixture is approved for the intended ceiling type, insulation contact, location, and operating environment.
Replacement support is another important difference. If an integrated residential fixture fails, the entire unit may need to be replaced. For a large facility, that can lead to inconsistent color and added labor. Ask whether the manufacturer supplies replacement drivers, modules, trims, or complete fixtures for the expected service period.
Compare lumens, watts, efficacy, lifespan, and lumen maintenance
Lumens describe the light produced by a fixture, while watts describe its power consumption. Efficacy, measured in lumens per watt, shows how efficiently the fixture converts electricity into light. Compare these figures under the same conditions, because output can change with CCT, trim, lens, and operating mode.
Review rated life and lumen maintenance together. A fixture may claim a long service life, but you also need to know how much light it will produce near the end of that period. The Department of Energy’s LED lighting guidance explains the relationship between LED efficiency, service life, and performance.
Use delivered fixture lumens for project comparisons rather than the output of the LED package alone. Then estimate total ownership costs, including energy use, maintenance access, replacement labor, and expected operating hours. A fixture with a higher purchase price may cost less to operate and maintain over its useful life.
Review CCT, CRI, slim designs, and adjustable aiming
Color temperature affects the way a room feels and how finishes appear. Warm white light around 2700K to 3000K can suit restaurants, hotels, and other relaxed settings. Neutral white around 3500K to 4000K often works well in offices, classrooms, and general commercial areas. Higher CCTs may suit warehouses or detail-oriented work, but they are not automatically the right choice.
Color rendering index, or CRI, indicates how accurately a light source displays colors. CRI 80 may work for general areas, while retail, healthcare, hospitality, and design spaces often benefit from CRI 90 or higher. When color accuracy is important, review R9 performance and the manufacturer’s color consistency rating.
Slim canless fixtures work well where ceiling depth is limited, but check the junction box, driver location, wiring, and code requirements. For directional lighting, compare the actual tilt and rotation range of gimbal fixtures rather than relying on the word “adjustable” in a product description.
Check beams, glare control, trims, and dimming
Beam angle determines how widely light spreads across floors, walls, and displays. Wider beams can provide even ambient coverage in rooms with standard ceiling heights, while narrower beams can focus light on merchandise, artwork, or architectural details. Use photometric files to review distribution at the planned mounting height.
Glare control matters in offices, classrooms, clinics, and hospitality spaces where people may look toward the ceiling. Compare baffle depth, reflector design, lens shielding, cutoff angle, and published glare data. A fixture with high output can still create an uncomfortable space if it produces harsh brightness or reflections on screens.
Trim selection also affects the finished ceiling. Options may include white or black finishes, regressed lenses, baffles, pinhole apertures, and wall-wash designs. Confirm dimming compatibility before ordering. TRIAC, ELV, 0–10V, and DALI systems require compatible drivers, dimmers, and wiring.
Verify drivers, sensors, smart features, and controls
The driver affects fixture reliability, dimming, flicker, startup behavior, and system compatibility. Ask whether it is replaceable, where it is installed, and how it performs under the project’s voltage and temperature conditions. Review the minimum dimming level and confirm that the fixture works with the planned control equipment.
Occupancy and daylight sensors can limit unnecessary operating hours, but the right option depends on the room. A conference room may use vacancy sensing, while a corridor may rely on occupancy detection or a scheduled control system. Confirm sensor coverage, commissioning requirements, and whether the sensor is factory-installed or added in the field.
For networked lighting, verify communication protocols and software requirements before choosing fixtures. Check compatibility with building management systems, wall controls, wireless gateways, and emergency circuits. ENERGY STAR’s commercial lighting resources provide useful guidance when evaluating efficient fixtures and control strategies.
Request samples, IES files, specifications, and quotes
Request a physical sample before approving a large order, especially when trim appearance, glare, color, or wall-wash performance matters. Install it in a representative area and review the light from standing and seated positions. Check how it looks near screens, polished floors, artwork, and other reflective surfaces.
Ask every manufacturer for an IES file, cut sheet, installation guide, warranty, certification details, and control compatibility information. IES files allow lighting professionals to model a fixture in a proposed layout. The Illuminating Engineering Society provides industry resources that can help teams understand photometric data and lighting documentation.
Provide identical project information to every supplier when requesting quotes. Include quantity, aperture size, lumen package, CCT, CRI, trim, dimming method, ceiling type, emergency requirements, and delivery location. Ask suppliers to list fixtures, accessories, controls, shipping, programming, and other charges separately.
Compare warranties, support, parts, and lead times
Read the warranty carefully instead of comparing warranty length alone. Check what the warranty covers, whether labor is excluded, which installation conditions apply, and how claims are handled. Some warranties cover the fixture but not troubleshooting, removal, shipping, or reinstallation costs.
Ask how the manufacturer handles failures after installation. Can you order a replacement driver or LED module, or must you replace the entire fixture? Are matching trims available if the ceiling finish changes? A clear parts policy can reduce downtime and help maintain a consistent appearance across the facility.
Lead times also deserve close attention, particularly for custom finishes, tunable-white fixtures, emergency options, and large orders. Confirm current inventory and estimated delivery dates in writing. Ask whether partial shipments are available if some areas of the project are ready first.
Before approving the purchase, review return policies, freight terms, technical support, and the supplier’s escalation process. These details can affect the project long after the initial order, especially when fixtures must be replaced or additional units are needed.
Find LED Recessed Ceiling Light Deals and Bulk Pricing
Finding a good deal on LED recessed ceiling lights takes more than choosing the lowest unit price. A less expensive fixture may use more power, offer limited dimming compatibility, carry a shorter warranty, or require extra installation components. For commercial projects, compare the complete cost across the number of fixtures you need, then factor in shipping, labor, maintenance, and potential rebates.
Create a comparison sheet for each product before requesting quotes. Record the model number, size, lumens, wattage, color temperature, CRI, certifications, warranty, unit price, shipping fee, and expected delivery date. Comparing identical model numbers helps you avoid confusing similar-looking products with different performance or safety ratings. A recessed lighting buying guide can help you identify the specifications that matter most.
Compare retailers, electrical suppliers, and distributors
Check several types of sellers before placing a large order. Retailers may provide convenient shipping, frequent promotions, and straightforward return policies. Electrical suppliers often offer contractor accounts, technical support, and access to commercial product lines. Distributors may provide stronger volume pricing, particularly when you purchase fixtures, trims, drivers, sensors, and controls from the same product family.
Compare the same model number whenever possible. Two fixtures with the same diameter may differ in lumen output, housing depth, driver quality, dimming performance, or certification. Ask each supplier for a written quote that includes unit pricing, quantity breaks, freight, taxes, and estimated lead time. Browsing commercial product ranges, such as recessed lighting collections from Warehouse Lighting, can help you compare product types and pricing structures.
Check coupons, newsletters, loyalty programs, and clearance stock
Look beyond the listed price for additional savings. Retailers may offer first-order coupons, newsletter promotions, loyalty rewards, or account-specific pricing. These offers are especially useful when ordering samples, replacement fixtures, or a smaller batch for a renovation.
Clearance stock can lower your upfront cost, but check the product details before buying. Confirm that the manufacturer still supports the model and that replacement drivers, trims, and other parts remain available. Make sure the remaining quantity is large enough to complete the project, since mixing fixture generations can create visible differences in color, output, and trim appearance.
Ask about return restrictions, restocking fees, and remaining warranty coverage. If the product is discontinued, determine whether the supplier will accept unopened cartons or provide replacement parts. Use resources such as this recessed lighting guide from Home Depot to review the features worth verifying.
Find seasonal promotions and commercial pricing
Seasonal sales can reduce fixture costs, but promotional pricing may apply only to standard products. Commercial lines, custom trims, and lighting packages often require a separate quote. If your project has a flexible schedule, ask suppliers when major promotions occur. If the schedule is fixed, request a quote early and ask whether the supplier can honor a promotional rate for a planned order.
Commercial pricing usually depends on quantity, account status, product availability, and delivery requirements. Send the supplier a complete bill of materials that includes fixture sizes, finishes, trims, drivers, controls, and emergency-lighting options. A supplier may suggest a comparable product with better availability or offer a lower package price when you purchase compatible components together. This commercial recessed lighting guide provides helpful context on fixture types, sizes, and project planning.
Request contractor, distributor, and bulk discounts
Do not assume the listed price is final. Ask about contractor rates, distributor pricing, project quotes, and quantity discounts. Include the estimated fixture count, project location, required delivery date, and preferred specifications in your request. Specific information gives the supplier enough context to provide useful pricing instead of a general retail quote.
For a larger order, request pricing for both the first shipment and the complete project. This can reveal quantity thresholds that qualify for lower rates. Ask whether the supplier can provide free freight, reserve inventory, offer split shipments, or credit sample purchases toward the final order.
Before accepting a substitute product, compare its lumens, wattage, CRI, CCT, dimming compatibility, ratings, and certifications with the original specification. A lower price is not helpful if the replacement requires different wiring or fails to meet the project requirements. Suppliers that discuss bulk discounts for LED fixtures may be worth contacting for large commercial orders.
Search for utility rebates and qualifying DLC products
Utility rebates can lower the effective cost of an LED lighting upgrade. Check your electricity provider’s commercial rebate program before placing an order. Requirements may include preapproval, specific wattage limits, eligible applications, approved controls, or installation by a qualified professional. Some programs will not reimburse products purchased before an application is accepted.
A DesignLights Consortium listing may support eligibility for certain commercial rebates, but it does not guarantee approval from your local utility. Search the DLC Qualified Products List using the manufacturer and exact model number. Then compare the listing with your utility’s current rules, including fixture category, control requirements, application deadlines, and quantity limits.
Keep invoices, product specifications, model numbers, installation records, and approval documents. Also confirm who receives the rebate, since payment may go to the building owner, contractor, or utility account holder. Confirming these details before purchase can prevent an unexpected gap in the project budget.
Calculate total installed costs, not sticker prices
Compare the complete installed cost for every option. Include the fixture, installation labor, ceiling access, wiring, junction boxes, housings, dimmers, sensors, lifts, disposal, shipping, and permit fees where applicable. A canless fixture may cost more per unit but require less ceiling space and fewer installation components. A retrofit light may be the better choice when existing housings are compatible, while new-construction fixtures may be more practical in an open ceiling.
Include operating and maintenance costs in your estimate. Review wattage, expected hours of use, electricity rates, driver replacement access, and projected service life. A fixture with a higher purchase price may cost less over time if it consumes less electricity, maintains light output, and includes a reliable warranty.
Compare the cost of controls as well. Occupancy sensors, daylight controls, dimmers, and compatible drivers add to the initial budget but may reduce energy use and extend service life. A commercial LED installation cost guide can help you account for expenses that are often missed during early budgeting.
Confirm inventory, shipping, returns, warranties, and rebates
Confirm that the exact model and quantity are in stock before paying. Ask whether the fixtures, drivers, trims, and accessories are available at the same location, and request a realistic shipping date. For time-sensitive projects, find out whether backordered components could delay installation or arrive in separate shipments.
Read the return policy and warranty terms before ordering samples or a full batch. Check who pays return freight, whether restocking fees apply, and whether opened cartons can be returned. Review coverage for the fixture, driver, finish, and lumen maintenance separately. Some warranties also require installation by a licensed electrician or registration within a specific period.
Finally, confirm rebate eligibility in writing and save the quote, invoice, product specifications, DLC listing, installation receipt, and approval notice. These records make it easier to resolve shipping or warranty issues and help ensure that a low unit price does not lead to an expensive project delay.
Build a Commercial Lighting Website with Airo AI Builder
A commercial lighting website should do more than display product photos. Contractors, designers, facility managers, and business owners need to find suitable fixtures, understand technical details, and request project pricing without digging through a confusing catalog.
With Airo AI Builder, you can turn a lighting business idea into a live website in minutes. Start with your product categories, target customers, service area, and key offerings. Then refine the pages with accurate specifications, project photos, downloadable resources, and clear contact options.
Organize products by size, lumens, CCT, ratings, and use
Organize your catalog around the details commercial buyers use when comparing fixtures. Create categories for 4-inch, 6-inch, and 8-inch recessed lights, then add filters for lumens, wattage, color temperature, CRI, beam angle, dimming method, housing type, and location rating.
Application-based collections can make the catalog easier to browse. Consider pages such as “Office Lighting,” “Retail Display Fixtures,” “High-CRI Downlights,” and “Damp-Location Fixtures.” Explain each specification in plain language. For example, describe how aperture size affects light distribution and how CRI affects the appearance of colors. Jarvis Lighting’s guide to LED retrofit issues provides useful background on wattage, color temperature, and color rendering.
Turn specifications into clear comparison pages
Specifications become more useful when customers can compare similar fixtures in one place. Create comparison pages that show lumen output, efficacy, CCT options, CRI, trim style, beam angle, housing type, controls, warranty, and recommended applications.
Add a short “Best for” section to each product page. One fixture may suit a low-ceiling office, while another may work better in a retail display or high-output commercial space. Include installation photos, downloadable specification sheets, and a visible request-a-quote button. Sunme Lighting’s commercial recessed lighting guide can help you identify the product details buyers are most likely to evaluate.
Keep comparison copy specific and easy to scan. Bullet points, consistent labels, and concise summaries help visitors understand the differences without reading every line of a technical data sheet.
Publish installation guides, certifications, IES files, and resources
A resource center can answer common questions before a buyer contacts your sales team. Publish practical guides on choosing retrofit, remodel, or new-construction fixtures, checking ceiling depth, selecting IC-rated housings, and coordinating dimming controls. Keep each article focused on one task, and include diagrams or installation photos when possible.
Give professional buyers easy access to UL or ETL information, DLC listings, warranty documents, cut sheets, photometric data, and IES files. These materials help lighting designers and contractors assess whether a fixture suits a specific project. Include clear safety guidance and recommend qualified installation professionals where appropriate. Industrial Lighting Fixtures’ installation guide explains how careful fixture selection, layout planning, and installation can prevent common performance issues.
Add quote requests, bulk forms, and contact pages
Commercial buyers often need pricing for dozens or hundreds of fixtures rather than a single item. Add a quote form that asks for the project type, fixture quantity, preferred CCT, delivery location, installation timeline, and product links. If relevant, let visitors upload plans, schedules, or specification documents.
Create a dedicated bulk-order page for contractors, distributors, and property managers. Explain volume pricing, lead times, samples, shipping options, and account support. Use specific calls to action, such as “Request contractor pricing” or “Get a project quote,” instead of a generic button labeled “Submit.” You can also highlight partner programs and trade savings, similar to the offer featured by Warehouse Lighting.
Make the contact page easy to use on mobile devices. Include your phone number, email address, service area, business hours, and an expected response time so buyers know what happens after they send an inquiry.
Launch your lighting business website with Airo AI Builder
Start by describing your lighting business, product range, service area, and ideal customers in Airo AI Builder. Ask it to create a commercial lighting website with a homepage, product catalog, comparison pages, resource center, quote form, and contact page. Review the generated content carefully, then replace general statements with accurate information about your products and services.
Add your logo, product photography, downloadable documents, phone number, email address, and project examples. Structure the navigation around buyer needs, with sections such as “Shop by Application,” “Shop by Specification,” “Resources,” and “Request a Quote.” Make sure every product page uses the same format, so visitors can compare fixtures without adjusting to a new layout.
Before publishing, test the forms, product links, file downloads, and mobile layout. Visit lit-365.com to learn more about creating a lighting website with Airo AI Builder.
Start with 50 free credits on lit-365.com
You can begin creating your commercial lighting website with 50 free credits on lit-365.com. Use the initial version to build your core pages, test different layouts, and organize the catalog around the questions customers ask most often.
Start with the pages that support your primary sales process: a clear homepage, several product categories, a comparison page, a resource center, and a quote form. You can add more product pages, certifications, installation guides, and project-specific landing pages as your catalog develops.
Before the site goes live, confirm that inquiries reach the correct inbox, downloadable files open properly, product details are accurate, and calls to action are easy to find. A focused first version gives contractors, designers, and facility managers a dependable place to review your fixtures and request the information they need.
Frequently Asked Questions
What are the main types of LED recessed ceiling lights?\ The most common options include canless wafer lights, can-based fixtures, retrofit kits, remodel housings, and new-construction housings. Fixed downlights provide general illumination, while gimbal and wall-wash trims direct light toward displays, artwork, signs, or walls. Your ceiling depth, installation access, and lighting goals should determine the best type.
How do I choose the right brightness and color for a commercial space?\ Compare delivered lumens, wattage, efficacy, ceiling height, and beam angle rather than relying on wattage alone. Offices and corridors often benefit from even, low-glare lighting, while retail and healthcare spaces may need higher output and stronger color accuracy. Warm white tones suit hospitality areas, while neutral white often works well in offices, classrooms, and retail settings.
What ratings should I check before buying recessed lights?\ Review IC or non-IC status, airtight construction, damp- or wet-location suitability, fire-rating requirements, and plenum approval. You should also verify UL or ETL listing, DLC eligibility when rebates matter, dimming compatibility, emergency-lighting provisions, and the product warranty. The exact requirements depend on the building and local codes.
Can I install LED recessed lights myself?\ Simple retrofit replacements may require less work, but commercial installations often involve circuit loads, junction boxes, control wiring, ceiling obstructions, insulation, permits, and code requirements. A qualified electrician should handle line-voltage connections and projects involving fire-rated ceilings, plenum spaces, emergency lighting, or new circuits.
How can I create a website for an LED lighting business?\ Use Airo AI Builder from lit-365.com to create a starting website from your business idea. Include product categories, comparison pages, technical documents, installation resources, quote forms, and contact information. You can begin with 50 free credits, then review every specification, link, form, and downloadable file before publishing.