
2026-09-08
How to Install Parking Lot Lighting: A Step-by-Step Guide
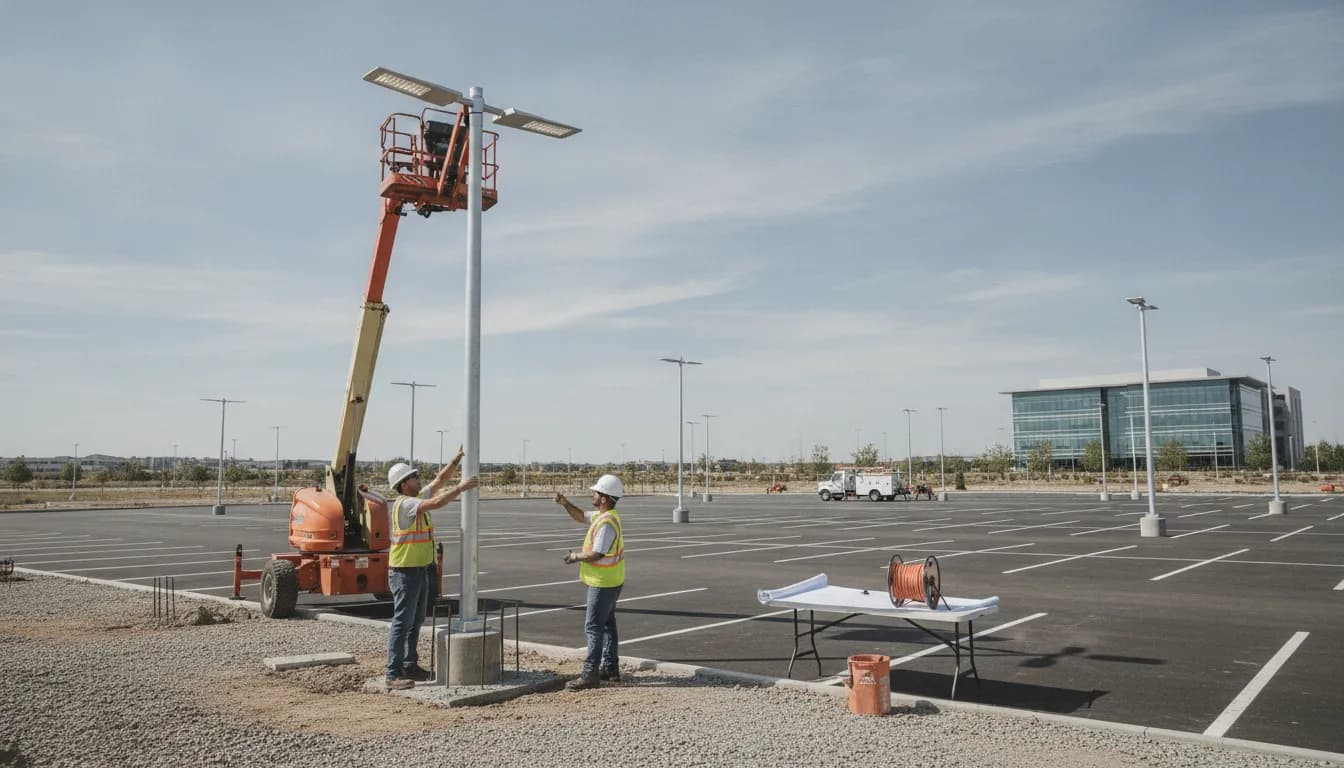
Dark corners, uneven brightness, frequent outages, and glare often point to planning problems rather than weak fixtures. A parking lot lighting project should begin with a detailed review of the property, including stalls, drive aisles, sidewalks, entrances, loading zones, accessible spaces, landscaping, and neighboring buildings. From there, the design must connect photometric planning with foundations, electrical work, controls, safety procedures, and maintenance access. If you want to learn how to install parking lot lighting correctly, this guide breaks the process into practical stages. You will also learn which tasks require qualified professionals and how to confirm that the completed system performs as planned.
Key Takeaways
- Start with a detailed site plan: Assess traffic patterns, walkways, entrances, utilities, landscaping, property boundaries, and local requirements before choosing fixture locations or beginning construction.
- Select a complete, compatible system: Coordinate LED fixtures, poles, foundations, wiring, controls, grounding, and surge protection to achieve even coverage, lower glare, and dependable operation.
- Make testing and maintenance part of the project: Complete inspections, nighttime measurements, control checks, documentation, and recurring service to keep the property safe and the lighting system reliable.
Plan the Parking Lot Lighting Installation
A reliable parking lot lighting system begins with careful planning, not with fixture selection. Before any trenching or pole installation, document how people use the property, where light is needed, and what limitations may affect construction. This early work helps prevent dark areas, excessive glare, electrical problems, and costly changes later.
Start with a daytime site visit, then return after sunset. Record the lot layout, existing fixtures, electrical equipment, landscaping, building entrances, sidewalks, drainage, and planned improvements. Include photographs, measurements, and notes about areas that feel difficult to see. A thorough site assessment and planning process gives the lighting designer and electrician the information needed to create a practical plan.
Create a written project brief that outlines the property’s goals, budget, schedule, operating hours, maintenance expectations, and local requirements. For a business, this may mean welcoming customers and protecting delivery areas. For an HOA, it may mean consistent lighting across shared spaces. Clear goals make it easier to compare designs and select equipment that fits the site.
Set lighting, uniformity, and safety goals
Decide what the lighting needs to accomplish before choosing fixtures or pole locations. A retail property may need strong visibility at entrances, crosswalks, storefronts, and payment areas. An office, apartment community, or HOA may focus more on comfortable light, consistent appearance, and limited glare.
Ask a lighting professional to establish target foot-candle levels, uniformity, mounting height, and glare limits. Average brightness does not show whether a lot is properly lit. Bright areas beside deep shadows can make it harder for drivers and pedestrians to see. This parking lot lighting design guide explains how these measurements work together.
Set goals for color temperature, operating hours, energy use, and future controls. Lighting should help people identify curbs, vehicles, signs, pedestrians, and obstacles without shining into nearby homes or passing traffic.
Identify business, HOA, and shared-property needs
Every property has different priorities. A business may need clear, welcoming light near customer entrances, while a warehouse may need stronger coverage around loading docks and employee parking. An HOA may want a uniform appearance across guest spaces, sidewalks, streets, and shared amenities.
Talk with the people who use and manage the property. Ask when the lot is busiest, which areas feel uncomfortable after dark, and whether residents, employees, or customers have reported glare, dark corners, or unreliable fixtures. Include delivery drivers, pedestrians, tenants, and maintenance staff in the discussion.
For commercial properties, lighting affects both safety and the customer experience. Consistent coverage helps people feel more comfortable arriving and leaving after dark, as this commercial parking lot lighting guidance explains. Record HOA design standards, community preferences, and property management requirements before approving the layout.
Survey stalls, drive aisles, walkways, and entrances
Walk the entire property during daylight and after sunset. Mark parking stalls, drive aisles, sidewalks, crosswalks, entrances, exits, loading zones, dumpster enclosures, and accessible parking spaces. Note where people actually walk, since their routes may not match the sidewalk plan.
Look for dark areas caused by existing poles, trees, building overhangs, or poorly aimed fixtures. Pay attention to transitions between the parking lot and building entrances, where sudden changes in brightness can affect visibility. Check whether light reaches stalls and aisles evenly instead of concentrating in isolated patches.
Take photographs and measurements from several viewpoints. Record existing pole locations, fixture types, mounting heights, and operating conditions. Complete coverage matters because uneven parking lot lighting can create visibility concerns even when the average light level appears acceptable.
Map trees, signs, buildings, canopies, and obstructions
Prepare a current site map that shows anything that could block, reflect, or redirect light. Include trees, signs, buildings, canopies, fences, retaining walls, utility equipment, dumpsters, monument features, and planned construction. Note both existing and expected conditions.
Trees deserve special attention. A layout that works when branches are bare may create shadows after seasonal growth. Avoid placing fixtures where foliage will block the light pattern or make future service difficult. Check that poles will not interfere with signs, delivery routes, snow removal, vehicle sightlines, or pedestrian movement.
Set poles away from curbs and parking spaces when possible to reduce impact risks. Eaton’s parking lot fixture placement guidance also recommends considering appearance and curb setbacks. Map nearby homes and neighboring properties so the design limits unwanted light trespass.
Confirm electrical service and locate underground utilities
Review the electrical system before deciding how many fixtures or control zones the property needs. Confirm the available voltage, panel capacity, spare breaker space, service locations, and distances to proposed poles. An older panel may need an upgrade, while a large property may require multiple circuits or a new distribution point.
Have a qualified professional inspect existing wiring for damaged conduit, water intrusion, undersized conductors, or overloaded circuits. Calculate voltage drop on long runs so fixtures receive dependable power. Include disconnects, surge protection, controls, and room for future additions in the electrical plan.
Never rely only on outdated drawings to locate buried lines. Contact the appropriate utility locating service before excavation, and mark electrical, gas, water, communications, irrigation, and drainage lines. Complete this electrical site assessment before trenching, drilling, or pouring foundations.
Check permits, codes, dark-sky rules, and property requirements
Identify required permits and inspections before ordering equipment or scheduling construction. Requirements may address electrical work, concrete foundations, pole height, setbacks, wind loading, accessibility, emergency access, and connections to existing services. Your local building department or electrical authority can explain which approvals apply.
Review zoning rules and lighting ordinances that limit brightness, operating hours, glare, or light trespass. Some communities require full-cutoff fixtures or specific color temperatures, especially near homes, airports, wildlife areas, or observatories. HOAs and commercial developments may also regulate pole colors, fixture styles, and placement.
Check for additional requirements from the property owner, insurer, landlord, municipality, or management company. A commercial lighting professional can help confirm local ordinance and industry requirements before the design is finalized. Keep permits, approved drawings, product data, and inspection records with the project documents.
Set the budget, schedule, energy goals, and maintenance plan
Build the budget around the complete project, not just the fixtures. Include design work, permits, utility locating, trenching, foundations, conduit, conductors, poles, lifts, electrical labor, controls, restoration, inspections, and testing. Include removal or recycling costs if existing equipment will be replaced.
Create a schedule that accounts for permitting, equipment lead times, concrete curing, weather, business hours, and inspection availability. Commercial properties may need phased work to keep parking spaces, entrances, and delivery routes open. Share important events and restricted work dates with the contractor before construction begins.
Set energy goals with efficient LED fixtures, practical operating schedules, dimming options, and controls suited to the property. Plan maintenance at the same time. Identify how technicians will reach each fixture, where replacement parts will be stored, and who will respond to outages. This LED parking lot installation checklist can help organize those decisions.
Coordinate lot coverage with permanent exterior lighting
Parking lot fixtures should complement the building’s existing exterior lighting. Review wall packs, entrance lights, canopy fixtures, pathway lights, signs, landscape lighting, and architectural systems. Compare their brightness, color temperature, operating schedules, and light direction.
Pay close attention to transitions between the lot and the building. If the parking area is much brighter than the entrance, the doorway may appear dark. If wall-mounted fixtures are much brighter than pole lights, the lot may feel uneven. Separate control zones can help maintain comfortable light levels throughout the night.
Permanent exterior lighting may include low-profile LED systems installed along rooflines or other building features. Coordinate these systems with parking fixtures so colors, schedules, and brightness levels feel intentional. Use shielding and precise aiming to limit spill into neighboring properties. Careful coordination reduces light pollution and glare while keeping entrances, walkways, and drive aisles visible.
Gather Materials and Tools
Gather every material, tool, and document before installation begins. Parking lot lighting involves far more than replacing old fixtures. Depending on the site, the project may require concrete foundations, reinforced steel, underground conduit, electrical distribution equipment, lighting controls, lifts, excavation machinery, testing devices, and traffic-control supplies.
Start with the approved lighting plan and equipment schedule. Confirm fixture quantities, pole locations, mounting heights, circuit assignments, control zones, foundation details, and wiring requirements. Materials will vary based on the lot’s size, soil conditions, electrical service, weather exposure, and local code requirements.
Plan the project around the entire property, not only the parking spaces. Building entrances, sidewalks, canopies, loading areas, and permanent exterior lighting may need to work together. This is especially important when coordinating parking lot lighting with a permanent system designed to provide year-round curb appeal and seasonal flexibility.
Choose LED area fixtures, shoebox lights, poles, and arms
Select commercial-grade LED fixtures according to the photometric plan, mounting height, coverage area, and site conditions. Area lights and shoebox fixtures are common choices for parking lots, while floodlights may be better suited to loading zones, large open areas, and building exteriors. For industrial or high-traffic properties, consider fixtures with strong impact resistance, such as an IK08 to IK10 impact rating.
Check each fixture’s lumen output, distribution pattern, color temperature, wet-location rating, surge protection, dimming capability, and warranty. Poles must support the fixture weight and withstand expected wind exposure. Include compatible tenons, slip-fitters, straight arms, upswept arms, bolts, washers, and other mounting hardware. Confirm that every fixture, arm, and pole connection matches before delivery.
Prepare foundations, rebar, anchor bolts, and hardware
Freestanding parking lot lights typically require reinforced concrete foundations designed for the pole height, fixture weight, soil conditions, and local wind loads. Foundation guidance from Eaton notes that steel reinforcing bars help support the pole and resist movement caused by wind.
Prepare the specified rebar cage, concrete mix, forms, anchor bolts, leveling nuts, washers, and bolt templates. Anchor bolts must be positioned precisely, since a small alignment error can prevent the pole base from fitting correctly. Keep bolts, threads, and hardware clean during the concrete pour. Do not install poles until the concrete has cured for the period specified by the project engineer or concrete supplier.
Gather conduit, conductors, pull boxes, and junction boxes
Underground wiring may require conduit, conductors, pull boxes, junction boxes, sweeps, couplings, fittings, warning tape, and weatherproof seals. Before ordering materials, confirm conductor type, insulation rating, wire size, conduit fill, burial depth, raceway requirements, and voltage-drop calculations.
Use pull boxes where the design calls for long conduit runs, directional changes, or branch connections. Select boxes rated for their location, and install covers that remain accessible for future service. A thorough site assessment and electrical plan should identify utility routes, circuit paths, access points, and areas that need additional protection. Keep spare conduit fittings and connectors available for field adjustments.
Prepare panels, breakers, disconnects, grounding, and surge protection
Collect the equipment needed to distribute and isolate power safely, including panels, breakers, disconnects, grounding conductors, grounding electrodes, bonding hardware, and surge protective devices. Match every component to the service voltage, expected circuit load, available fault current, enclosure location, and applicable electrical code.
Provide a disconnect where required, and label each circuit before installation. Ground and bond poles, metallic boxes, fixtures, and other conductive parts according to the approved design. Outdoor lighting can be vulnerable to lightning and utility disturbances, particularly when circuits include long wire runs, so surge protection deserves careful attention. Have a qualified electrician verify the equipment schedule before work begins.
Select photocells, timers, sensors, and controls
Choose controls based on the property’s operating hours, traffic patterns, security needs, and energy goals. A photocell can switch lights on at dusk and off at dawn. Timers can support scheduled dimming or shutoff periods, while occupancy sensors may reduce output in areas with little overnight activity.
A parking lot lighting controls guide explains that a photocell handles dusk-to-dawn operation but does not provide mid-night scheduling or occupancy response by itself. Confirm compatibility between controls, LED drivers, voltage, dimming methods, emergency operation, and lighting zones. Program controls so entrances, walkways, and other safety-sensitive areas remain adequately lit.
Gather lifts, trenching equipment, torque tools, testers, and PPE
Choose equipment based on the site layout, pole height, soil conditions, and installation sequence. Depending on the project, you may need a bucket lift or boom lift, excavator, trencher, compactor, concrete tools, conduit benders, fish tape, ladders, and traffic-control barriers. Include torque wrenches for pole and fixture hardware, along with a multimeter, clamp meter, insulation tester, phase tester, and grounding tester.
Provide hard hats, high-visibility clothing, safety glasses, gloves, hearing protection, electrical PPE, fall protection, and appropriate footwear. Only trained workers should operate lifts or excavation equipment. Before touching wiring, workers must shut off the circuit, apply lockout/tagout procedures, and verify that it is de-energized. Electrical safety guidance emphasizes that live circuits should never be handled during installation or service.
Prepare permits, drawings, labels, and documentation
Collect approved permits, site plans, photometric layouts, foundation details, single-line diagrams, equipment cut sheets, utility markings, and inspection requirements. Keep the latest drawing set on site so installers can verify pole locations, conduit routes, circuit assignments, foundation dimensions, and control zones.
Prepare durable labels for panels, disconnects, pull boxes, junction boxes, poles, and lighting circuits. Record fixture model numbers, serial numbers, warranty information, control settings, and test results. This documentation supports inspections and gives property owners useful information for future repairs or upgrades. Professional lighting design and installation support can help confirm that the system meets safety requirements and performs as intended.
Choose Fixtures and Electrical Components
Parking lot lighting performs best when every component is selected as part of one coordinated system. Fixtures, poles, mounting hardware, electrical circuits, controls, and foundations all affect how safely and evenly the property is illuminated. Choosing lights based only on wattage or appearance can leave dark areas, create glare, or overload existing infrastructure.
Start with the site plan and photometric layout. Review pole locations, mounting heights, property lines, drive aisles, walkways, entrances, loading areas, and nearby buildings before ordering equipment. The plan should show expected light levels and uniformity across the lot, not just the total number of fixtures.
Because parking lot lighting involves excavation, elevated equipment, electrical connections, and structural loads, a qualified contractor should verify the design and handle installation. The Illuminating Engineering Society’s lighting standards can also help guide performance requirements and fixture selection.
Match LED fixtures to lot size and coverage needs
Choose fixtures according to the area they need to illuminate, not just their wattage or lumen rating. A small lot may need compact LED area lights, while a large commercial property, truck yard, or industrial site may require higher-output fixtures on taller poles.
Consider the number of parking spaces, drive aisles, entrances, walkways, loading zones, and perimeter areas. These features may require different fixture outputs or distribution patterns. Surface color and reflectance also affect how much light reaches the ground.
Request a photometric layout before purchasing equipment. It can show whether the design needs more fixtures at lower output or fewer fixtures with higher output. This step helps limit overlighting, reduce glare, and avoid paying for unnecessary energy capacity.
Choose area lights, shoebox fixtures, floodlights, or wall mounts
The fixture style should match its mounting location and purpose. LED area lights and shoebox fixtures are common for parking lot poles because they provide broad, controlled illumination across stalls and drive aisles. Shoebox fixtures can also simplify upgrades when existing poles or mounting arrangements remain suitable.
Floodlights may work well for large open lots, truck parking, loading yards, and building exteriors. They must be aimed carefully to prevent glare and light trespass. Wall-mounted fixtures are useful near entrances, service doors, garages, and smaller parking areas.
Review the manufacturer’s distribution pattern, mounting instructions, and photometric files before making a selection. Eaton’s parking lot lighting guidance also recommends matching the fixture to the site layout and mounting conditions.
Select fixtures for covered parking and loading zones
Covered parking structures, loading docks, and service areas can expose lighting equipment to moisture, dust, exhaust, impacts, and limited airflow. Use fixtures rated for the environment, such as sealed vapor-tight or tri-proof LED models where appropriate. These options may suit garages, canopies, underground areas, and other damp or debris-prone locations.
Loading areas may need wider distribution, stronger housings, or greater impact resistance than standard parking spaces. Check the fixture’s operating temperature range, ingress protection rating, lens material, and mounting method.
If forklifts, delivery vehicles, or other equipment could strike a fixture, mount it outside the impact zone when possible. Select equipment designed for the expected conditions, and confirm that its listing and rating match the installation environment.
Match lumens, wattage, color temperature, and CRI to the site
Lumens describe how much light a fixture produces, but they do not show how evenly that light reaches the pavement. Compare lumen output with pole height, fixture spacing, distribution pattern, pavement reflectance, and surrounding obstructions.
Wattage matters for energy use and circuit sizing, but a higher-wattage fixture does not automatically create a better design. Excess output can cause glare and uneven contrast. Color temperature also affects how the property looks and feels. A warm or neutral white may work well near entrances, while a cooler white may suit service yards or industrial areas.
Color Rendering Index, or CRI, indicates how accurately a fixture displays colors. A suitable CRI can help drivers, employees, and security cameras distinguish vehicles, people, signs, and objects.
Select Type III, Type IV, or Type V distribution
Light distribution describes where a fixture sends its output. Type III distribution is often useful near property edges because it projects light outward from the pole and supports perimeter coverage. Type IV distribution can suit roadways, drive aisles, and lot edges where an asymmetric pattern is helpful.
Type V distribution sends light more symmetrically around the fixture. It may work well for poles located within open interior sections of a parking lot. The best choice depends on pole placement, setbacks, lot shape, and nearby properties.
Do not select a distribution type based on its label alone. Review the manufacturer’s photometric file and confirm that the proposed layout meets lighting and uniformity requirements. The design should provide useful illumination without sending excessive light beyond the property.
Choose full-cutoff, wet-rated, durable, surge-protected fixtures
Parking lot fixtures must withstand rain, snow, dust, temperature changes, and wind. Look for wet-location approval, sealed optical compartments, durable housings, and an ingress protection rating that suits the site. Die-cast aluminum housings and impact-resistant lenses can provide added protection when properly installed and maintained.
Full-cutoff or well-shielded fixtures direct light toward the ground instead of above the fixture. This can reduce glare, light trespass, and skyglow. The DarkSky guidance on outdoor lighting offers practical principles for limiting unnecessary light.
Include fixture-level or system-level surge protection where required by the design. Exterior lighting can be affected by lightning and utility disturbances, so surge protection should be considered during electrical planning rather than added after installation.
Check pole height, mounting hardware, and wind-load requirements
Fixture selection must account for the pole and mounting assembly. Pole height affects spacing, coverage, glare, maintenance access, and the force placed on the structure. Confirm that the pole, arm, tenon, brackets, and fixture are compatible and rated for their combined weight and projected wind area.
The foundation must support the expected wind load, soil conditions, and fixture assembly. A qualified contractor or structural professional may need to verify foundation dimensions, reinforcing steel, anchor bolts, and concrete specifications.
Before ordering poles, review the manufacturer’s installation details and local wind criteria. Confirm that the mounting hardware allows proper aiming and provides safe access for future service. A well-planned assembly can reduce premature movement, vibration, and maintenance problems.
Size circuits, conductors, conduit, and voltage drop correctly
Electrical sizing should account for connected load, circuit length, voltage, installation method, conductor material, and future capacity. A licensed electrician can determine conductor sizes, overcurrent protection, conduit dimensions, grounding, disconnect locations, and panel requirements according to applicable codes.
Do not assume that existing circuits can support new LED fixtures simply because LEDs use less power than older lights. Long runs can create voltage drop, which may affect fixture performance, controls, or LED drivers. The design should account for feeder length and operating conditions.
Conduit must provide adequate capacity and protection for the site. It should also be routed to avoid unnecessary exposure to traffic, water, impact, and future excavation. OSHA’s electrical safety guidance explains the importance of proper wiring methods, grounding, and qualified work practices.
Divide fixtures into practical control zones
Organize fixtures into zones that reflect how the property is used. Separate entrances, pedestrian walkways, customer parking, employee parking, loading areas, and perimeter lighting when practical. Zoning allows the property owner to operate only the lights needed during quieter hours while keeping important areas illuminated.
Photocells can switch fixtures on at dusk. Time clocks, astronomical timers, occupancy sensors, and networked controls can adjust operation throughout the night. Make sure each control is compatible with the LED drivers and located where it can be inspected or serviced.
Label every circuit and control zone clearly in the electrical panel. Keep a record of control settings and fixture locations so future technicians can troubleshoot the system quickly. A thoughtful zoning plan can reduce unnecessary operating hours while preserving visibility in entrances, walkways, and security-sensitive areas.
Determine Fixture Placement and Spacing
Effective parking lot lighting starts with a site-specific plan. Fixture locations should account for pole height, light distribution, traffic patterns, property boundaries, landscaping, building entrances, and areas that require extra visibility.
The goal is not simply to make the lot brighter. A well-designed system provides consistent coverage without creating harsh glare, deep shadows, or unnecessary light spill. Poor spacing can leave dark areas between fixtures, while excessive output can waste energy and disturb nearby properties. Review the layout during the design phase, before excavation and foundation work begin.
Create a photometric layout before construction
A photometric layout shows how light will spread across the property at ground level. It accounts for fixture output, mounting height, distribution pattern, pole locations, and expected illumination levels. The plan should include parking stalls, drive aisles, sidewalks, entrances, loading areas, crosswalks, and property edges.
This process helps identify dark spots before construction starts, when changes are easier and less expensive to make. It can also show whether a fixture is likely to create excessive glare or light trespass beyond the property line.
Use the layout to compare different fixture types, pole heights, and spacing options. As US LED explains in its parking lot lighting guide, skipping a photometric plan can lead to insufficient illumination and uneven coverage. Have a qualified lighting professional review the design before any poles or foundations are installed.
Set pole height, mounting height, spacing, and setbacks
Pole height and spacing work together. Taller poles can cover a wider area, while shorter poles may provide more focused light and require additional fixtures. The best arrangement depends on the lot’s dimensions, fixture distribution, surrounding structures, target light levels, and local requirements.
Setbacks are equally important. Keep poles clear of vehicle paths, turning areas, sidewalks, accessible parking spaces, fire lanes, and overhead obstructions. Position them where they are less likely to be struck by vehicles or interfere with snow removal and routine maintenance.
Foundations must also suit local soil and wind conditions. Pole size, base design, anchor bolts, and reinforcing steel should be reviewed before construction. Eaton recommends working with a qualified engineer who can account for wind loads, fixture weight, torsion, and shear forces.
Establish foot-candle targets and lighting uniformity
Set lighting targets before selecting the final fixtures. Foot-candle targets describe the amount of light reaching the pavement, while uniformity describes how evenly that light is distributed. Both measurements matter. A lot can have a high average reading and still contain uncomfortable glare or poorly lit areas.
Targets may vary by property type. A retail center, office campus, apartment community, industrial facility, and church parking lot may each have different needs. Consider vehicle traffic, pedestrian activity, operating hours, security concerns, and local requirements.
Ask a qualified designer to review applicable codes, insurer recommendations, and recognized lighting standards. A parking lot lighting design guide explains how brightness, uniformity, and mounting height work together. Avoid judging the design by average brightness alone. Check minimum readings and the contrast between bright and dark areas.
Cover stalls, drive aisles, walkways, and entrances
Place fixtures so drivers can see parked vehicles, pedestrians, curbs, signs, and changes in direction. Parking stalls should not depend entirely on light from a nearby drive aisle, particularly when larger vehicles can block illumination. Drive aisles need consistent coverage from one end to the other, with extra attention at turns and intersections.
Give sidewalks and building entrances the same consideration as vehicle areas. These spaces connect the parking lot to the property and often receive steady foot traffic. Review the plan from a pedestrian’s point of view, not only from the center of the driving lanes.
Check whether light reaches curb ramps, stairs, entry doors, pickup areas, and routes between accessible spaces and the building. FSG recommends reviewing every area of the parking lot to prevent coverage gaps that can affect visibility and comfort.
Light corners, crosswalks, payment areas, and accessible spaces
Corners and transitions can become dark when fixtures are spaced only for the main parking rows. Review crosswalks, ramps, stairs, payment kiosks, pickup zones, and pedestrian gathering points separately. People may be walking, waiting, turning, or using equipment in these locations, so clear visibility is especially important.
Accessible parking spaces and routes deserve careful attention. Light should reach the stall, access aisle, curb ramp, and path to the entrance without creating harsh glare for drivers or pedestrians. Avoid placing a pole where it narrows an accessible route or creates a hazard near an access aisle.
Also review building corners, side entrances, dumpsters, loading areas, and isolated walkways. These areas may need additional coverage or a different fixture distribution. A well-planned commercial lighting system balances visibility, compliance, energy use, and maintenance, as noted in this parking lot lighting guide from 1000Bulbs.
Account for trees, signs, buildings, and future changes
Obstacles can block light and create shadows that are not obvious on a basic site plan. Review mature trees, new plantings, monument signs, canopies, retaining walls, buildings, dumpsters, and delivery equipment. Consider how these elements will affect illumination at night and how shadows may change as landscaping grows.
Include existing and planned construction in the layout. A building addition, parking expansion, drive-through lane, new sign, or covered walkway could affect fixture performance. Where practical, leave room for future fixtures, conduit, service access, and separate control zones.
Walk the property at night after installation to check whether the built environment matches the design assumptions. A lighting professional can identify dark corners and coverage issues that may be missed during a daytime inspection, including areas outside the reach of existing fixtures, as Solais explains in its installation guide.
Reduce glare, light trespass, spill, and skyglow
More light is not always better. Aim fixtures toward the areas that need illumination, and select an appropriate distribution pattern, mounting angle, and shielding. These choices help keep light out of drivers’ eyes, nearby homes, upper-floor windows, adjacent roads, and neighboring properties.
Full-cutoff fixtures can direct light downward and limit unnecessary uplight. Depending on the site, you may also need house-side shields, glare shields, lower mounting heights, or a different fixture orientation. Review the property boundary during design, not after complaints arise.
If a fixture sends too much light beyond the lot, adjust the distribution or aiming angle before increasing or decreasing overall output. Eaton’s parking lot lighting guidance emphasizes proper fixture selection and application to help control glare and light pollution while maintaining useful pavement coverage.
Check fixture locations against utilities and foundation plans
Before marking pole locations, compare the lighting plan with utility records, civil drawings, drainage systems, irrigation lines, existing foundations, and pavement details. Confirm the locations of underground electrical, gas, water, communication, and sewer lines before excavation. Follow all required utility-locating and verification procedures on site, even when records are available.
Make sure each foundation can be installed without interfering with curbs, stormwater features, accessible routes, fire lanes, or future construction. Review conduit paths, pull boxes, panel locations, and service access at the same time. This coordination can prevent costly changes once concrete work begins.
Confirm that foundations will not obstruct snow storage, landscaping maintenance, delivery routes, or emergency access. GLS Electric highlights the importance of planning for safe commercial parking lot lighting, including coordination between electrical work, site conditions, and the property’s everyday use.
Follow Safety Procedures
Parking lot lighting installation combines excavation, concrete foundations, electrical connections, heavy poles, elevated work, and active vehicles or pedestrians. A safe process protects the crew, customers, employees, and property while helping prevent damaged utilities, injuries, and project delays. Treat safety planning as part of the lighting design, not as a task to address after construction begins.
Before work starts, review the site plan, identify hazards, assign responsibilities, and confirm which tasks require licensed electricians or qualified construction professionals. The Occupational Safety and Health Administration’s electrical safety guidance offers a helpful reference for controlling electrical hazards, but local codes, permits, utility requirements, and site rules also apply. Keep the work area organized, communicate changes clearly, and stop whenever conditions become unsafe.
Hire qualified installers and follow electrical codes
Parking lot lighting is more than a fixture replacement. The installation may involve service panels, underground conduit, concrete foundations, grounding, elevated equipment, and circuits serving an occupied property. Hire a licensed electrician and an experienced lighting contractor who understand local electrical codes, permit requirements, and commercial site conditions.
Qualified installers can verify conductor sizing, breaker capacity, grounding, disconnects, surge protection, and weatherproof connections. They can also coordinate inspections and correct problems before the system is energized. Review the contractor’s license, insurance, project history, and safety procedures before signing an agreement. A professional parking lot lighting installation should protect both electrical performance and public safety.
Confirm underground utilities before excavation
Never begin trenching or digging a pole foundation until underground utilities have been located and marked. Contact the appropriate utility-locating service and allow enough time for electric, gas, water, telecommunications, and other service providers to respond. Mark proposed trench and foundation locations, then compare them with the approved lighting drawings.
Utility markings are a starting point, not permission to dig without care. Follow required tolerance zones, use approved locating methods, and hand-expose services when necessary. Review the markings with the excavation crew before work begins, and repeat the process if the site plan changes. Eaton’s parking lot lighting guidance also emphasizes utility planning before installing foundations and underground electrical systems.
Apply lockout/tagout and verify de-energized circuits
Before opening a panel or working on existing electrical equipment, identify every possible source of power. A qualified person should shut down the correct equipment, apply lockout/tagout devices, and attach clear warning tags. Never rely on a switch position, control setting, or someone else’s assurance that a circuit is off.
Use an appropriately rated tester to verify that the circuit is de-energized before touching conductors. Test the meter on a known live source before and after verification so you know the instrument is operating properly. Keep locks and tags under the control of authorized workers, and restore power only after tools, covers, and personnel are clear. OSHA explains how lockout/tagout procedures help control hazardous energy during servicing and installation.
Wear electrical, high-visibility, and fall-protection PPE
Choose personal protective equipment based on the task and site conditions. Electrical work may require voltage-rated gloves, eye protection, arc-rated clothing, and a face shield. Crews working near moving vehicles should wear high-visibility garments. Excavation and foundation work may also require hard hats, protective footwear, gloves, and eye protection.
Anyone using a lift or working near an unprotected edge must use the required fall-protection equipment and follow the manufacturer’s instructions. Inspect harnesses, lanyards, gloves, helmets, and other gear before each shift. Replace damaged or contaminated equipment promptly. PPE supports a larger safety plan, but it does not replace de-energizing circuits, securing equipment, or removing hazards from the work area.
Secure trenches, foundations, rebar, and concrete work areas
Open trenches and foundation holes need protection from workers, vehicles, and pedestrians. Use suitable barricades, covers, warning signs, and access controls. Keep soil, tools, and materials away from trench edges to reduce pressure on the walls and prevent objects from falling inside.
Foundation work creates additional risks from forms, reinforcing steel, anchor bolts, wet concrete, and uneven ground. Cap or otherwise protect exposed rebar where required, cover anchor bolts until poles are installed, and prevent people from walking through curing areas. A competent person should inspect excavations and protective systems, especially after rain, vibration, or other site changes. Eaton’s installation resource describes how reinforced concrete foundations support poles under wind loads.
Operate lifts and ladders on stable ground
Inspect lifts, ladders, and related equipment before use. Set them on firm, level ground that can support the equipment and its load. Avoid soft shoulders, recently excavated areas, sloped surfaces, and locations near unprotected trench edges. Use outriggers, wheel chocks, or ground mats when the manufacturer or site conditions require them.
Respect rated load limits, maintain safe clearances from electrical conductors, and keep workers away from areas beneath raised equipment or suspended materials. Ladders should be the correct height and type, positioned at a safe angle, and secured against slipping. Only trained operators should use aerial lifts, and occupants should wear the required restraint or fall-arrest equipment. Follow the manufacturer’s operating instructions throughout the installation.
Set traffic barriers and pedestrian detours
A parking lot may remain partly open during installation, making traffic control essential. Create a work-zone plan that separates people, vehicles, equipment, and excavation areas. Use visible cones, barricades, signs, fencing, and temporary lighting to guide drivers and pedestrians safely around the project.
Do not route pedestrians through active lift zones, open trenches, material staging areas, or locations where overhead work is underway. Keep accessible routes usable, or provide a clearly marked alternative route when the normal path is closed. Coordinate closures with the property owner, and schedule disruptive work during lower-traffic periods when possible. FSG’s parking lot lighting guidance highlights the importance of planning lighting work around safe access and ongoing site operations.
Protect workers from overhead conductors and falling materials
Survey the site for overhead power lines, communication cables, tree limbs, building edges, and other elevated hazards before bringing in poles, lifts, or long conduit sections. Maintain the clearance required by applicable regulations and utility rules. If the work area cannot maintain a safe distance, contact the utility and arrange an approved control method before proceeding.
Create exclusion zones below elevated work, and never allow workers or customers to stand beneath raised fixtures, poles, tools, or materials. Secure equipment in lift baskets, use tool lanyards when appropriate, and lower materials in a controlled manner. Keep the area below installation work clear until hardware has been tightened and the crew confirms that tools and materials cannot fall.
Stop work during lightning, high winds, or unsafe conditions
Weather can quickly turn routine installation work into a serious hazard. Stop elevated work, pole handling, excavation, and electrical work during lightning, high winds, heavy rain, flooding, or conditions that reduce visibility. Wet surfaces can affect footing, equipment stability, trench conditions, and electrical safety.
Establish clear weather limits before the project begins, and make sure every crew member knows who can call a work stoppage. Secure loose materials, lower equipment, protect open excavations, and move workers to a safe location. Resume only after the site has been inspected and conditions meet project requirements. If a hazard cannot be controlled, postpone the work instead of rushing to maintain the schedule.
Install Parking Lot Lighting
Once the lighting plan, materials, permits, and safety controls are ready, installation can begin. Parking lot lighting involves much more than replacing a fixture. The work may include excavation, concrete foundations, underground wiring, pole installation, electrical connections, controls, inspections, and site restoration.
Follow the approved drawings and local electrical requirements throughout the project. A qualified electrical contractor can coordinate the civil, structural, and electrical work, which helps prevent delays, unsafe conditions, and expensive rework. The installation team should also keep the property owner informed about temporary parking changes, work zones, access restrictions, and the expected schedule.
Document changes as they happen. If a pole location, conduit route, fixture, or control setting changes in the field, update the project drawings and records before the crew leaves the site. Accurate documentation makes future maintenance easier and gives the property owner a reliable record of the completed system.
Mark pole locations and verify the lighting plan
Start by marking every pole location according to the approved site plan. Use stakes, paint, or other visible markers to identify each foundation center. Confirm the required setbacks from curbs, drive aisles, property lines, buildings, accessible routes, fire lanes, and parking spaces.
Before excavation begins, compare the marked locations with the photometric layout. Check that each pole will provide the intended coverage and that trees, signs, canopies, buildings, or future construction will not block the light. A photometric study can help verify illumination levels, uniformity, fixture placement, and potential glare concerns before construction makes changes more difficult.
Review the layout with the property owner and installation team. Resolve discrepancies before equipment arrives. If field conditions differ from the drawings, pause the work and have the lighting designer or engineer approve the adjustment.
Prepare the site and establish work zones
Prepare the work area before excavation, concrete work, or lifting begins. Identify equipment access points, material staging areas, temporary parking changes, pedestrian routes, and emergency access lanes. Use cones, barriers, signs, and high-visibility markings to separate workers from vehicles and pedestrians.
A clear work zone protects customers, employees, residents, and the installation crew from open trenches, concrete forms, lifts, and electrical equipment. Keep walkways accessible where possible, and provide clearly marked detours when a route must close. Coordinate work hours with the property owner to reduce disruption during busy periods.
Most parking lot poles sit on reinforced concrete foundations designed to handle the weight of the pole, fixture, and environmental forces. Foundation planning should account for soil conditions, pole height, wind exposure, drainage, and local requirements. Protect stored materials from vehicle traffic, standing water, and unauthorized access.
Excavate trenches and install conduit and pull boxes
Excavate trenches along the approved underground wiring routes. The required depth and width depend on the conduit type, installation method, soil conditions, and local code. Confirm utility markings before digging, even when the work area appears clear. Existing irrigation lines, drainage systems, communication cables, and private utilities may not be obvious from the surface.
Install conduit with suitable bends, fittings, and sweeps so conductors can be pulled without unnecessary strain. Place pull boxes where shown on the drawings and where they will remain accessible for future maintenance. Keep conduit openings capped during construction to prevent dirt, water, and concrete from entering the raceway.
Before backfilling, inspect the conduit route and confirm that each section is continuous and undamaged. Verify pull box locations, conduit depth, warning tape, and separation from other utilities as required. Careful coordination between trenching, wiring, foundations, and existing site features is central to a successful parking lot lighting installation.
Build foundations with forms, rebar, and anchor bolts
Construct each pole foundation according to the engineered drawings. Excavate to the specified dimensions, then install forms and reinforcing steel as required. Position the rebar cage correctly within the concrete and maintain the specified cover to help protect the steel from moisture and corrosion.
Set the anchor bolts with a template that matches the pole base. Check the bolt pattern, projection, spacing, and orientation before pouring concrete. Confirm that conduit enters the foundation in the correct location and will not interfere with the anchor bolts. Even a small error can prevent the pole from fitting properly later.
Protect forms, rebar, anchor bolts, and exposed conduit from equipment traffic and debris. Foundation requirements vary with pole height, soil conditions, wind loads, and local engineering standards, so do not use a generic detail without approval. Complete any required foundation inspection before placing concrete, and record the location and dimensions of each foundation.
Verify alignment and allow concrete to cure
Before the concrete arrives, verify that each foundation is located correctly and that the anchor bolt template is level and properly oriented. Check the conduit position as well, making sure it will enter the pole base without interfering with the bolts or reinforcing steel.
After pouring, finish the concrete surface as specified and protect it from damage, standing water, freezing conditions, and vehicle traffic. Do not install poles simply because the surface appears firm. Concrete needs adequate time to cure and develop the required strength based on the mix, weather, and project specifications.
During curing, inspect the foundations for cracks, displaced bolts, damaged conduit, or form movement. Confirm the required strength before lifting poles into place. Properly designed and installed foundations are essential to pole stability, as noted in parking lot lighting guidance from Eaton.
Erect, plumb, and torque the poles
Once the foundations reach the required strength, lift each pole into position with approved equipment and rigging. Protect the pole finish during handling, and keep workers clear of suspended loads. Inspect the pole for shipping damage before installation, particularly around the base, mounting surfaces, and access doors.
Set the pole over the anchor bolts, install the washers and nuts, and make initial adjustments. Use a level or another suitable method to verify that the pole is plumb from more than one direction. Tighten the hardware evenly so the base seats properly without distorting the pole or damaging the foundation.
Finish by torquing the anchor nuts to the manufacturer’s or engineer’s specifications. Do not guess at torque values or substitute unsuitable hardware. Proper alignment and hardware installation help the system withstand wind, vibration, and fixture weight. Record torque checks and inspect each pole base before moving on to fixture installation. Guidance on avoiding common LED parking lot installation mistakes can help crews catch preventable issues.
Mount, aim, and secure the LED fixtures
Mount each LED fixture using the specified arm, tenon adapter, bracket, or other hardware. Confirm that the mounting connection is compatible with the pole and rated for the fixture’s weight, wind exposure, and intended orientation. Inspect the fixture housing, lens, gasket, and wiring before raising it into position.
Aim every fixture according to the approved photometric plan. Do not simply point each light straight down or toward the brightest visible area. Correct aiming helps cover parking spaces, drive aisles, walkways, entrances, and accessible areas while limiting glare and light trespass.
Tighten mounting hardware according to the manufacturer’s instructions. Check that gaskets, covers, lenses, and wire connections are properly seated, especially on fixtures exposed to rain and snow. LED fixtures can provide efficient, long-lasting illumination, but poor aiming or loose mounting can still create dark areas and early maintenance problems. Review LED parking lot fixture considerations when evaluating fixture performance and placement.
Pull conductors and complete electrical connections
After the conduit system is ready, pull the conductors through each raceway using approved methods and suitable pulling equipment. Confirm that conductor sizes, insulation ratings, circuit identification, and voltage match the electrical design. Use pulling lubricant when appropriate for the conductor and conduit materials.
Avoid sharp bends, excessive pulling tension, and damage to insulation. Leave enough conductor length at poles, pull boxes, panels, and disconnects for clean terminations and future service. Keep conductors organized and protected from moisture, dirt, and sharp edges.
Make connections with listed connectors and follow the fixture, equipment, and electrical code requirements. Clearly identify each circuit so technicians can isolate the correct equipment during maintenance. A qualified electrician should perform and verify these connections. Wiring errors can damage fixtures, trip breakers, or create shock and fire hazards, so do not energize a circuit until all terminations have been inspected.
Bond the system and connect panels, disconnects, and surge protection
Bond the metal poles, enclosures, conduit, equipment grounding conductors, and other required components into a continuous grounding and bonding system. Proper bonding creates a low-resistance path for fault current and helps protective devices operate as intended.
Connect the lighting circuits to the designated panel and breakers. Install disconnects where required, and make sure they are accessible, identified, and rated for the system. Surge protection can help protect LED drivers and controls from transient voltage events, particularly on large outdoor systems exposed to storms and utility disturbances.
Verify terminations, grounding connections, breaker sizes, disconnect ratings, and panel labels before energizing the circuits. Parking lot lighting directly affects public safety, so electrical safety and lighting design should be part of the commissioning process rather than an afterthought. Have the electrician correct any damaged components or questionable connections before testing.
Install controls, seal enclosures, and label circuits
Install the selected controls, such as photocells, timers, astronomical time clocks, occupancy sensors, or networked lighting controls. Position photocells where they can accurately detect ambient light without being affected by nearby fixtures, vehicle headlights, or reflective surfaces.
Configure controls for the property’s operating schedule. Separate zones when the site needs different settings for entrances, parking areas, loading zones, or after-hours security lighting. Test manual overrides so authorized staff can operate the system during maintenance, special events, or unexpected schedule changes.
Seal pole bases, junction boxes, pull boxes, and other outdoor enclosures according to the manufacturer’s instructions. Replace damaged gaskets and secure covers tightly. Label panels, breakers, disconnects, pull boxes, control zones, and fixture circuits. Proper labels and documented control settings save time during future troubleshooting. Control equipment should also remain accessible without creating a hazard for customers or employees.
Complete inspections before energizing the system
Before turning on the system, complete a detailed inspection of the installation. Confirm that poles are plumb, anchor hardware is tight, fixtures are secure, lenses are intact, and all covers and enclosure seals are in place. Check that no tools, wire scraps, or construction materials remain inside electrical equipment.
An electrician should verify conductor terminations, grounding, bonding, breaker ratings, disconnect operation, and equipment condition. Test for damaged insulation, incorrect connections, and other problems that could create a hazard when power is applied.
Complete required inspections with the authority having jurisdiction before energizing the system. Follow a controlled start-up process, energizing circuits in a planned sequence while monitoring for unusual sounds, odors, heat, flicker, or breaker trips. Common installation problems include poor layout, inadequate controls, and uneven coverage. A lighting safety inspection checklist can help the team identify problems before the lot returns to normal use.
Restore pavement, landscaping, and disturbed areas
After installation and inspection, restore every area affected by the work. Backfill trenches with suitable material and compact it in stages to reduce settling. Repair asphalt, concrete, curbs, striping, sidewalks, and accessible routes according to the property’s specifications and local requirements.
Replace damaged sod, planting beds, mulch, irrigation components, signs, and other landscape features. Remove excess soil, concrete, conduit scraps, packaging, and construction barriers. Clean the work area without directing debris into storm drains, planting beds, or drainage channels.
Walk the property with the owner or facilities manager and compare the finished site with its original condition. Check that parking spaces, drive aisles, entrances, walkways, and drainage paths remain usable. Confirm that pole bases are protected from vehicle impact and that no equipment obstructs accessible routes. Complete a final cleanup before removing traffic controls, then provide the owner with updated drawings, circuit labels, control settings, inspection records, and warranty information.
Test and Maintain the System
A parking lot lighting project is not complete when the poles are standing and the fixtures turn on. The system still needs a careful commissioning process, followed by regular inspections and maintenance. Testing confirms that the installation delivers the planned light levels, operates safely, and responds correctly to its controls.
Begin with a complete inspection during daylight, then test the system again after dark. Compare the results with the approved photometric plan, electrical drawings, equipment specifications, and local requirements. Check every zone, control, enclosure, and connection rather than relying on a quick visual check from the parking lot entrance.
Keep a record of the initial test results, including light measurements, control settings, circuit labels, and photographs. These records create a useful baseline for future service. If a fixture fails, a dark area appears, or a control setting changes, the maintenance team can identify what changed and correct the issue before it affects customers, employees, or visitors.
Inspect fixtures, poles, foundations, hardware, and enclosures
Begin with a visual inspection of every part of the system. Check LED fixtures for cracked lenses, loose covers, water intrusion, impact damage, discoloration, and signs of overheating. Inspect poles for dents, rust, damaged coatings, leaning, movement, and damage around the base. Foundations should be free from major cracks, exposed rebar, and shifting around the anchor bolts.
Examine mounting arms, bolts, brackets, and other hardware to confirm that everything remains secure. Open electrical enclosures only when it is safe to do so, then check for moisture, corrosion, damaged gaskets, and loose connections. Regular parking lot lighting inspections can help identify dark spots and equipment problems before they become safety concerns.
Test voltage, circuit load, continuity, grounding, and disconnects
Have a qualified electrician test the electrical system before placing it into regular operation. Measurements should confirm that voltage is within the fixture manufacturer’s specifications and that each circuit can support its connected load without overheating or nuisance tripping. Check conductor continuity, grounding paths, bonding, and disconnect operation.
Follow lockout and tagout procedures, shut off the correct breaker, and verify that circuits are de-energized with an appropriate tester before touching wiring or equipment. A qualified professional can also check voltage drop, panel connections, surge protection, and grounding performance. These tests help protect the equipment and reduce the risk of electrical injury or premature component failure.
Confirm photocell, timer, sensor, and manual control operation
Test every control method under the conditions in which it should operate. Cover a photocell, or use the manufacturer’s approved test procedure, to confirm that fixtures respond correctly. Check timers for the right schedule, including seasonal adjustments if the system requires them. For occupancy sensors, verify detection range, response time, timeout settings, and zone coverage.
Test manual overrides from the panel, disconnect, wall control, or management software. Controls should not leave a zone permanently on, off, or operating at an unintended brightness level. A photocell manages dusk and dawn operation, but it does not replace scheduling or occupancy controls. As Jarvis Lighting explains, different control functions may require separate devices or a networked lighting system.
Test every lighting zone
Turn on and test each lighting zone separately before operating the entire parking lot. This makes it easier to identify crossed circuits, mislabeled breakers, failed fixtures, control problems, and areas that do not receive power. Compare actual operation with the lighting plan and confirm that zones cover the intended stalls, drive aisles, walkways, entrances, loading areas, and accessible spaces.
Walk the site during testing instead of relying only on the electrical panel or control software. Look for fixtures that are aimed incorrectly, fail to illuminate, or produce noticeably different output from nearby fixtures. Test scheduled scenes and combinations of zones as well. A system may work correctly one zone at a time but still reveal dark areas or unwanted glare when all zones operate together.
Measure nighttime foot-candle levels and uniformity
Complete a nighttime lighting test after installation and aiming adjustments are finished. Use a calibrated light meter to measure illumination at representative points across parking stalls, drive aisles, pedestrian routes, entrances, corners, and other important areas. Compare the readings with the approved photometric plan, applicable requirements, and the property owner’s expectations.
Do not judge performance by average brightness alone. A lot can have a high average reading while still containing uncomfortable glare or dark pockets. Uniform coverage generally supports better visibility and a stronger sense of safety. Parking lot lighting guidance from Jarvis Lighting also emphasizes the importance of uniformity when evaluating how people experience a site.
Record the date, weather, fixture status, meter used, measurement points, and any areas that need correction. Repeat measurements after changing fixture output, aiming, shielding, or pole equipment.
Check for glare, flicker, light spill, and dark areas
Walk and drive through the property from several viewpoints, including a driver’s approach, a pedestrian route, neighboring properties, and nearby building entrances. Look for direct glare from exposed LED sources, reflections from wet pavement, uncomfortable brightness changes, and light shining into windows or adjacent streets. Check for flicker, especially when fixtures are viewed through a phone camera or from a moving vehicle.
Inspect areas beneath canopies, beside buildings, behind trees, and between pole coverage zones. These locations can remain dark even when the main lot appears well lit. If problems appear, adjust fixture aiming, shielding, mounting, output, or control settings rather than simply increasing wattage. Many lighting problems come from layout and aiming decisions, not fixture quality alone, as noted in this parking lot lighting guide.
Record control settings, circuit labels, and as-built changes
Create a complete record of how the system was installed and commissioned. Label breakers, disconnects, junction boxes, control zones, and fixture groups so a technician can identify them quickly. Record photocell settings, timer schedules, sensor ranges, dimming levels, manual override procedures, and software information where applicable.
Update the drawings if pole locations, conduit routes, circuit assignments, fixture types, or control zones changed during construction. Include photographs of panels, equipment labels, foundations, and unusual installation details. Keep an updated one-line diagram and site plan with the property’s maintenance records.
Clear documentation reduces troubleshooting time and helps future contractors work safely without guessing about hidden wiring or changed equipment. Store digital copies in a shared location and keep a printed copy in the electrical room or maintenance office.
Document warranties, replacement parts, and service contacts
Keep all product information in one accessible location. Save fixture model numbers, driver details, pole specifications, control equipment, surge protection components, and installation dates. Record warranty periods, coverage limits, registration requirements, and the process for submitting a claim. Some warranties may require specific installation or maintenance records, so do not rely on memory.
Create a replacement parts list for components that may need attention later, including LED drivers, photocells, fuses, sensors, gaskets, lenses, and mounting hardware. Add contact information for the installer, electrician, manufacturer, controls provider, utility, and emergency service company.
Review the documentation after every repair or equipment change. Proper records can reduce delays when equipment fails and help owners avoid choosing incompatible replacement parts.
Clean lenses and inspect seals, hardware, corrosion, and vegetation
Dirt, dust, insects, vehicle exhaust, and pollen can reduce light output and make fixtures appear uneven. During routine service, clean lenses according to the manufacturer’s instructions. Avoid abrasive materials or harsh chemicals that can damage coatings and optical surfaces. While cleaning, inspect gaskets, seals, drain paths, covers, and enclosure fasteners for deterioration or water entry.
Check poles and hardware for rust, peeling finishes, loose bolts, and corrosion caused by moisture or deicing products. Trim branches and vegetation that block light, contact fixtures, interfere with sensors, or make maintenance access difficult. Pay close attention to landscaping that has grown since the original installation.
Simple periodic maintenance supports a safe, functional parking area. Manufacturer maintenance guidance can help establish suitable cleaning and inspection practices for the fixtures installed on the property.
Replace damaged components and schedule routine service
Repair problems as soon as they are identified, especially failed fixtures, exposed wiring, loose hardware, damaged enclosures, leaning poles, and areas with inadequate visibility. Use approved replacement parts that match the original fixture’s electrical ratings, optical distribution, mounting method, and control compatibility. Do not install a different driver or component simply because it appears to fit.
Set a recurring service schedule based on the site environment, equipment recommendations, and operating hours. Higher-traffic properties, coastal locations, industrial sites, and lots exposed to salt or severe weather may need more frequent inspections. Include visual reviews, electrical testing, lens cleaning, vegetation control, and nighttime performance checks in the maintenance plan.
After repairs, retest the affected zone and confirm that the change did not create glare, light spill, or uneven coverage elsewhere. Prompt repairs can improve safety and prevent a small defect from becoming a larger electrical or structural problem.
Avoid Common Installation Mistakes
A parking lot lighting project involves more than selecting LED fixtures and attaching them to existing poles. Small planning errors can create dark areas, harsh glare, electrical problems, and difficult maintenance. The design should account for the property layout, local requirements, electrical capacity, control strategy, and long-term service needs.
Before construction begins, review the plan with a qualified commercial lighting contractor. A professional can coordinate parking lot fixtures with building lights, walkways, entrances, landscaping, signs, and other permanent exterior lighting. This creates a more consistent experience for customers, employees, residents, and visitors.
Skip the photometric layout
A photometric layout shows how light will spread across the property before excavation or installation begins. It can reveal dark pockets, excessive brightness, glare, and poor uniformity while there is still time to adjust pole locations or fixture selections.
Without this step, a lot may look bright from a distance while leaving customers walking through poorly illuminated areas. Ask for a layout that includes parking stalls, drive aisles, sidewalks, entrances, accessible spaces, landscaping, buildings, and nearby properties. The US LED parking lot lighting guide explains why photometric planning is important for reliable coverage and safer movement.
Treat installation as more than a fixture swap
Replacing an old fixture with an LED model does not automatically create a successful lighting system. A new fixture may have a different beam pattern, mounting height, wattage, control method, or electrical requirement than the original equipment.
A complete project evaluates the poles, foundations, wiring, disconnects, controls, grounding, and maintenance access. The installer should confirm that existing poles can support the new fixtures and that their locations still provide suitable coverage. The 1000Bulbs parking lot lighting guide offers useful context on why a fixture upgrade requires more planning than a simple one-for-one replacement.
Judge the design by more than average brightness
Average brightness does not tell the whole story. A lot can meet an average illumination target while still containing dark areas between poles, along property edges, near parked vehicles, or around walkways.
Review the target light levels and how evenly those levels are distributed. Consistent illumination helps drivers, pedestrians, employees, and customers see vehicles, curbs, signs, and other people. The contractor should assess the darkest and brightest points, then adjust spacing, mounting height, distribution, or fixture output as needed. This creates a more comfortable environment than simply installing the brightest available equipment.
Choose the right fixture distribution and wattage
Fixture distribution controls where light travels. Type III, Type IV, and Type V patterns serve different layouts, so the right choice depends on pole locations, lot dimensions, setbacks, and nearby buildings. Higher wattage is not always better if it creates glare or sends light beyond the property.
An undersized fixture may leave drive aisles and pedestrian areas too dim, while an oversized fixture can waste energy and create uncomfortable brightness. Compare lumen output, distribution, mounting height, and intended application within the photometric plan. The 1000Bulbs parking lot guide provides additional guidance on choosing fixture performance instead of relying on wattage alone.
Light entrances, walkways, corners, and accessible spaces
Parking stalls are only one part of the property. Pay close attention to entrances, sidewalks, crosswalks, loading areas, payment stations, stairways, corners, and accessible parking spaces. These locations often have the most pedestrian activity and may require a different lighting approach from the main lot.
Coordinate pole-mounted fixtures with wall packs, canopy lights, bollards, and other exterior fixtures so people do not move between sharply contrasting areas. Keep signs, landscaping, and parked vehicles from blocking key light paths. A practical parking lot lighting layout should support safe movement from each vehicle to the building entrance, not just illuminate the center of the lot.
Address voltage drop, circuit capacity, grounding, and surge protection
The electrical design should confirm that existing panels and circuits can support the new lighting system. Long conductor runs may create voltage drop, while an overloaded circuit can cause nuisance trips or shorten equipment life. Conduit size, conductor type, breaker ratings, and disconnect locations must also match the installation.
Grounding and bonding protect people and equipment. Surge protection can help reduce damage from electrical disturbances and nearby lightning activity. Have a qualified electrician review these details before equipment arrives. The LED parking lot installation checklist covers several electrical issues that are easy to overlook during a fixture upgrade.
Choose the right color temperature and limit glare
Color temperature affects how the property looks and feels at night. A neutral white setting often provides clear visibility without making the site feel harsh, but the best choice depends on the building, surrounding neighborhood, existing fixtures, and local requirements.
Glare deserves equal attention. Bright light aimed toward drivers, neighboring homes, or upper-floor windows can create discomfort and complaints. Use full-cutoff fixtures, proper aiming, shielding, and suitable mounting heights to keep light where it belongs. Review glare performance and distribution instead of judging a fixture only by its product photo. The US LED lighting guidance explains how poor fixture selection can affect visibility and comfort.
Include controls, separate zones, and future expansion
Controls provide more flexibility than a single on-and-off switch. Photocells can turn fixtures on when daylight fades, timers can support operating schedules, and sensors may reduce output in areas with limited nighttime activity.
Divide the system into practical zones, such as the main lot, building entrances, loading areas, walkways, and security-sensitive locations. Zoning allows staff to manage energy use and service one area without shutting down the entire property. Leave room in panels, conduits, and control systems for future fixtures or site changes. A thoughtful parking lot lighting design considers current coverage and future property needs.
Complete permits, utility checks, inspections, and nighttime testing
Before excavation, confirm permit requirements and locate underground utilities. Local rules may address pole height, setbacks, light trespass, electrical work, accessible routes, and dark-sky considerations. Skipping these checks can delay construction or require costly corrections after installation.
Schedule inspections at the required stages, including foundation work, electrical connections, and final operation. Nighttime testing is essential because a system can appear correct on paper while producing glare, shadows, or dark zones in practice. Walk the site after dark with the contractor and property representative, then record any needed adjustments. Parking lot lighting project guidance covers common permitting, testing, and commissioning considerations.
Budget for foundations, lifts, electrical work, and maintenance
The fixture price is only one part of the project budget. Include poles, concrete foundations, rebar, anchor bolts, trenching, conduit, wiring, panels, controls, permits, inspections, lift equipment, traffic management, and site restoration.
Plan for long-term service as well. Pole-mounted fixtures may require a lift or specialized access equipment, and replacement drivers, photocells, surge protectors, or lenses can have different costs and lead times. Ask for a maintenance plan covering cleaning, hardware inspections, vegetation control, electrical testing, and fixture replacement. Eaton’s parking lot lighting resource outlines installation and maintenance factors to include before work begins.
Coordinate Professional Installation and Service
Parking lot lighting involves far more than mounting fixtures on poles. The project may include trenching, concrete foundations, electrical connections, controls, utility coordination, permits, and inspections. Coordinating these details before work begins helps prevent delays, protects the property, and ensures the finished system delivers consistent light where customers, employees, and visitors need it.
Professional coordination is especially important when parking lot lighting connects with walkways, building entrances, canopies, signs, and permanent exterior lighting. Treating the property as one lighting system can reduce dark transitions, limit glare, and create a more consistent appearance.
Identify work that requires a licensed electrician
Electrical requirements vary by location, but parking lot projects commonly involve work that should be completed or supervised by a licensed electrician. This may include installing new circuits, connecting panels and disconnects, running underground conductors, grounding equipment, and integrating photocells, timers, or other controls with the building’s electrical system.
Ask the contractor who will handle permits, utility coordination, inspections, and final energization. A qualified professional can confirm that the installation follows applicable electrical codes and operates safely, as Aetna explains in its parking lot lighting safety guidance.
Do not assume an existing circuit can support new fixtures. The electrician should review panel capacity, breaker sizes, conductor ratings, grounding, voltage drop, and space for future equipment before installation begins.
Combine photometric design, permits, electrical planning, and installation
A photometric layout should guide the project before excavation or pole installation begins. It shows fixture locations, mounting heights, light distribution, illumination levels, and areas that may remain too dark. The plan can also reveal glare, light trespass, and conflicts with trees, signs, buildings, and utility lines.
Your lighting professional should coordinate the layout with permits and the electrical plan. The final scope may include pole foundations, conduit routes, pull boxes, circuit zones, control locations, and access for future service. A thorough review can identify dark corners and maintenance obstacles that are easy to miss during a basic fixture replacement, as Solais notes in its parking lot lighting installation guide.
Provide the contractor with a current site plan, existing electrical drawings, property details, and any HOA or municipal requirements. This information supports accurate planning and helps prevent expensive changes during construction.
Schedule construction, inspections, testing, and commissioning
Build a schedule that includes permitting, utility marking, excavation, concrete curing, pole installation, electrical work, inspections, and nighttime testing. If the property remains open during construction, divide the work into phases to preserve safe parking access, pedestrian routes, and business operations.
Inspections may be required for underground conduit, foundations, electrical connections, and the completed installation. Do not energize the system until the required checks are complete. After installation, test every lighting zone, control, disconnect, and emergency shutoff.
Commissioning should include a nighttime walkthrough. Check parking stalls, drive aisles, walkways, entrances, and accessible spaces for dark spots, glare, light spill, flicker, and uneven coverage. Regular safety audits should also confirm that lighting levels remain appropriate and every fixture operates properly, as Aetna recommends.
Coordinate lot, walkway, building, and permanent exterior lighting
Treat parking lot fixtures as one part of the property’s complete exterior lighting system. Pole lights should provide broad coverage without overpowering pathway fixtures, building-mounted lights, entrance lighting, signs, or decorative features. Coordinating these elements creates a more consistent appearance and makes entrances easier to identify.
Pay close attention to transitions between the lot and nearby walkways. A brightly lit parking area beside a dark sidewalk can still feel unsafe, while excessive brightness near a building may cause glare inside offices or nearby homes. Eaton’s parking lot lighting guidance emphasizes the importance of considering surrounding areas during design and installation.
For businesses and upscale properties, permanent exterior lighting adds another layer of coordination. Keep fixture appearance, color temperature, and operating schedules consistent where practical. Separate lighting zones allow security, wayfinding, architectural, and seasonal lighting to operate independently.
Plan fixture access, replacement parts, and maintenance
Before approving fixture locations, confirm that technicians can safely reach each light for cleaning, inspection, repairs, and replacement. Consider lift access, traffic patterns, landscaping, overhead obstructions, and the distance between poles and service areas. A fixture that performs well but requires major disruption to access may cost more to maintain.
Ask the installer for a maintenance plan that includes inspection intervals, cleaning instructions, warranty details, and replacement procedures. Keep compatible replacement parts available, such as LED fixtures, photocells, fuses, surge protection components, gaskets, and mounting hardware.
Routine service should include checking lenses, seals, pole connections, anchor bolts, corrosion, wiring enclosures, and nearby vegetation. Hi-Hyperlite’s parking lot lighting guide explains why selecting, installing, and maintaining the system all require ongoing planning. Schedule service before small problems create dark areas or disrupt business operations.
Keep circuit labels, control settings, and service records current
Label each circuit, disconnect, panel location, control zone, and fixture group clearly. Labels should match the as-built drawings and remain readable after installation. This basic step can save time when a fixture fails or an electrician needs to isolate a circuit.
Record photocell settings, timer schedules, sensor adjustments, fixture wattages, mounting heights, and control settings. Note every service change, including relocated fixtures, replaced drivers, modified wiring, and updated programming. Store these records where property managers and service providers can access them.
Maintain a service log with installation dates, inspection results, repairs, warranty claims, and replacement parts. Complete records support faster troubleshooting and can reveal repeated failures. They also give future contractors reliable information, so they do not have to guess how the system was configured.
Document future upgrades and expansion needs
Plan for changes that may affect the property later. Future construction, parking expansion, new signs, landscape growth, EV charging stations, security cameras, canopies, or building additions may change the lighting requirements. Mark spare conduit, panel capacity, pull boxes, and possible pole locations on the project drawings.
Ask the lighting designer or electrician which components can support expansion and which would need replacement. Planning for additional circuits or control zones may reduce the cost of future work, particularly when excavation or concrete installation would otherwise need to be repeated.
Save the final photometric layout, electrical drawings, equipment schedules, warranty information, inspection records, and photographs of concealed work. A complete project file gives future contractors a reliable starting point and helps property owners make informed decisions as the site changes.
Frequently Asked Questions
How long does a parking lot lighting installation take?\ The timeline depends on the number of fixtures, trenching requirements, concrete foundation work, permitting, and site access. Smaller projects may take a few days, while larger commercial properties may require phased construction over several weeks.
Can existing parking lot poles and wiring be reused?\ Sometimes. A qualified electrician should inspect the poles, foundations, wiring, panel capacity, conduit, and grounding system first. Existing equipment may be suitable for an LED upgrade, but damaged structures, undersized conductors, or outdated electrical components may require replacement.
How do I know how many parking lot lights I need?\ A photometric layout determines fixture quantity and placement based on lot size, pole height, light distribution, target brightness, and uniformity. This approach helps prevent dark areas and avoids installing more fixtures than the property needs.
What type of maintenance does parking lot lighting require?\ Routine service should include cleaning lenses, checking poles and mounting hardware, inspecting seals and electrical enclosures, trimming obstructive vegetation, testing controls, and replacing damaged components. Nighttime inspections are also helpful for identifying glare, flicker, and dark areas.
Should parking lot lights remain on all night?\ Not always. Photocells can turn lights on at dusk, while timers, sensors, and networked controls can reduce output or shut off selected zones during quieter hours. Entrances, walkways, security areas, and accessible routes should remain adequately illuminated according to site needs and local requirements.