
2026-09-02
How to Choose Commercial Parking Lot Lighting Fixtures
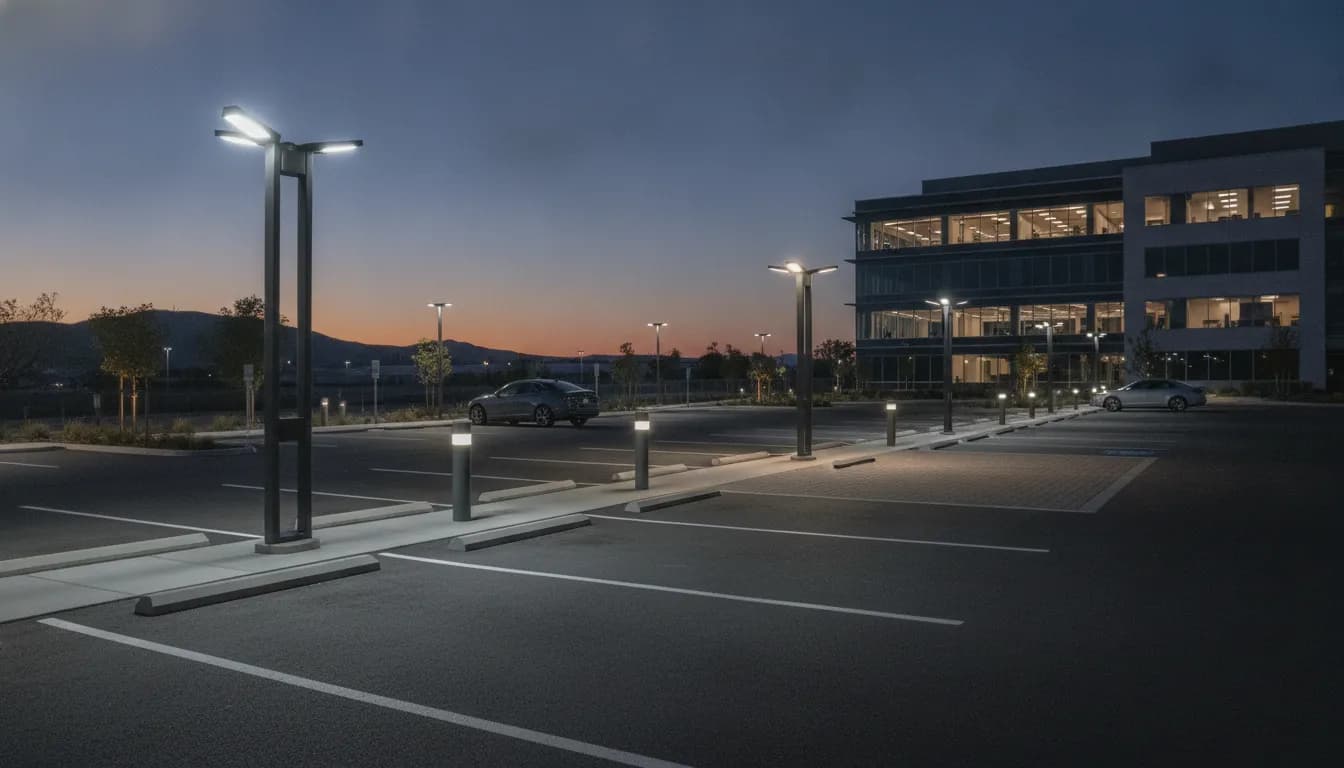
Replacing parking lot lights is not always as simple as removing an old fixture and installing an LED model in the same spot. Existing poles may have structural damage, mounting dimensions may not match, and the new fixture may produce a completely different light pattern. That is why selecting commercial parking lot lighting fixtures should begin with a site audit and photometric plan. You need to understand how people use the property, where visibility matters most, and how the electrical system will support the upgrade. From fixture types and optics to controls, certifications, installation, and maintenance, this guide covers what to review before you place an order.
Key Takeaways
- Assess the property first: Map parking areas, drive lanes, walkways, entrances, poles, neighboring buildings, traffic patterns, and nighttime activity before selecting fixtures.
- Compare complete performance data: Review delivered lumens, efficacy, optics, uniformity, glare control, environmental ratings, voltage, controls, certifications, and warranty terms.
- Validate the full installation plan: Request a photometric layout, inspect existing infrastructure, confirm code requirements, hire qualified professionals, and account for energy, maintenance, lift, and replacement costs.
Commercial Parking Lot Lighting Fixtures: Start With the Site
Choosing commercial parking lot lighting fixtures starts with the property, not the product catalog. A fixture that works well in a shopping plaza may create glare or uneven coverage in an apartment complex. Before comparing wattage, lumen output, or prices, study how people use the site and what the lighting must accomplish.
Map parking spaces, drive aisles, entrances, sidewalks, loading areas, landscaping, building walls, and existing poles. Mark pedestrian crossings, areas with limited visibility, and locations monitored by security cameras. Consider neighboring properties too, since poorly aimed light can create unwanted spill beyond your site.
Then identify the project type. A new installation offers flexibility when planning poles and electrical infrastructure. A replacement project may rely on existing equipment, while a retrofit requires close compatibility checks. This early assessment helps you compare fixtures according to coverage, installation needs, maintenance, and total operating costs. Lighting affects more than pavement visibility, it also supports safety and the experience of everyone using the property, as this parking lot lighting guide explains.
Define visibility, security, and wayfinding goals
List the tasks people perform in each area of the property. Drivers need to see vehicles, pedestrians, curbs, signs, lane markings, and obstacles. Pedestrians need comfortable, continuous illumination along sidewalks, crossings, entrances, and routes between parked cars and buildings.
Security goals may call for consistent lighting near payment stations, elevators, building entrances, and isolated sections of the lot. Pay attention to areas where people stop, change direction, or interact with others. These locations may need different optics or additional fixtures than standard parking rows.
Do not judge performance by brightness alone. Excessively bright fixtures can create glare and harsh contrast, making darker areas more difficult to see. Define practical goals for each zone, such as clear vehicle movement, comfortable pedestrian travel, or reliable camera visibility. These goals give your lighting designer a useful basis for selecting fixtures.
Map lot size, traffic, and operating hours
Create a scaled site map showing the lot’s dimensions, parking rows, drive aisles, entrances, sidewalks, landscaping, nearby buildings, and existing pole locations. Record areas with heavy traffic, delivery activity, occasional use, or limited nighttime occupancy. A busy retail plaza may need steady coverage throughout the evening, while a private office lot may use lower lighting levels after business hours.
Document when lights turn on, when activity decreases, and whether individual zones can be dimmed or switched separately. Controls may reduce operation in low-use areas without leaving important routes unlit. Commercial parking areas commonly require between one and five foot-candles, depending on traffic, activity, and property use, according to this LED parking area lighting standards guide. Treat that range as a planning reference, then confirm final targets with local codes and a qualified professional.
Separate fixtures, poles, mounts, lamps, and retrofit kits
A parking lot lighting system includes more than the visible fixture. Create a component list before requesting quotes. Include the fixture, pole, arm, tenon, bracket, wiring, conduit, photocell, driver, surge protection, and mounting hardware. Each part affects installation, compatibility, and service access.
Next, determine whether you need a complete fixture, replacement lamp, or LED retrofit kit. A new LED area light typically combines the housing, optics, and driver in one assembly. A retrofit kit may reuse an existing housing or mounting structure, but only when its dimensions, weight, wiring, and electrical characteristics match.
Check pole condition and mounting dimensions before ordering. Also confirm whether the existing electrical system can support the proposed equipment. Reviewing every component separately helps prevent delays caused by mismatched hardware. This parking lot fixture selection guide explains why fixtures, mounts, and related parts all matter to system performance.
Compare new, replacement, and retrofit projects
New installations allow you to plan pole locations, foundation sizes, conduit routes, voltage, and fixture spacing together. This makes it easier to create even coverage and avoid awkward aiming or excessive wattage. Consider future expansion and maintenance access while the site is still being designed.
Replacement projects require an inspection of existing poles, tenon dimensions, mounting heights, wiring, foundations, and electrical capacity. A new fixture may produce a different distribution pattern from the equipment it replaces, even when it uses less energy.
Retrofit projects need additional compatibility checks. Confirm that the kit fits the existing housing, supports the available voltage, and delivers suitable optics at the current mounting height. A professional layout can show fixture quantity, pole locations, illumination levels, uniformity, dark areas, and glare for both new and existing systems, as explained in this commercial parking lot lighting guide.
Complete a site audit and photometric plan
A site audit turns observations into project information. Measure the lot, photograph existing fixtures and poles, and record mounting heights, orientations, and visible damage. Inspect foundations, wiring, and connection points where possible. Also note trees, signs, buildings, and other obstructions that could block or reflect light. Seasonal foliage may change coverage, so include that in your review.
Use the audit to create a photometric plan before placing the fixture order. The plan should model fixture types, mounting heights, spacing, optics, aiming, light levels, uniformity, and illumination near the property line. It can reveal dark areas, excessive overlap, and glare before installation begins.
Selecting fixtures without a photometric layout can leave safety gaps or result in unnecessary equipment. Review the plan with a qualified lighting or electrical professional, then compare the modeled results with local requirements and the property’s operating needs. This commercial lighting layout guidance offers further context on why planning matters.
What Types of Commercial Parking Lot Lighting Fixtures Are Available?
Commercial parking lots often need more than one type of lighting fixture. A retail center may require broad illumination over parking spaces, focused light near entrances, and lower fixtures along sidewalks. A warehouse may need high-output fixtures for vehicle lanes, wall packs near loading doors, and canopy lights under covered areas. The best combination depends on the property’s layout, pole locations, mounting heights, traffic patterns, and visibility goals.
When comparing commercial parking lot lighting fixtures, look beyond wattage and appearance. Review lumen output, light distribution, color temperature, mounting requirements, glare control, weather resistance, controls, and maintenance needs. A fixture that works well over an open parking row may create dark spots or uncomfortable glare near a building or pedestrian route. Manufacturer photometric files can help you compare how each fixture is likely to perform before installation.
LED area and shoebox lights
LED area lights are a popular choice for parking lots because they provide strong illumination with lower energy use than older metal halide systems. According to PacLights’ parking lot fixture guide, one LED area light can replace a 1,000-watt metal halide fixture while using about 300 watts. Actual savings depend on the existing system, operating schedule, utility rate, and selected output.
Shoebox lights typically mount to parking lot poles and direct light across parking spaces, drive lanes, and walkways. Their rectangular housing supports several optical distributions, including forward-throw and wide-throw patterns. Compare mounting adjustments, cutoff design, surge protection, housing seals, and wet-location ratings before choosing a model.
Cobra-head and roadway fixtures
Cobra-head fixtures have a curved, hooded shape and are commonly used along roads, drive lanes, and larger parking areas. They usually attach to horizontal arms or roadway brackets, which makes them useful when poles sit along a lot’s edge or beside a public street. They can also simplify replacement projects when existing poles and arms remain structurally sound.
These fixtures distribute light over a relatively long distance to support visibility for drivers and pedestrians. Commercial LED Lights identifies cobra-head fixtures as a common roadway and parking lot solution. Compare the IES distribution, mounting height, arm compatibility, and glare control. A fixture aimed too far across the property may create light trespass or uncomfortable brightness for drivers.
Post-top and decorative fixtures
Post-top fixtures combine practical illumination with an architectural appearance. Property owners often use them in shopping plazas, office campuses, apartment communities, parks, and public spaces where lighting should complement the surrounding design. Available styles include globe fixtures, lantern-inspired housings, contemporary domes, and simple cylindrical forms.
These fixtures often mount on shorter poles, making them suitable for sidewalks, courtyards, entrances, and landscaped areas. They may not cover a large parking field on their own, so check the distribution and spacing plan. Huston Electric’s parking lot lighting guide notes that post-top lights can provide necessary illumination while creating a welcoming setting. Look for durable finishes, impact resistance, and accessible service components.
Floodlights and wall packs
Floodlights provide broad illumination for open areas, building exteriors, signs, service yards, and property boundaries. They can supplement area fixtures near dark corners, loading zones, dumpster enclosures, and security-sensitive locations. Adjustable models allow installers to direct light where it is needed, but careful aiming is essential to limit glare and light trespass.
Wall packs mount directly to a building and typically cast light outward or downward. They work well beside doors, loading bays, pedestrian exits, and narrow areas where a pole would be impractical. CMI Companies recommends LED floodlights for large spaces, signage, building exteriors, and open grounds. Compare beam angle, cutoff, mounting height, controls, and wet-location ratings before installation.
Canopy lights, bollards, and pedestrian fixtures
Canopy lights are low-profile fixtures designed for covered areas, including gas stations, parking garages, drive-through lanes, building overhangs, and covered entrances. They provide even downward illumination without requiring much overhead space. Choose a model with a sealed housing, suitable impact rating, and color temperature that makes pavement, signs, and faces easy to see.
Bollards and pedestrian fixtures provide a lower layer of light along sidewalks, pathways, entrances, and outdoor gathering areas. They can help people identify curbs, stairs, route edges, and changes in elevation. As CMI Companies explains, bollards offer a functional lighting solution with a decorative appearance. Keep them outside vehicle paths and check spacing to prevent dark gaps or excessive glare.
Solar-powered fixtures
Solar-powered area lights use photovoltaic panels and batteries to illuminate locations where extending electrical service would be costly or difficult. They may suit remote parking areas, temporary lots, pathways, rural properties, and sites where trenching is not practical. Because they operate independently from the electrical grid, they can simplify installation and reduce reliance on utility power.
Performance depends on panel size, battery capacity, charging time, operating schedule, and local weather. Nearby trees, buildings, and signs can shade the panel and reduce available energy. Warehouse Lighting’s solar area light collection presents solar fixtures as an option for outdoor areas without grid power. Ask about expected operation during overcast conditions, battery replacement, and cleaning requirements.
Integrated LEDs and retrofit kits
Integrated LED fixtures combine the LED boards, drivers, optics, and housing in one complete product. They work well for new construction or full fixture replacements because the components are designed to operate together. This can support consistent light distribution and simplify installation. Before purchasing, confirm whether the driver and LED components can be serviced or replaced.
Retrofit kits upgrade existing fixtures without replacing the entire housing or pole. They can reduce material waste and installation time when current housings, arms, wiring, and foundations remain in good condition. Compatibility still requires careful review. Check fixture dimensions, mounting methods, electrical connections, thermal conditions, and optical performance. Industrial Lighting Fixtures explains integrated LEDs and retrofit kits, including how retrofit products can improve efficiency without a complete fixture replacement. Request a photometric review before approving a kit, particularly when the new optics will change the existing light pattern.
Which Specifications Matter for Commercial Parking Lot Lighting Fixtures?
A fixture’s wattage and price tell only part of the story. Commercial parking lot lighting must provide useful illumination, distribute it evenly, withstand outdoor conditions, and work with the property’s electrical system. A product that looks efficient on paper may still create dark corners, excessive glare, or costly maintenance issues when its specifications do not match the site.
Start by reviewing the complete product data sheet. Look for delivered lumens, input wattage, efficacy, optics, mounting options, operating temperature, environmental ratings, certifications, photometric files, and warranty terms. Then compare those details with a site plan that shows poles, drive lanes, parking spaces, sidewalks, entrances, landscaping, and neighboring properties.
Your project goals should guide every specification. A busy retail center may need stronger visibility and tighter uniformity than a low-traffic employee lot. An apartment complex may place greater emphasis on pedestrian routes and light trespass near bedrooms. A warehouse may need wide coverage around loading areas and truck lanes. The Illuminating Engineering Society’s standards can help designers and contractors establish appropriate lighting criteria before selecting products.
Compare lumens, wattage, and efficacy
Lumens measure the total light produced by a fixture. Wattage measures its electricity use. Efficacy, expressed as lumens per watt, indicates how efficiently the fixture converts electricity into light. Review all three values instead of choosing a product based on wattage alone.
A higher-wattage fixture is not automatically brighter or better. Optics, lens quality, LED output, and driver performance determine how much light reaches the pavement. Compare delivered lumens, not only the LED chips’ theoretical output, and check whether the manufacturer lists input wattage under normal operating conditions.
For a fair comparison, evaluate fixtures that provide similar coverage and uniformity. A fixture with slightly lower output may perform better if its optics direct more light toward parking spaces and drive lanes. This commercial parking lot lighting guide explains why wattage alone can lead to poor design decisions.
Choose color temperature and color rendering index
Color temperature affects how parking lot lighting looks at night. Measured in Kelvin, warmer light appears more yellow, while cooler light appears whiter or slightly blue. Many commercial properties use a neutral white range because it provides clear visibility without making the site look overly harsh.
Color rendering index, or CRI, indicates how accurately a light source displays colors. A higher CRI can help drivers and pedestrians identify vehicles, signs, clothing, and surroundings. This matters near entrances, sidewalks, security cameras, and storefronts.
Do not select the highest available color temperature or CRI without considering the property. Cooler light may appear brighter, but it can also cause visual discomfort and affect nearby homes or businesses. Some fixtures offer adjustable color temperature, a feature covered in this parking lot fixture selection guide.
Select optics, beam angles, and IES distributions
Optics determine where light travels after it leaves the fixture. Beam angle describes the width of the light pattern, while an IES distribution provides detailed photometric information about that pattern. These specifications help designers direct light across parking spaces, drive lanes, sidewalks, and building entrances.
Common distributions include forward-throw, wide, medium, and asymmetric patterns. A narrow distribution may suit a long drive lane, while a wider pattern may work better around a centrally located pole. The wrong distribution can leave areas underlit or send unwanted light beyond the property.
Request the fixture’s IES file before approving a product. A lighting professional can import the file into design software to test pole locations, mounting heights, spacing, and aiming. Modern optics and diffusers can reduce glare without sacrificing useful output, as this fixture guide from PacLights explains.
Set foot-candle targets and lighting uniformity
Foot-candles describe the amount of light reaching a surface. Your target depends on the property’s use, traffic levels, pedestrian activity, security needs, and local requirements. A retail center, apartment complex, and low-traffic employee lot may not need the same lighting level.
Average illumination is only one part of the design. Uniformity shows how evenly light is distributed across the site. A lot with very bright areas beside deep shadows can cause visual discomfort and make it harder for drivers to see people, obstacles, or other vehicles.
Set both an illumination target and a uniformity requirement before selecting fixtures. Many commercial parking areas fall within a broad range of roughly one to five foot-candles, but a qualified designer should confirm the appropriate target for your property. This parking area lighting standards guide provides additional information about foot-candles and uniformity.
Control glare with cutoff and BUG ratings
Glare occurs when a bright light source enters someone’s line of sight and makes it harder to see. In a parking lot, glare can affect drivers, pedestrians, security staff, and people inside nearby buildings. Proper fixture placement and optical control can reduce glare without leaving the site underlit.
Review the fixture’s cutoff classification and BUG rating. BUG stands for backlight, uplight, and glare. The rating describes how much light travels behind the fixture, above it, and toward high-angle viewing zones. Lower unwanted uplight and glare can help protect neighboring properties and the night sky.
The right rating depends on pole locations, property boundaries, nearby windows, roadways, and coverage requirements. Avoid random spacing, since it can create alternating dark and overly bright areas. This LED installation guide explains how poor spacing can affect safety and visibility.
Match pole height, mounts, spacing, and aiming
Fixture specifications must match the existing or planned pole system. Confirm the pole height, tenon size, arm style, mounting orientation, and fixture weight before ordering. A product may have excellent photometric performance but still require an adapter or different bracket to fit the site.
Pole height affects coverage, glare, uniformity, and maintenance access. Taller poles can spread light across a wider area, while lower poles may provide stronger localized illumination and easier servicing. Spacing and aiming matter as well. Even a suitable fixture can perform poorly when poles are too far apart or aimed incorrectly.
For replacement projects, inspect the existing poles, arms, junction boxes, and wiring first. Check for corrosion, movement, damaged hardware, and structural concerns. Correct mounting hardware helps replacement fixtures align properly and meet installation requirements, as this lighting safety guide explains.
Check IP, IK, wet-location, and environmental ratings
Outdoor parking lot fixtures face rain, dust, humidity, temperature changes, insects, vehicle exhaust, and occasional impact. Environmental ratings indicate how well they can handle these conditions. An IP rating addresses protection from solids and water, while an IK rating indicates resistance to mechanical impact.
Confirm that the fixture is listed for wet locations when it will be directly exposed to weather. Also consider the local climate. Coastal sites may need stronger corrosion protection, while properties in cold regions may require fixtures rated for low temperatures, snow, and ice.
Look beyond the rating itself. Review the housing material, coating, lens, seals, drain paths, and heat dissipation design. Weak weather protection and poor thermal management can shorten service life, especially when fixtures operate for long hours. This LED parking area standards guide highlights the importance of weather protection and dependable performance.
Confirm voltage, drivers, surge protection, and dimming
Before selecting a fixture, confirm the site’s supply voltage, phase, frequency, and available electrical capacity. The fixture’s voltage range must match the power supplied at the pole. A mismatch can cause flickering, reduced output, premature failure, or installation delays.
The driver is another important component. Review its efficiency, operating temperature range, dimming method, and replacement availability. If you plan to use photocells, motion sensors, timers, or networked controls, verify that the driver supports the selected control protocol.
Outdoor fixtures also benefit from surge protection because utility events and nearby lightning can damage electronic components. Ask whether protection is built in and whether additional protection is needed at the circuit or panel. As this LED installation guide points out, overlooking voltage compatibility is a common source of installation problems.
Review service life, thermal management, and warranties
Manufacturers often list LED life in hours, but that figure needs context. Look for rated operating life, lumen maintenance, ambient temperature, and testing conditions. A fixture may continue operating for many years while producing less light, so lumen maintenance is important for long-term planning.
Heat management strongly affects LED and driver performance. Look for a housing designed to move heat away from the LEDs, along with a stated operating temperature range. Avoid treating an unusually high life claim as a guarantee of trouble-free service.
Read the warranty carefully. Check its length, coverage for the fixture and driver, exclusions, labor terms, and replacement process. A longer warranty is useful only when the supplier can provide replacement parts and responsive technical support. Commercial-grade fixtures can last 50,000 hours or more when properly designed and maintained. Review this commercial LED lighting guidance for additional product considerations.
Verify UL, ETL, DLC, and other certifications
Certifications help confirm that a fixture has been evaluated against recognized safety and performance requirements. Depending on the project, look for listings from organizations such as UL or ETL, along with suitable wet-location and electrical safety markings.
DLC qualification may also matter when you are applying for utility rebates or comparing commercial energy performance. A listing does not replace a design review, but it gives buyers a way to verify that a product meets defined criteria. Check the exact model number, since a certification may apply to one configuration and not another.
Ask the supplier for current certification records, test reports, and product data. Also confirm whether the fixture complies with local energy codes, light pollution requirements, and project specifications. IES standards can provide a useful reference when contractors and designers evaluate photometric performance and product documentation.
Review photometric files and delivered performance
A photometric file contains data that design software uses to model how a fixture distributes light. Request the correct file for the exact fixture, optic, lumen package, mounting position, and operating configuration you plan to purchase.
A complete photometric layout should show fixture quantity, pole locations, mounting heights, aiming angles, average illumination, minimum illumination, uniformity, and areas that may receive excessive glare or insufficient light. It should also account for drive lanes, parking spaces, sidewalks, entrances, landscaping, and property boundaries.
Do not approve a product solely because its catalog lists a high lumen output. Compare the modeled results with the project’s lighting targets, then confirm that the installed fixture matches the approved configuration. A professional layout can identify dark areas and spacing problems before installation, which is why photometric planning belongs early in the purchasing process.
Which Applications Need Different Commercial Parking Lot Lighting Fixtures?
Commercial parking lots rarely have identical lighting requirements. A retail plaza may need broad, even coverage across busy parking aisles, while a warehouse may prioritize truck movement, high mounting heights, and durable housings. An apartment community may need comfortable pedestrian lighting, and a municipal lot may prioritize reliable operation with minimal maintenance.
Start by identifying how people use each area, when the lights operate, and what conditions the fixtures must withstand. Traffic patterns, pole locations, security needs, nearby buildings, landscaping, and local lighting rules all affect fixture selection. Consider more than horizontal illumination on the pavement. Drivers and pedestrians also need to see signs, building entrances, curbs, people, vehicles, and other vertical surfaces.
A photometric plan can compare fixture distributions, mounting heights, spacing, and aiming before installation. It can also identify dark areas, excessive brightness, glare, and light trespass. Divide the property into functional zones instead of assuming one fixture style will work everywhere. Taller area lights may cover parking fields, while wall packs, bollards, floodlights, or canopy fixtures provide more focused support in pedestrian and specialty-use areas.
Retail centers and shopping plazas
Retail parking lots serve drivers, pedestrians, delivery vehicles, and employees throughout the day. Lighting should help customers find open spaces, identify storefronts, read signs, and move safely between vehicles and entrances. As the 1000Bulbs parking lot lighting guide explains, parking lot lighting affects more than whether drivers can physically see the pavement. It also influences comfort, visibility, and the property’s overall appearance.
LED area lights with broad, controlled distributions often work well for large parking fields. Use more focused optics near drive aisles, building fronts, and property boundaries when appropriate. Photocells, schedules, and dimming controls can reduce output after closing while maintaining essential security lighting. Review lighting near signs and storefronts separately, since excessive glare can make both harder to see.
Apartment complexes and multifamily properties
Multifamily properties need lighting that supports both vehicles and pedestrians. Residents may cross the lot at night, carry groceries, use mail kiosks, or walk to shared amenities. Fixtures should illuminate parking spaces, sidewalks, stairs, ramps, and entrances without shining directly into apartment windows or creating uncomfortable glare.
Uniformity matters particularly in residential settings. Revolve LED’s installation guidance notes that proper lighting design is about achieving uniform illumination. Select optics and mounting heights that limit bright patches and deep shadows. Lower-mounted fixtures along walkways may complement taller area lights, creating a comfortable environment without lighting the entire property more intensely than necessary.
Warehouses and industrial facilities
Industrial sites often combine employee parking, trailer storage, loading areas, and internal vehicle lanes. These properties may operate around the clock, so fixtures need dependable performance in demanding conditions. High mounting heights, dust, vibration, forklifts, and large vehicles can all affect fixture selection, aiming, and maintenance access.
Use durable LED area lights or floodlights with distributions suited to wide yards and long lanes. Loading and truck areas may need stronger vertical illumination so drivers can see dock doors, trailers, signs, and people. Avoid selecting products by wattage alone. Industrial Lighting Fixtures recommends careful design, since avoidable design errors can prevent a project from achieving consistent performance. Check environmental ratings and glare control before specifying fixtures for high-bay outdoor areas.
Public and municipal parking lots
Municipal parking lots may support public events, transit access, civic buildings, parks, or downtown businesses. These sites typically need dependable lighting, straightforward maintenance, and controls that limit operating costs. Fixtures may also need to meet local requirements for glare, uplight, light trespass, accessibility, and dark-sky protection.
LED area fixtures with photocells and scheduled dimming can provide consistent illumination while reducing unnecessary nighttime output. Select housings and finishes that can withstand rain, snow, road salt, and repeated public use. Existing systems often struggle with uneven brightness, rising electric bills, and frequent maintenance calls, according to Hevilite’s commercial outdoor lighting guide. A planned replacement should address illumination quality, energy use, service access, and long-term parts availability.
Entrances and vehicle lanes
Entrances and vehicle lanes require lighting that helps drivers recognize turns, intersections, stop signs, speed bumps, and pedestrian crossings. Fixtures should illuminate the pavement and nearby vertical surfaces without producing glare that interferes with driver vision. Pole placement, mounting height, beam direction, and fixture orientation all affect visibility.
Use area lights for open approaches and more focused distributions along lanes or entry points. Adjustable mounting options can help when the site requires precise aiming. The selected system should account for visibility, security, fixture access, code requirements, and long-term maintenance, considerations included in LED Light Expert’s buying guidance. Coordinate lighting with signs, cameras, gates, and access-control equipment so one fixture does not create glare or shadows in another system’s field of view.
Walkways, sidewalks, and pedestrian routes
Pedestrian routes need comfortable, continuous illumination rather than isolated pools of intense light. People should be able to see curbs, ramps, doors, faces, changes in elevation, and potential obstacles as they move through the property. Lighting should also support security cameras without shining into nearby residences.
Bollards, low-mounted area fixtures, wall packs, and decorative post-top lights can supplement taller parking lot fixtures. Pay close attention to spacing where sidewalks pass behind landscaping or between parked vehicles. Hevilite explains that bright hotspots beside dark shadows can create visibility problems and make a property feel less secure. Include the entire pedestrian route in the photometric review, including crossings, ramps, stairs, and entrances, rather than evaluating only the parking spaces.
Loading zones and truck lanes
Loading zones need lighting that supports large vehicles, reversing movements, dock operations, and employee safety. Drivers may need to read dock numbers, identify obstacles, and judge distances while maneuvering trailers. Tall structures, parked trucks, and dock canopies may block light from nearby parking lot fixtures.
Choose distributions that reach the full loading area and provide useful illumination on vertical surfaces. Floodlights, high-output area lights, and dedicated canopy fixtures may work together, depending on the layout. Avoid increasing fixture output to compensate for poor placement or blocked light. A thoughtful design creates consistent illumination while avoiding over-lighting, an issue Industrial Lighting Fixtures addresses in its commercial parking lot guide. Allow room for truck clearance, service access, and future changes to loading operations.
EV charging and specialty-use areas
EV charging spaces need lighting for payment screens, charging connectors, signs, and pedestrian movement around vehicles. Users may stand outside their cars while connecting equipment, so glare control and vertical visibility matter as much as pavement illumination. Charging areas may also operate independently from the main parking field.
Use fixtures that illuminate chargers and access paths without creating reflections on windshields or making screens difficult to read. Canopy lights, nearby area fixtures, and wall-mounted products may be suitable, depending on the installation. Advanced fixtures can use optics and diffusers to reduce glare without sacrificing useful output, according to PacLights’ fixture selection guidance. Confirm that fixtures do not obstruct charging access, cable movement, vehicle clearance, or maintenance areas. Separate controls may allow charging zones to follow different operating schedules.
Existing poles and wiring for retrofits
A retrofit involves more than replacing one fixture with another. Existing poles may have corrosion, damaged foundations, overloaded circuits, or spacing that does not suit the new LED distribution. Inspect wiring, junction boxes, conduit, mounting arms, tenons, voltage, and electrical capacity before ordering replacement fixtures.
A new LED product may use less power yet perform poorly if it is mounted at the wrong height or aimed incorrectly. Review pole condition, fixture weight, wind loading, and maintenance access as part of the site audit. Revolve LED warns against placing lights on existing poles without a plan. For larger retrofits, compare current illumination with the proposed photometric layout before installation. Confirm that the replacement fixture fits the existing mount and that its driver, controls, and surge protection match the site’s electrical system.
Why Choose LED Commercial Parking Lot Lighting Fixtures?
LED commercial parking lot lighting fixtures can do more than reduce wattage. They can provide more consistent coverage, start instantly in cold weather, and work with controls that adjust light levels based on time or activity. Their long service life can also reduce relamping, lift rentals, and maintenance interruptions.
However, LEDs are not automatically the right choice for every project. Fixture quality, pole spacing, mounting height, electrical capacity, and required illumination levels all affect the result. Before ordering, compare the complete lighting system rather than focusing on a single product specification. A photometric plan can show whether the proposed fixtures will cover parking spaces, drive lanes, walkways, and entrances without creating excessive glare or dark areas.
Reduce energy and operating costs
LEDs typically use less electricity than older HID and metal halide systems while producing comparable or better illumination. This difference can have a noticeable effect on operating costs in parking lots that stay lit all night or operate continuously.
The savings extend beyond the utility bill. Commercial LED fixtures can last 50,000 hours or more, reducing lamp replacements, lift rentals, service calls, and labor. When estimating project savings, compare wattage, delivered lumens, driver efficiency, operating hours, and control settings. PacLights explains the operating and maintenance advantages of commercial-grade LED parking lot lights.
Extend service life and reduce relamping
Replacing lamps in a large parking lot can require traffic control, lift equipment, and multiple maintenance visits. A failed lamp may also leave a parking space, sidewalk, or vehicle lane poorly illuminated until repairs are completed. LED fixtures reduce these interruptions by offering a much longer service life than many older lighting technologies.
Commercial LED parking lot fixtures commonly have rated lives between 50,000 and 100,000 operating hours. Still, do not judge a product by this figure alone. Check whether the rating applies to the full fixture, LED board, or expected lumen maintenance. Review warranty coverage for the driver, housing, LED components, and seals as well. eLuminaire’s parking area lighting guide explains how service life and compliance affect fixture selection.
Get instant-on performance in cold weather
LED fixtures reach full brightness almost immediately after power is supplied. This is useful in cold climates, where some traditional lighting technologies may start slowly or need time to reach their intended output. Immediate illumination can help drivers and pedestrians see clearly as soon as a fixture turns on.
This feature also supports occupancy sensors, timers, and other controls. A fixture can switch on when activity is detected without waiting for a warm-up period. Before installation, check the fixture’s minimum and maximum operating temperatures, along with the driver’s cold-start performance. Industrial Commercial Lighting covers temperature considerations in its LED parking lot lighting guide.
Improve optical distribution and coverage
LED area lights use lenses and reflectors to direct light across specific portions of a property. With the right distribution, they can illuminate parking spaces, drive lanes, entrances, and walkways more evenly. This can reduce dark spots, harsh transitions, and shadows that make a lot harder to use or monitor.
Review the fixture’s IES distribution, beam pattern, mounting height, and aiming angle before choosing a model. A broad distribution may suit an open parking field, while a narrower pattern may work better beside a building or along a property boundary. PacLights describes how optical distribution affects parking lot coverage. A photometric layout should confirm the result for your specific site.
Add photocells, sensors, and smart controls
LED fixtures are compatible with photocells, timers, occupancy sensors, dimming systems, and networked controls. Photocells can switch fixtures on at dusk and off at dawn. Sensors can lower light output in areas with little activity, while scheduled dimming can reduce output during low-use hours.
Check compatibility before placing an order. The fixture may require a dimmable driver, control receptacle, wireless module, or particular communications protocol. After installation, test schedules, sensor zones, dimming levels, and emergency settings. Revolve LED explains how smart controls can reduce energy use and support longer LED system life.
Check LED retrofit compatibility and infrastructure
An LED retrofit is not always a simple lamp-for-lamp replacement. Start by inspecting the existing poles, arms, tenons, junction boxes, conduit, wiring, and electrical panels. The structure must support the new fixture’s weight and wind load, and the mounting connection must match the proposed product.
Confirm voltage, grounding, disconnects, surge protection, and control wiring before installation. Older systems may contain ballasts, damaged conductors, or undersized components that need attention. A retrofit may require new hardware or a complete fixture replacement rather than a replacement lamp. eLuminaire recommends reviewing the full installation because fixture selection alone does not guarantee compliance.
Compare LEDs with HID, fluorescent, and metal halide
LEDs generally provide longer service life, faster startup, more precise optical control, and better dimming capability than older HID and metal halide systems. They also reduce the relamping work associated with traditional lamps. Fluorescent products may be less suitable for exposed outdoor areas because low temperatures can affect startup and light output.
Compare total ownership costs instead of focusing only on the initial fixture price. Include energy use, replacement lamps, maintenance access, controls, expected service life, installation labor, and disposal requirements. A lower-wattage fixture is not necessarily a better replacement if it creates uneven illumination. Industrial Lighting Fixtures recommends completing a photometric layout before upgrading parking lot lighting.
Weigh fixture cost, driver quality, and heat management
The least expensive fixture may cost more over time if it uses a low-quality driver, weak seals, or an inadequate thermal design. Excess heat can shorten the life of the LED board and driver. Moisture inside the housing can lead to corrosion, flickering, electrical faults, and early failure.
Compare the driver brand, surge rating, operating temperature, ingress protection, housing material, and warranty terms. Look for a fixture that moves heat away from the LED board and protects internal components from rain, dust, and seasonal temperature changes. eLuminaire warns that poor heat management and weak weather protection can cause low-cost fixtures to fail early.
Plan Installation and Maintenance
A commercial parking lot lighting project does not end when the fixtures are mounted and switched on. Installation decisions affect illumination, electrical safety, maintenance access, and ownership costs for years. Before ordering equipment, document the site and confirm that the proposed system works with the property’s existing infrastructure.
Start with a site plan showing poles, buildings, driveways, sidewalks, trees, signs, utility equipment, and areas that need extra visibility. Include electrical panels, underground conduit, junction boxes, drainage features, and possible lift locations. This gives your lighting designer and electrical contractor the information they need to plan fixture placement and installation.
Maintenance deserves the same attention. A fixture may provide excellent light, yet still become expensive to service if technicians cannot reach it easily or replacement parts are difficult to find. Prioritize durable housings, accessible connections, replaceable components, and clear warranty terms. Keep product data sheets, wiring diagrams, photometric layouts, and installation records in one location.
Before work begins, create a written schedule for inspections, cleaning, testing, repairs, and parts replacement. The schedule should identify who handles routine checks, who responds to outages, and how quickly safety-related issues must be addressed. Following recognized electrical safety practices, including the guidance provided by the Occupational Safety and Health Administration, helps reduce risks during installation and service.
Verify foundations, conduit, wiring, and electrical capacity
Inspect existing poles and foundations before choosing replacement fixtures. A new fixture may weigh more or create different wind loads than the original equipment. Look for corrosion, cracks, leaning poles, loose anchor bolts, and water damage. Older poles and foundations may require a structural review before they can be reused.
Have an electrician examine the conduit, conductors, grounding, junction boxes, disconnects, and electrical panels. Confirm that the circuits can support the proposed fixtures and that the voltage matches the fixture and driver requirements. Damaged insulation, undersized conductors, poor grounding, or limited panel capacity should be corrected before installation.
Do not assume an existing circuit is suitable simply because the previous lights operated on it. LED systems may use different drivers, controls, and surge protection. Record circuit locations and conditions, then resolve infrastructure problems before equipment arrives. This step helps prevent delays, repeated service calls, and unsafe temporary connections.
Match fixtures with arms, tenons, brackets, and hardware
A parking lot fixture must connect securely to its mounting system. Check the fixture’s mounting type, tenon size, arm diameter, bolt pattern, and adjustment range before ordering. Common arrangements include slip-fit mounts, direct mounts, adjustable knuckles, bullhorn arms, and wall brackets. Similar-looking products are not always interchangeable.
Confirm all required hardware, including bolts, clamps, adapters, gaskets, washers, and locking components. Outdoor hardware should resist corrosion and remain secure despite wind, vibration, and temperature changes. Provide the supplier with exact pole, arm, wall, or bracket dimensions so the mounting solution fits the site.
Review the fixture’s weight and projected surface area as well. A housing may fit an arm while still exceeding its structural rating. Compare the manufacturer’s installation instructions with the existing equipment, and ask the contractor to verify the connection before work begins. An adapter can solve a fit issue, but it should not replace a structural and electrical review.
Set pole height, spacing, orientation, and aiming
Pole height and spacing determine how evenly light reaches parking spaces, drive lanes, sidewalks, entrances, and loading areas. Taller poles can cover more ground, while shorter poles may offer better control in smaller lots. The appropriate arrangement depends on fixture output, optical distribution, mounting height, site geometry, and required illumination.
Use a photometric plan to test pole locations before installation. The layout should account for property lines, buildings, landscaping, signs, tree growth, neighboring homes, and areas where vehicles may block light. It can identify weak areas and reveal where overlapping beams may create excessive brightness.
Aim each fixture at its intended coverage area rather than pointing every unit in the same direction. Corner fixtures, entrance lights, and units serving irregular sections may need different tilt angles. After installation, compare the aiming with the approved plan and make adjustments during commissioning. Recheck glare and light trespass whenever you change a fixture’s angle.
Prevent dark spots, harsh shadows, and over-lighting
Effective parking lot lighting is consistent, not simply bright. Dark areas between poles can make drivers, pedestrians, curbs, and obstacles harder to see. Excessive brightness may create glare and reduce visibility when people move from a bright area into a darker one. A balanced design supports comfortable movement throughout the property.
Review average light levels along with minimum readings and uniformity. Pay close attention to corners, stairways, crossings, dumpster areas, and sections affected by trees or buildings. Pavement color can influence reflected light, but the design should not depend on reflection alone to illuminate important areas.
Use optical distribution, shielding, mounting height, and aiming to shape coverage before adding more wattage. Walk the property after dark once installation is complete. Look for bright hotspots, vehicle shadows, glare toward drivers, and poorly lit pedestrian routes. Resources from the Illuminating Engineering Society can help qualified lighting professionals assess distribution and visual performance.
Hire qualified electrical professionals
Commercial parking lot lighting can involve elevated work, electrical connections, grounding, controls, traffic management, and equipment near pedestrians. Hire a licensed electrical contractor with experience in exterior commercial lighting. Ask about previous work involving bucket trucks, lift equipment, underground wiring, photocells, timers, sensors, and emergency troubleshooting.
Request proof of licensing, insurance, and relevant project experience. A qualified contractor should review the plans, confirm local requirements, follow manufacturer instructions, and coordinate permits or inspections. The crew should also establish a safe work zone with barriers, cones, signs, and traffic controls while working in active areas.
Avoid treating pole-mounted fixture replacement as a simple do-it-yourself project. Elevated equipment and electrical systems require appropriate training and safety procedures. The National Institute for Occupational Safety and Health provides workplace safety resources, while local authorities may set additional commercial installation requirements. Put the project scope in writing, including wiring, controls, disposal, testing, cleanup, and documentation.
Commission fixtures and verify illumination
Commissioning confirms that the installed system performs as planned. Start by checking fixture orientation, mounting security, photocells, timers, sensors, dimming settings, and control zones. Confirm that every fixture turns on and responds correctly without flicker, unexpected shutoff, or visible electrical problems.
Compare the finished installation with the photometric plan. Measure light levels at representative points across parking spaces, drive lanes, walkways, entrances, and loading areas. The purpose is not to make every location produce the same reading. Instead, verify that the completed system meets the project’s illumination and uniformity targets.
Inspect the property from the viewpoint of drivers, pedestrians, nearby residents, and security cameras. Look for glare into eyes or windows, shadows behind vehicles, and light spilling beyond the property line. Record final fixture locations, aiming angles, control settings, measured readings, and installation changes. This record gives future technicians a reliable reference when fixtures are adjusted or replaced.
Schedule lens cleaning and inspections
Dust, pollen, insects, exhaust residue, and moisture can collect on lenses and reduce the light reaching the pavement. Create a cleaning schedule based on the property’s environment. Lots near construction, heavy traffic, agricultural activity, or industrial operations may need more frequent service than clean, low-traffic sites.
Schedule routine inspections at least twice a year, then adjust the frequency based on site conditions and fixture performance. Inspect the lot during daylight to identify physical damage and after dark to find outages, flicker, uneven illumination, and control problems. Night inspections are especially useful after severe weather or changes to landscaping.
Keep a service log showing the inspection date, fixture location, problem found, action taken, and parts used. Clean lenses according to the manufacturer’s instructions, and avoid abrasive materials or harsh chemicals that may scratch optical surfaces. Planned service helps property managers address declining performance before several fixtures fail or a poorly lit area becomes a safety concern.
Inspect housings, poles, wiring, drivers, and connections
A maintenance inspection should cover more than the LED board or lamp. Examine housings for cracks, corrosion, loose covers, damaged seals, and condensation. Check poles, arms, brackets, and anchor bolts for movement, rust, impact damage, or other structural changes. A leaning pole or loose connection requires prompt attention.
Inspect visible wiring, conduit entries, junction boxes, and connectors for deterioration or water intrusion. Check drivers for overheating, unusual noise, discoloration, swelling, or intermittent operation. If a fixture fails repeatedly, replacing the driver without identifying the underlying problem may only provide a short-term repair.
Follow the manufacturer’s service instructions and use appropriate lockout and verification procedures before opening equipment. Maintain an inventory that lists each fixture’s model number, wattage, voltage, driver type, installation date, and location. This information helps technicians identify compatible components quickly and reduces unnecessary equipment removal during service calls.
Plan lift access, repairs, and replacements
Parking lot fixtures are often installed high above the ground, so maintenance requires a safe access plan. Identify locations where a bucket truck or boom lift can park without blocking fire lanes, accessible spaces, drive aisles, or entrances. Check pavement strength, overhead wires, tree branches, clearance limits, and nearby traffic before scheduling work.
Coordinate repairs during low-traffic periods whenever possible. Use cones, barricades, spotters, and temporary closures to protect technicians and the public. For properties that operate continuously, divide work into zones and notify tenants, employees, delivery teams, and visitors about access changes.
Plan for common service needs, including driver replacement, photocell changes, loose connections, damaged lenses, and complete fixture replacement. Keep wiring diagrams, manufacturer instructions, lift requirements, and emergency contacts in the maintenance file. A clear process reduces downtime and prevents rushed decisions when a fixture fails during a busy operating period.
Stock compatible fixtures and spare parts
Keep a small inventory of parts that commonly fail or may be difficult to source quickly. Depending on the system, useful spares can include drivers, photocells, surge protectors, gaskets, lenses, mounting hardware, connectors, fuses, and control components. Store electronic parts in a dry, labeled location away from extreme temperatures and moisture.
Larger properties may also benefit from keeping one or more complete replacement fixtures. This allows staff to restore lighting after vehicle impact, storm damage, or major electrical failure. Use the exact model when possible. If you select an alternative, confirm that it matches the original fixture’s voltage, output, optical distribution, mounting, color temperature, and control compatibility.
Record approved substitutes in the property’s asset register. Product lines change, and a fixture that looks similar may produce a different beam pattern or require different hardware. Review efficiency and product information through ENERGY STAR’s commercial lighting resources when comparing replacement options. A well-organized parts plan keeps repairs consistent and limits the time that areas remain poorly lit.
Meet Safety, Controls, and Compliance Requirements
Commercial parking lot lighting must do more than make a property appear bright. It should help drivers identify lanes, pedestrians, signs, curbs, vehicles, and obstacles without creating glare or distracting neighboring properties. The system should also support security cameras, conserve energy during low-traffic periods, and comply with local installation requirements.
Start by reviewing the site’s safety goals, operating hours, surrounding properties, environmental conditions, and applicable codes. Consider how people move through the lot after dark, where vehicles enter and exit, and which areas need additional visibility, such as loading zones, payment stations, stairs, and building entrances.
A photometric plan can show whether the proposed fixtures will provide adequate illumination and consistent coverage. It can also identify dark areas, excessive brightness, glare, and light crossing the property line. Use this information to guide fixture selection, pole placement, mounting height, controls, and aiming. Addressing these details before installation is easier and less expensive than correcting an unsuitable layout later.
Improve driver, pedestrian, and surveillance visibility
Position fixtures so drivers have enough time to see lane markings, vehicles, pedestrians, cart returns, curbs, signs, and entry points. Aim for consistent illumination throughout the lot instead of placing intense light in only a few areas. Uneven lighting can create dark zones between bright fixtures, making hazards harder to identify.
Give extra attention to sidewalks, crosswalks, stairs, ramps, building entrances, and payment areas. Light these routes without pointing fixtures directly into people’s eyes. Proper parking lot lighting can help reduce accidents and liability concerns, as explained in this guide to the advantages of LED parking lot lighting. Review camera locations as well, and avoid placing poles where they block views or create deep shadows.
Limit glare, light trespass, uplight, and harsh shadows
More light does not automatically create a safer parking lot. Excessive brightness can cause glare and visual discomfort, while harsh shadows may make people and objects harder to see. Review each fixture’s optics, mounting height, tilt, and aiming before installation. A small adjustment can change how much light reaches nearby roads, homes, offices, and adjacent lots.
Choose shielded or full-cutoff fixtures when the site requires tighter control. Check BUG ratings, which describe backlight, uplight, and glare, and review the fixture’s photometric file instead of relying only on wattage or lumen claims. This commercial outdoor lighting guide explains why excessive brightness can reduce visual comfort rather than improve visibility.
Follow dark-sky and neighboring-property requirements
Dark-sky-friendly lighting limits unnecessary uplight and helps preserve nighttime visibility beyond the property. Depending on the location, local rules may restrict brightness, operating hours, color temperature, light trespass, or illumination above the horizontal plane. Requirements may apply to new construction, fixture replacements, and major retrofit projects.
Review these rules before ordering fixtures, particularly when the lot is near homes, farmland, waterways, observatories, or environmentally sensitive areas. The parking lot lighting compliance guide notes that many lighting problems result from design choices rather than fixture quality. Use shielding, suitable distributions, dimming schedules, and careful aiming to keep light within the property.
Use photocells, timers, sensors, and networked controls
Controls allow the lighting system to respond to site conditions and operating needs. Photocells can turn fixtures on at dusk and off at dawn, while timers can manage predictable schedules. Occupancy sensors may reduce output in low-traffic areas and return fixtures to full power when vehicles or pedestrians approach.
Networked controls can add remote scheduling, fault alerts, dimming, and usage reports across multiple properties. Confirm that the controls work with the fixture drivers and meet local electrical requirements. An unreliable control system can create service calls instead of simplifying operations. Properly specified and commissioned smart lighting controls can reduce energy use and extend LED service life.
Check zoning requirements and energy codes
Zoning rules and energy codes may affect fixture output, controls, mounting height, operating hours, and allowable light at the property line. Some jurisdictions require automatic shutoff, scheduled dimming, or maximum lighting power limits. Others set separate requirements for parking areas, driveways, loading zones, and pedestrian routes.
Ask the local building department or a qualified lighting professional which rules apply to your project. Do this before finalizing the layout, because a fixture can meet its product requirements and still fail when installed at the wrong height, aimed incorrectly, or operated outside the permitted schedule. Use commercial parking area lighting standards to organize the initial review, then confirm requirements with local authorities.
Confirm permits, grounding, wiring, and wet-location installation
Exterior parking lot lighting requires careful attention to permits, circuit capacity, grounding, conduit, junction boxes, disconnects, and conductor sizing. Fixtures and electrical components should be approved for wet locations when exposed to rain, snow, condensation, or irrigation. Check mounting hardware and seals as well, since water can enter through a poor connection even when the fixture itself is weather resistant.
Confirm that existing poles, foundations, wiring, and electrical panels can support the new equipment. Do not assume a fixture swap avoids electrical work. An electrician or electrical contractor experienced in exterior lighting can inspect the installation, make required connections, and address access needs safely. This overview of who repairs parking lot lights explains why qualified professionals are often needed for this work.
Maintain photometric and inspection records
Keep the approved lighting plan, fixture schedule, photometric files, product certifications, control settings, permits, and inspection reports in one accessible location. These records can show that the installed system matches the approved design and make future repairs or replacements easier.
After installation, compare actual conditions with the plan. Check illumination, uniformity, aiming, glare, dark areas, control operation, and light at the property line. Record any changes made during commissioning, including fixture substitutions and revised dimming schedules. A documented professional lighting layout provides a useful baseline for inspections, maintenance, and future expansion.
Coordinate electrical work and controls with qualified professionals
Lighting designers, electricians, contractors, property managers, and control specialists should review the project together. The lighting designer can develop the layout, while the electrical contractor verifies circuits, mounting, grounding, wiring, and installation conditions. A controls specialist can confirm programming, sensor coverage, network access, and manual override procedures.
Ask for a clear commissioning plan before work begins. It should identify who will test each fixture, program schedules, verify dimming, confirm sensor response, and document final settings. Qualified professionals can also identify compatibility issues between fixtures, drivers, photocells, sensors, and networked controls. Careful coordination helps the finished system perform as intended and remain manageable after installation.
Compare Commercial Parking Lot Lighting Fixture Brands and Quality
Comparing commercial parking lot lighting brands takes more than checking wattage and price. Two fixtures with similar lumen ratings can produce very different results when installed at different pole heights, spacing, and mounting angles. Compare the complete product package, including optics, drivers, housing materials, controls, certifications, warranty terms, and long-term support.
Request the same information from every supplier so you can make a fair comparison. Ask for product data sheets, IES files, certifications, warranty documents, installation instructions, lead times, and itemized quotes. Clear documentation also helps you identify costs that may appear after installation, such as custom brackets, replacement parts, freight, or lift rental.
A professional lighting layout can show fixture quantities, pole locations, light distribution, average illumination, uniformity, dark areas, and glare risks. This commercial parking lot lighting guide explains why photometric planning should happen before you select a brand.
Compare product data sheets and IES files
Product data sheets list important specifications, including lumens, wattage, efficacy, color temperature, mounting options, operating temperature, and environmental ratings. Compare these details line by line instead of relying on descriptions such as “high output” or “premium grade.”
IES files contain photometric data that lighting software uses to model fixture performance. Request the file for the exact configuration you plan to purchase, including the optic, lumen package, and mounting position. A similar model may create a very different lighting pattern.
Ask each supplier to prepare a photometric layout using your site plan. Compare average and minimum illumination, uniformity, glare, and light trespass. More lumens do not automatically make a fixture better if the result includes bright hotspots and poorly lit areas.
Verify testing, certifications, and performance claims
Look for recognized safety and performance certifications that apply to the fixture’s intended use. Depending on the project, these may include UL or ETL listing, DLC qualification, wet-location approval, and documented surge protection. Confirm that each certification covers the complete fixture, not just an individual component.
Review how the manufacturer supports claims about lumen output, service life, energy use, and operating temperature. Ask whether the ratings come from independent testing, standardized laboratory procedures, or internal estimates. You can review this LED parking area lighting standards guide for common compliance considerations.
Thermal management and weather protection also matter. Heat buildup and moisture intrusion can shorten a fixture’s life, especially in properties with long operating hours or severe weather. Check the enclosure rating, housing construction, lens materials, and test conditions before comparing prices.
Review fixture, driver, finish, and corrosion warranties
Read the complete warranty document rather than relying on a sales representative’s summary. Some warranties cover the LED board but exclude the driver, photocell, surge protector, paint finish, or corrosion. Ask whether labor, shipping, inspection, and replacement costs are included when a failure occurs.
Check the warranty length, claim procedure, exclusions, and start date. Some coverage begins at purchase, while other policies begin at installation. Also confirm whether the manufacturer requires installation by an approved contractor or proof of specific maintenance procedures.
LED fixtures may operate for 50,000 hours or longer, but actual service life depends on heat, voltage, operating conditions, and component quality. This commercial LED parking lot lighting guide explains how longer service life can reduce relamping, labor, and downtime.
For coastal, snowy, or industrial locations, review the finish and corrosion warranty separately. Ask about powder coating, salt-spray testing, stainless steel hardware, and restrictions related to chemicals, salt, or marine exposure.
Check replacement parts and technical support
Before ordering, ask whether the supplier stocks compatible replacement drivers, LED boards, lenses, photocells, surge protectors, and mounting hardware. A fixture can remain serviceable for years, but only if replacement components are available when something fails.
Find out how the supplier handles troubleshooting. Can you speak with a lighting specialist, or does every issue go through a general customer service queue? Ask whether the company provides wiring diagrams, installation manuals, replacement instructions, and technical documentation.
Plan inspections at least every six months, with more frequent checks for high-traffic properties. Regular inspections can reveal damaged housings, loose connections, failed controls, and declining light output before they create safety concerns. This parking lot lighting maintenance guidance explains what routine checks should cover.
Assess design assistance and project services
A reliable supplier should help you select fixtures that fit the property rather than simply recommending its highest-output model. Ask whether the company provides photometric layouts, pole and mounting reviews, energy comparisons, fixture schedules, and assistance with local requirements.
For larger projects, clarify who will coordinate design revisions, submittals, samples, and installation questions. You may also need support with controls, emergency lighting, EV charging areas, or compatibility with existing poles and electrical systems.
Design assistance is particularly useful when several fixture types must work together. Review this guide to choosing parking lot lighting fixtures for factors that affect safety, energy use, light quality, and property management.
Request a written scope of services. One supplier may include a basic layout, while another may charge separately for revisions, stamped plans, field visits, or commissioning support. Comparing these services helps you evaluate quotes based on the complete project cost.
Compare established and private-label suppliers
Established lighting brands often provide extensive product documentation, mature warranty processes, and better access to replacement parts. They may also offer more choices for optics, mounting options, controls, and lumen packages.
Private-label and lesser-known suppliers can offer competitive pricing, but investigate the company behind the label. Ask who manufactures the fixture, where it is tested, how long the model has been available, and whether the same product will remain available for future orders.
Do not judge a supplier by name recognition alone. Review sample fixtures, test reports, customer references, and warranty responsiveness. A smaller company may provide excellent support, while a familiar brand may not suit your project or service expectations.
Lighting problems often result from poor planning rather than defective equipment. Bright hotspots beside dark shadows can reduce visibility and make a property feel less secure. Compare the supplier’s commercial property lighting recommendations with your actual site layout before placing an order.
Evaluate consistency across large installations
For a large parking lot, consistency matters as much as individual fixture performance. Fixtures should deliver the expected lumen output, color temperature, light distribution, and mounting configuration across the entire property. Variations can create visible differences between poles and complicate future maintenance.
Ask how the supplier manages quality control and product revisions. Request a production or pre-shipment sample for large orders, especially when fixtures will serve multiple buildings or installation phases. Confirm that the sample matches the final bill of materials.
Keep records of model numbers, optic codes, color specifications, driver types, and factory revision numbers. These details make it easier to reorder compatible products and identify changes before they reach the job site.
Use a clear installation and inspection process to protect consistency. Review common commercial lighting mistakes before installation, then verify aiming, spacing, illumination, and uniformity after the work is complete.
Verify lead times, inventory, and product availability
A well-priced fixture will not help if it cannot arrive before your installation window. Ask for current inventory, estimated production time, shipping method, and the date the supplier can reserve the required quantity. Include these details in the written quote.
Check whether the lead time applies to the complete fixture or only the housing. Drivers, photocells, brackets, controls, and custom finishes may have separate availability dates. Also ask how the supplier handles backorders, substitutions, and partial shipments.
For phased projects, confirm that the same model, optic, color, and lumen package will remain available for future orders. If a product may be discontinued, request a recommended successor and compare its photometric file with the original.
Availability is only one part of the purchasing decision. This LED parking lot light buying guide covers durability, efficiency, light distribution, and other factors that affect long-term value. A slightly longer lead time may be worthwhile when the product offers stronger documentation, support, and replacement-part availability.
Avoid Common Commercial Parking Lot Lighting Fixture Mistakes
Choosing commercial parking lot lighting fixtures involves more than comparing prices and wattage. A fixture that looks suitable on paper may create dark areas, excessive glare, unnecessary energy use, or frequent maintenance problems after installation. The safest approach is to evaluate the complete system, including the site, poles, wiring, controls, optics, and long-term operating costs.
A careful review before purchase can prevent expensive changes later. Measure the property, inspect existing infrastructure, request a photometric plan, and compare product documentation instead of relying on sales descriptions alone. Pay close attention to how each fixture will perform in the specific environment where it will be installed.
Choosing fixtures by wattage alone
Wattage tells you how much electrical power a fixture uses. It does not tell you how much useful light the fixture produces or where that light will go. Two fixtures with the same wattage can have different lumen outputs, optical distributions, glare levels, and coverage patterns.
Compare lumens and efficacy, measured in lumens per watt, alongside the fixture’s mounting height and distribution. A higher-wattage fixture may perform poorly if its optics create bright spots beneath the pole while leaving spaces between poles too dark. The U.S. Department of Energy’s LED lighting guidance explains why light output and efficiency matter more than power consumption alone.
Ask for photometric data and compare the predicted illumination across the entire lot. This helps you choose the lowest-power fixture that can meet the property’s visibility and uniformity needs.
Skipping a photometric study
A photometric study predicts how light will spread across the property. It uses the site dimensions, pole locations, mounting heights, fixture outputs, distributions, and aiming angles to create a detailed lighting layout. Without one, you may install too few fixtures, space them too far apart, or miss areas blocked by buildings and trees.
The plan should show average and minimum illumination, uniformity ratios, and potential light spill beyond the property line. It should also account for entrances, pedestrian routes, accessible spaces, loading areas, and vehicle lanes. The Illuminating Engineering Society’s standards provide useful guidance for lighting design and evaluation.
Request the completed layout before ordering equipment. Check that the drawing reflects the property’s actual dimensions, then review the fixture schedule and calculated results with the lighting designer or installer. Ask for revisions if the plan does not match the site.
Selecting the wrong distribution or mounting height
Fixture distribution determines where light travels. A Type II pattern may suit a narrow driveway, while Type III or Type IV distribution may work better across a broader parking area. Type V distribution can provide a symmetrical pattern around a centrally located pole. The wrong choice can leave corners dark or send light toward neighboring properties.
Mounting height affects spacing, coverage, glare, and shadows. Fixtures mounted too low may create harsh brightness beneath the pole. Fixtures mounted too high may need greater output and send more light beyond the intended area. The right combination depends on the pole locations, lot shape, fixture optics, and illumination targets.
Review the manufacturer’s IES files instead of choosing a distribution by name alone. Similar labels can produce different results across product lines. Confirm that the fixture, arm, pole height, and spacing work together in the site plan.
Overlooking uniformity, glare, and light trespass
A parking lot can meet its average illumination target and still feel uncomfortable or unsafe if the light is uneven. Bright areas directly beneath fixtures can make darker spaces seem even dimmer. This contrast can affect visibility for drivers, pedestrians, and security cameras.
Glare is another concern. Exposed LEDs, poor aiming, and excessive output can make it harder to see. Light trespass occurs when illumination crosses property lines or enters nearby homes, roads, or natural areas. The International Dark-Sky Association’s lighting principles offer practical guidance for reducing unnecessary outdoor light.
Review the plan for uniformity ratios, uplight, spill zones, and high-angle brightness. House-side visors, shields, cutoff optics, dimming, and better aiming can address many problems. Effective lighting should help people see clearly without directing their attention toward the light source.
Installing too few fixtures or over-lighting
Reducing the fixture count may lower the initial purchase price, but it can leave dark corners and uneven coverage. Increasing the output of a few fixtures does not always solve the problem. Extremely bright fixtures can create glare and harsh shadows while leaving the spaces between poles underlit.
Over-lighting creates its own concerns. It uses more energy, may disturb nearby properties, and can make the site uncomfortable for drivers and pedestrians. More light is not automatically better. The goal is consistent coverage at suitable levels for the property’s use, operating hours, and security requirements.
Ask the lighting designer to compare several layouts in the photometric plan. Review fixture quantity, output, pole spacing, mounting height, and controls as a group. Dimming and scheduling can reduce output during low-traffic periods while maintaining necessary visibility.
Ignoring existing poles, wiring, and electrical capacity
A retrofit does not always involve removing an old fixture and attaching a new one in the same location. Existing poles may have corrosion, structural damage, loose foundations, or insufficient load capacity. Arms, tenons, junction boxes, conduit, and wiring may also be incompatible with the replacement fixtures.
Confirm the available voltage, circuit condition, grounding, breaker capacity, and wiring insulation before installation. LED fixtures generally use less energy than older systems, but their drivers still require suitable circuits, grounding, surge protection, and control compatibility.
Inspect the infrastructure before ordering equipment, especially at older properties. Document pole heights, arm types, mounting configurations, and circuit locations. A qualified professional can identify the need for new hardware, rewiring, structural repairs, or pole replacement before those issues delay the project.
Overlooking weather exposure and environmental ratings
Parking lot fixtures face rain, snow, dust, salt, wind, temperature changes, insects, and ultraviolet exposure. A product designed for a sheltered location may fail quickly in an exposed coastal lot or an area with severe winter conditions. Weak seals and poor heat management can also shorten LED and driver life.
Check the fixture’s wet-location listing, IP rating, impact rating, operating temperature range, and corrosion-resistant finish. The National Electrical Manufacturers Association standards provide information about enclosure classifications and environmental protection. Match these ratings to the conditions at your property, not just the product’s indoor specifications.
Consider how water drains from the housing and whether the lens, gasket, and electrical connections can withstand repeated exposure. Coastal properties may need additional corrosion protection, while areas with vandalism concerns may benefit from higher impact resistance. Confirm that the warranty covers the intended operating environment.
Failing to compare lifecycle costs and maintenance
The purchase price is only one part of a parking lot lighting budget. Include installation labor, lifts, wiring, controls, electricity, cleaning, inspections, repairs, and eventual replacement. A low-cost fixture can become expensive if its driver fails early, its lens discolors, or replacement parts are difficult to obtain.
Estimate annual operating costs for each option and compare expected service life. Ask whether the stated life refers to the LED chips, the driver, or the complete fixture. Review lumen maintenance information when available, since light output may decline over time even when the fixture remains operational.
Plan inspections and cleaning for dusty, polluted, or high-traffic locations. Guidance on parking lot lighting maintenance commonly recommends checking fixtures at least twice a year. Include lift access and labor in the estimate so your comparison reflects the actual cost of ownership.
Choosing low-cost products without checking drivers
The LED board receives much of the attention, but the driver is equally important. It converts incoming power to the current required by the LEDs. A poor-quality driver can cause flicker, early failure, inconsistent output, and problems with dimming controls.
Review the driver manufacturer, operating temperature range, surge rating, power factor, total harmonic distortion, and dimming compatibility. Ask whether the driver is field-replaceable and whether replacement units will remain available. Confirm whether the fixture includes internal surge protection or needs an external device.
Do not judge a product from its lumen claim or price alone. Compare the complete commercial-grade LED fixture data, including driver specifications, thermal design, certifications, warranty terms, and replacement support. Reliable components can reduce outages and service calls throughout the fixture’s life.
Skipping code reviews, permits, and professional installation
Parking lot lighting projects may involve electrical permits, zoning rules, energy codes, dark-sky requirements, accessibility considerations, and restrictions related to neighboring properties. Requirements vary by location and project scope, so do not assume a fixture replacement is exempt from review. Changes to wattage, pole height, wiring, or controls may require additional approval.
Professional installation also protects system performance. Incorrect grounding, loose connections, poor sealing, and improper aiming can create safety hazards or shorten fixture life. Installers should check pole stability, conduit condition, circuit labels, disconnects, and weatherproof connections before energizing the system.
Confirm the contractor’s license, insurance, and experience with exterior commercial lighting. Ask who will handle permits and inspections, then request documentation after completion. A final walkthrough should verify fixture operation, control settings, aiming, illumination, and inspection records before the project is considered complete.
Where Can You Buy Commercial Parking Lot Lighting Fixtures?
You can buy commercial parking lot lighting fixtures from manufacturers, electrical distributors, commercial lighting suppliers, and B2B retailers. The right source depends on your project size, fixture specifications, installation timeline, and need for technical support. An online retailer may work well for a small replacement project, while a large retail center, apartment complex, or industrial property may need design assistance and a complete lighting package.
Before contacting suppliers, collect basic project details, including lot dimensions, pole heights, existing wiring, operating hours, fixture quantity, and local lighting requirements. Share this information with each potential supplier so you receive comparable recommendations. A qualified lighting professional should confirm the final layout and electrical design. PacLights explains why choosing the right parking lot lighting fixtures involves more than comparing wattage.
You should also decide whether you need new fixtures, replacement heads, retrofit kits, or a complete pole-and-fixture package. This distinction affects the products you compare, the installation work required, and the total project cost. Having a clear scope before requesting quotes helps prevent mismatched equipment and unexpected expenses.
Buy from manufacturers, distributors, and B2B retailers
Manufacturers are useful when you need custom specifications, large quantities, or direct technical support. They may provide photometric files, mounting options, warranty information, and guidance on choosing optics for your site. Direct purchasing can also simplify communication when a project requires several fixture types with the same finish, color temperature, or control system.
Electrical distributors and commercial lighting suppliers offer another practical option. They may stock popular models, coordinate related electrical materials, and recommend local installation contractors. B2B retailers often provide online ordering and product comparisons, which can be convenient for smaller projects or replacement purchases.
Before choosing a supplier, review the product data sheet, certification details, warranty terms, lead time, and replacement-part availability. Ask whether the supplier can provide technical assistance if the fixture does not perform as expected. A reliable source should be able to explain product limitations, mounting requirements, and compatibility with your existing infrastructure.
Compare fixture prices with total installed costs
The fixture price represents only one part of the project budget. Two products with similar purchase prices may have very different installation costs if one requires new brackets, adapters, wiring, or additional labor. A fixture that appears less expensive may also require more units to provide suitable coverage and uniformity.
Request a complete quote that separates equipment, shipping, installation materials, controls, and labor. Include accessories such as photocells, surge protectors, arms, tenons, and junction boxes. This makes it easier to identify missing items before placing an order.
A professional photometric lighting layout can show how many fixtures you need and where they should be positioned. Use that information to compare complete project totals instead of isolated fixture prices. Also ask whether the proposed price includes programming, testing, and disposal of old equipment.
Budget for poles, brackets, wiring, lifts, permits, and labor
A lighting replacement may involve more than removing an old fixture and attaching a new one. Check whether existing poles can support the new equipment and whether current tenons, arms, brackets, conduit, and junction boxes are compatible. New underground wiring, breakers, disconnects, grounding components, or control equipment may also be necessary.
Installation can require bucket trucks, lifts, traffic control, and after-hours work. Permit and inspection fees may add to the budget, depending on local requirements and project scope. Include these costs before comparing supplier quotes.
Ask a qualified electrical contractor to inspect the site before ordering fixtures. The contractor can identify damaged poles, overloaded circuits, deteriorated wiring, and access limitations. FSG offers additional guidance on commercial parking lot lighting installation, including why professional review matters during replacement projects.
Calculate energy, maintenance, and lifecycle costs
Compare fixtures by their expected operating cost, not only their purchase price. Review wattage, operating hours, utility rates, driver efficiency, and expected service life. A lower-wattage fixture is not automatically the better choice if it produces insufficient light or requires more units to cover the property.
Maintenance affects the long-term budget as well. Account for cleaning, inspections, driver replacement, lift access, repairs, and possible outages. Ask suppliers how the fixture performs in the expected weather conditions and whether replacement drivers or lenses are available.
Commercial LED fixtures can provide long service lives, but performance depends on thermal management, driver quality, moisture protection, and installation conditions. PacLights explains the factors that affect LED parking lot fixture service life. Use this information to compare the total cost of ownership for each product.
Check rebates, tax incentives, and energy programs
Your utility provider may offer rebates for replacing metal halide, high-pressure sodium, or other older fixtures with qualified LED products. Programs may require specific certifications, minimum efficiency levels, approved product lists, or preapproval before installation. Confirm the requirements before ordering, since a product may not qualify after the work is complete.
Tax incentives and local energy programs may also affect the final project cost. Ask the supplier or contractor whether they help prepare rebate paperwork or provide the required product documentation. Keep invoices, specifications, certification records, installation details, and energy calculations together.
Also check whether controls qualify for separate incentives. Photocells, occupancy sensors, timers, and networked systems may receive support under some energy programs. Confirm eligibility directly with the utility or program administrator, since requirements vary by location and can change over time.
Compare bulk pricing, minimum orders, freight, and returns
Large projects may qualify for tiered pricing, but a bulk discount does not always produce the lowest total cost. Compare the discount with freight charges, pallet fees, delivery timing, and storage costs. Ask whether the supplier has a minimum order and whether mixed fixture types count toward that requirement.
Review the return policy before ordering custom-configured products. Some suppliers charge restocking fees or do not accept returns for fixtures with special optics, finishes, mounting options, or voltage configurations. Confirm quantities and specifications in writing before production begins.
Check the shipping address, delivery schedule, and unloading requirements as well. Some commercial deliveries need a loading dock, forklift, or liftgate service. Complete product packages, such as LED parking lot pole kits, can simplify purchasing, but confirm that every included component suits your site.
Look for promotions and free shipping
Promotions, contractor pricing, and free shipping can reduce the purchase cost, particularly when you order a complete lighting package. Compare the final delivered price rather than relying on a headline discount. A product with free shipping may still cost more than a comparable fixture with a lower base price.
Check whether free shipping applies to your location, order value, product size, and delivery method. Some suppliers offer standard freight at no charge but add fees for liftgate service, expedited shipping, remote delivery, or residential addresses. Ask whether an order ships in one delivery or several separate shipments.
Also confirm how promotions affect returns, warranties, and replacement orders. Warehouse Lighting lists LED area and parking lot lights with shipping offers, but you should review the exact terms before checkout. Save a copy of the promotion and quote for your project records.
Request a photometric plan and itemized quote
Request a photometric plan before purchasing fixtures for a new installation or major replacement. The plan should show fixture locations, mounting heights, aiming angles, light levels, uniformity, and selected IES distributions. It can reveal dark areas, excessive brightness, glare, and light spilling onto nearby properties.
An itemized quote should identify every fixture, optic, mounting accessory, control, warranty, and installation material. Ask the supplier to state delivered lumens, wattage, color temperature, voltage, certification, and expected lead time for each product.
Have the plan reviewed against local requirements and your property’s lighting goals. Industrial Lighting Fixtures warns that selecting equipment before completing a photometric lighting layout can result in poor coverage and avoidable costs. Request revisions if the design does not show sufficient uniformity or creates unwanted glare.
Use a commercial parking lot lighting fixture checklist
A checklist helps you compare suppliers consistently and prevents small details from being missed. Record the fixture model, wattage, delivered lumens, color temperature, distribution, mounting type, voltage, controls, certifications, warranty, and service-life rating. Include the number of fixtures, poles, brackets, wiring materials, installation equipment, freight charges, permits, and labor.
Before approving the purchase, confirm that the plan meets local codes and the property’s lighting goals. Check the return policy, replacement-part process, installation instructions, and expected delivery date. Verify that the quoted products match the photometric plan and that any substitutions require your approval.
Keep the final quote, photometric plan, product data sheets, invoices, rebate documents, and inspection records in one project file. This documentation supports future maintenance, warranty claims, and fixture replacements. A complete checklist also gives property managers and contractors a shared reference throughout purchasing and installation.
Related Articles
- Lighting the Way in Business: The Definitive Guide to Commercial Parking Lot Lights
- How to Choose Parking Lot Lighting Fixtures
- LED Parking Area Lighting Standards and Compliance Guide
- Parking Lot Lighting Guide
- The Best Outdoor Lighting Fixtures for Commercial Properties
Frequently Asked Questions
What should I consider first when choosing commercial parking lot lighting fixtures?\ Start with a site assessment. Review the lot’s size, pole locations, mounting heights, parking rows, drive lanes, sidewalks, entrances, loading areas, nearby buildings, and operating hours. These details help determine the fixture type, light distribution, output, controls, and spacing needed for consistent coverage.
Are LED fixtures a good choice for commercial parking lots?\ LED fixtures are often a practical option because they use less electricity, provide instant illumination, support dimming and sensors, and typically require less relamping than older HID or metal halide systems. Compare delivered lumens, optics, driver quality, environmental ratings, warranty coverage, and total ownership costs before making a decision.
Do I need a photometric plan before buying parking lot lights?\ A photometric plan is strongly recommended for new installations, major replacements, and retrofits. It models fixture locations, mounting heights, spacing, aiming, light levels, uniformity, glare, and light trespass. This helps identify dark areas or excessive brightness before equipment is purchased.
Which type of fixture is best for a commercial parking lot?\ There is no single fixture that suits every property. LED area or shoebox lights often cover parking fields, while cobra-head fixtures may work along roadways and drive lanes. Wall packs, floodlights, canopy lights, bollards, and decorative post-top fixtures can provide focused illumination near entrances, sidewalks, loading zones, and covered areas.
Should a professional install commercial parking lot lighting fixtures?\ Yes. Commercial installations may involve elevated work, electrical connections, grounding, permits, controls, structural inspections, and traffic management. A qualified electrical contractor can verify pole and wiring conditions, install the fixtures safely, program controls, and confirm that the completed system meets the approved design.