
2026-08-07
The Ultimate Guide to Can Lights for Your Home
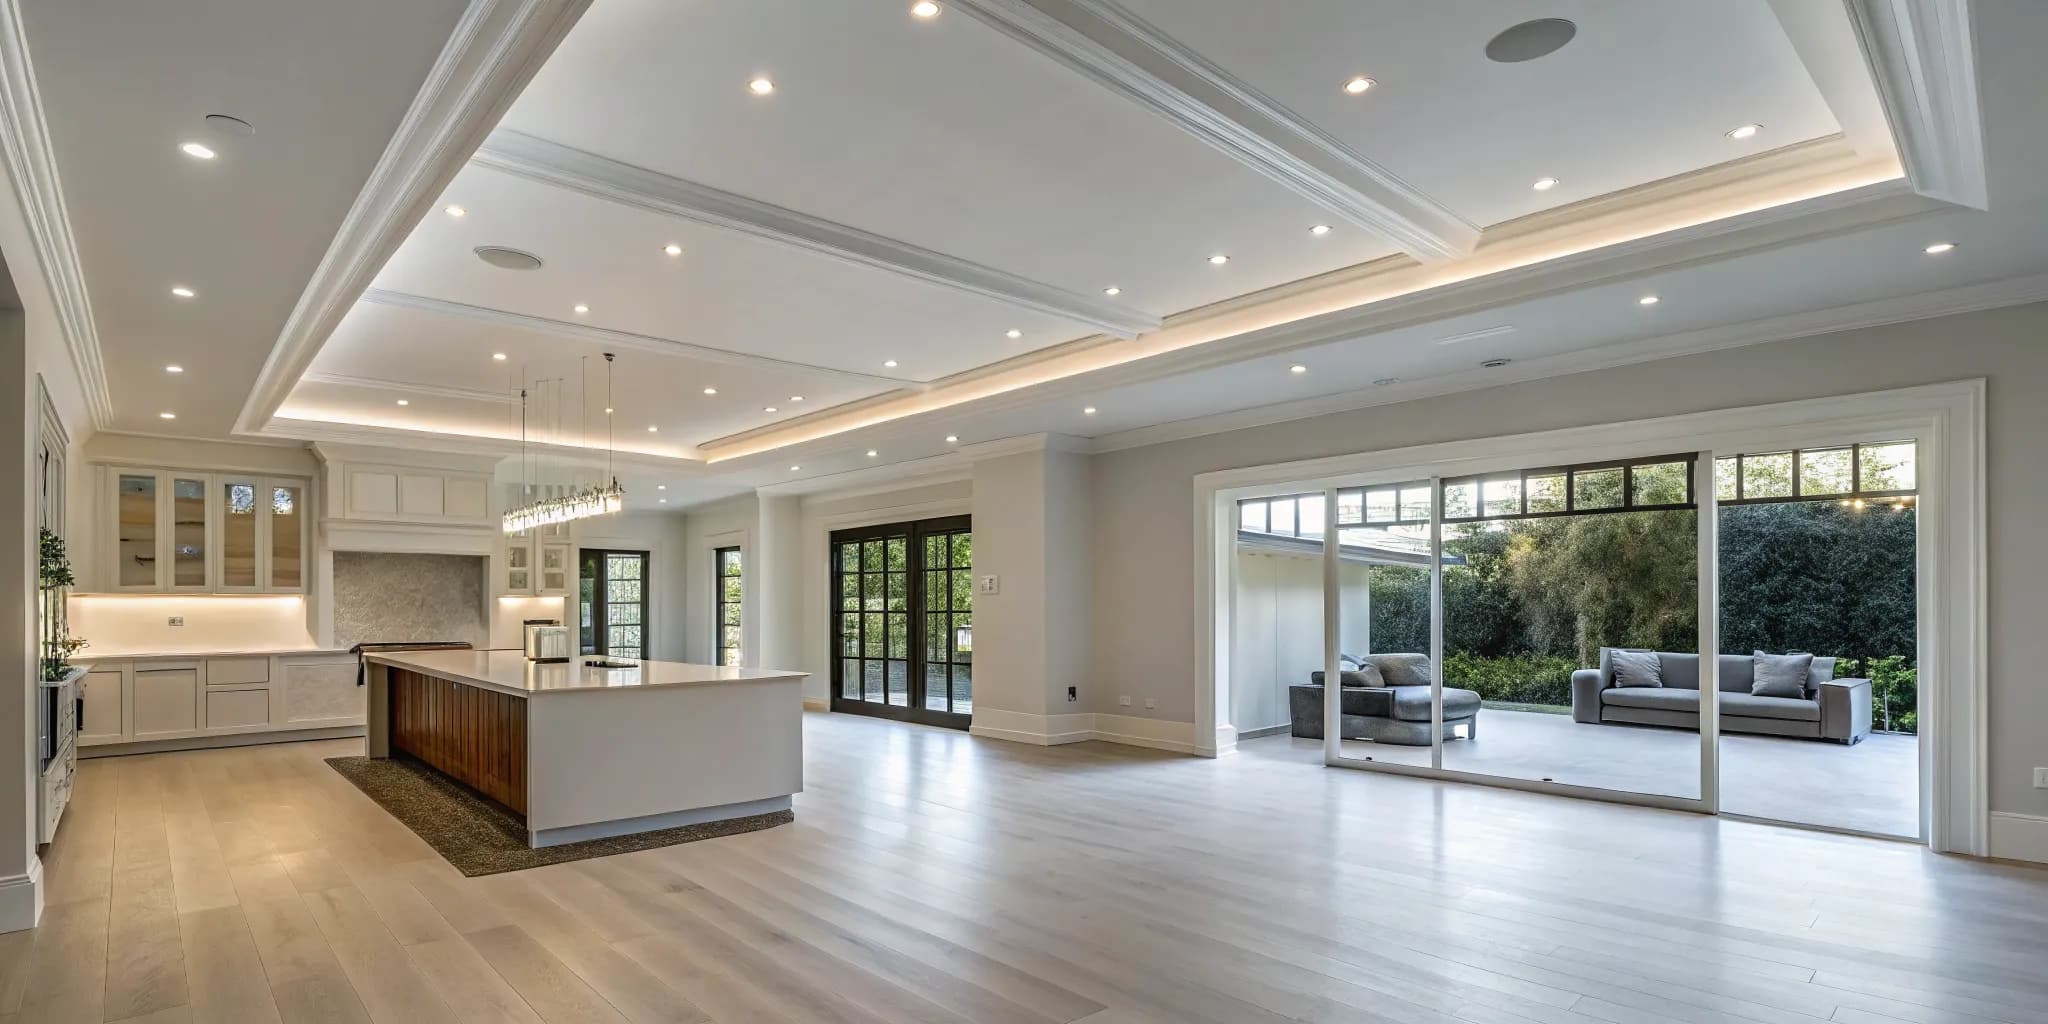
Choosing the lighting for your home is a lot like building a personal website. You can pick a standard template, or you can design something that perfectly reflects your style and needs. Can lights are the custom-design option for your ceiling. Instead of a fixture that hangs down, these lights are built directly into the structure of your home, creating a seamless, high-end look. This integrated approach gives you complete control over the atmosphere of a room. Just as our Airo AI Builder helps you create a unique online presence, understanding can lights allows you to design a lighting plan that is both beautiful and functional.
Key Takeaways
- Plan Your Layout First: Before cutting any holes, map out your light placement based on ceiling height, furniture, and how you use the room. A thoughtful layout is the secret to achieving even, professional-looking illumination and avoiding awkward dark spots or glare.
- Prioritize Safety Ratings: For a safe and code-compliant installation, always match the fixture to your ceiling. Use IC-rated (Insulation Contact) lights if they will touch insulation, and choose the correct location rating (wet, damp, or dry) for rooms like bathrooms or covered patios.
- Select Features for Function and Ambiance: Modern lighting is about more than just brightness. Choose LED fixtures for energy savings, and look for dimming capabilities and adjustable color temperatures to easily change the room's feel from focused and bright to warm and relaxing.
What Are Can Lights?
If you love a clean, modern aesthetic, you’ve probably admired can lights without even realizing it. You might know them as recessed lights or even "high hats," but the idea is the same: they are light fixtures installed directly inside your ceiling. Instead of hanging down, the main components are hidden away, leaving only the light and a neat trim visible. This creates a streamlined look that makes rooms feel more open and less cluttered. They provide excellent ambient or task lighting, washing your walls with light or highlighting specific features like artwork or a kitchen island.
Can lights are incredibly versatile and can be used in almost any room, from the living room to the bathroom. They work by housing the bulb and all the electrical wiring inside a cylindrical metal container, the "can," that gets mounted inside your ceiling. This simple but effective design is what gives them their signature flush appearance. Understanding the different parts and types is the first step to planning a layout that will beautifully illuminate your home. It’s all about choosing the right fixture for your specific project, whether you’re building a new home from scratch or just giving an existing room a much-needed lighting makeover.
How Do They Work?
The magic of a can light is all in its hidden design. Think of it as a structured home for a light bulb, tucked away inside your ceiling. The main part is a metal housing, or the "can," that gets installed between the ceiling joists. This canister holds all the important electrical parts, including the socket for the bulb and the wiring that connects it to your home’s power.
Once the housing is in place, the only part you actually see from the room below is the trim and the bulb itself. The light shines straight down or can be angled, depending on the style you choose. This setup is what creates that clean, unobtrusive look, as the fixture doesn't hang down or take up any visual space in the room.
The Parts of a Can Light
Every can light is made of two primary parts: the housing and the trim. The housing is the workhorse of the fixture. It’s the actual can that gets installed into the ceiling, containing the lamp socket and all the wiring. This is the part that needs to be chosen carefully based on your ceiling type and insulation.
The trim is the decorative, visible part of the light that you see from below. It finishes the look and can even shape the light itself. For example, baffle trims have interior grooves that help reduce glare, which is great for living rooms. Smooth trims offer a minimalist look perfect for kitchens. There are many recessed lighting styles to choose from, including adjustable "eyeball" trims that let you direct light exactly where you need it.
New Construction vs. Remodel Fixtures
When you’re shopping for can lights, you’ll see two main types: new construction and remodel. The one you need depends entirely on your ceiling. New construction housings are designed to be installed when the ceiling is open and the joists are exposed, like during a major renovation or when building a house. They have mounting bars that attach directly to the ceiling joists before the drywall goes up.
Remodel housings, on the other hand, are made for existing ceilings. To install one, you simply cut a hole in the drywall, and the fixture is secured in place with clips that press against the back of the drywall. This makes them perfect for adding recessed lighting to a finished room without having to tear the whole ceiling out.
Understanding IC Ratings and Insulation
This is one of the most important safety features to understand. "IC" stands for "Insulation Contact." An IC-rated can light is specifically designed to be safely installed in direct contact with your ceiling's insulation. These fixtures have special construction that prevents them from overheating, which is a critical fire safety measure. If your ceiling is insulated (and most are), you absolutely need to use IC-rated fixtures.
A non-IC rated fixture requires at least three inches of clearance from any insulation. These are typically used in ceilings without insulation or in some commercial settings. Always check the IC rating before you buy to make sure you have the right product. It’s a simple step that ensures your lighting is not only beautiful but also completely safe for your home.
Can Lights vs. Canless LEDs: What's the Difference?
When you're planning recessed lighting, one of the first choices you'll face is whether to go with traditional can lights or modern canless LEDs. Both will give you that clean, built-in look, but they function quite differently. Think of can lights as the classic, component-based option and canless LEDs as the streamlined, all-in-one solution. Your decision will come down to your ceiling structure, installation preferences, and long-term goals for your space. Let's break down the key differences to help you figure out which is the perfect fit for your home.
Installation and Ceiling Depth
The biggest distinction between these two lighting types is how they are installed. A traditional can light uses a metal housing (the "can") that holds the bulb and wiring. This housing is installed inside your ceiling, which means you need a good amount of clearance above the drywall to fit it. This makes them a straightforward choice for new construction projects where the ceiling joists are exposed. Canless LEDs, on the other hand, are a game-changer for renovations and tight spaces. These fixtures are incredibly slim, all-in-one units that don't need a separate can. They simply clip directly into the ceiling, making installation much faster and easier, especially in areas with shallow ceiling cavities.
Energy Efficiency and Lifespan
This is where canless LEDs really shine. Because they use integrated LED technology, they are exceptionally energy-efficient. Compared to the incandescent or halogen bulbs often used in traditional can lights, LEDs consume significantly less power and generate very little heat. This translates to lower electricity bills and a cooler, more comfortable room. Beyond the monthly savings, canless LEDs also boast an incredibly long lifespan, with many fixtures rated to last for 50,000 hours or more. While you can certainly use an LED bulb in a traditional can fixture, the integrated design of canless models is optimized for maximum performance and longevity from the start.
Maintenance and Replacement
Your approach to maintenance will differ depending on your choice. With a can light, if a bulb burns out, you simply unscrew the old one and pop in a new one. It’s a familiar process that takes just a few minutes. Canless LEDs are different; the light source is built directly into the fixture. This means if the light fails, you have to replace the entire unit, not just a bulb. While that might sound like a hassle, it's important to remember their long lifespan. You might enjoy 15-20 years of use before a replacement is even a consideration, making it a rare task.
Available Styles and Trims
Both options offer plenty of ways to customize your lighting, but they do it differently. Traditional can lights provide great flexibility through interchangeable trim kits. The trim is the visible part of the light you see on the ceiling. You can find everything from simple baffles that reduce glare to adjustable "gimbal" trims that you can aim to highlight artwork or architectural features. Canless LEDs also come in various styles and finishes, but the trim is typically integrated into the fixture. They excel at providing a minimalist, seamless look that blends right into the ceiling, which is perfect for a modern design aesthetic.
How to Decide Which Is Right for You
So, how do you choose? If you have plenty of ceiling space, want the ability to easily swap out bulbs, or need specialized, adjustable trims, traditional can lights are a solid choice. They offer a time-tested, customizable approach to recessed lighting. However, if you're working with a shallow ceiling, want the easiest possible installation, and prioritize long-term energy savings and a sleek, modern look, canless LEDs are likely your best bet. They represent a simpler, more efficient way to plan your lighting layout for any room.
How to Choose the Right Size Can Light
Picking the right size can light isn't just about what fits in your ceiling. The size of the fixture directly impacts how light fills your room, affecting everything from the overall mood to how well you can see. A light that's too small might leave you with dark corners, while one that's too large can feel overwhelming. Getting the scale right is the first step to a professional-looking lighting plan. Let's walk through how to match the light size to your space for the best results.
Factor in Room Size and Ceiling Height
Your ceiling height is a big piece of the puzzle. When you're choosing your fixtures, a good recessed lighting buying guide will always tell you to keep height in mind. Lights in a higher ceiling cast a wider, softer circle of light on the floor, so you might need a larger fixture to get enough brightness. A great starting point is to use 4-inch lights for smaller spaces like hallways or bathrooms, especially with standard or lower ceilings. For larger areas like living rooms, kitchens, or rooms with high ceilings, 6-inch lights are usually a better fit, as they provide broader coverage and prevent the space from feeling under-lit.
Plan Your Spacing for Even Lighting
Once you've picked a size, the next step is figuring out where they'll all go. Proper spacing is what separates a well-lit room from one with awkward bright spots and dark patches. A common mistake is installing lights without a clear plan, which can lead to uneven illumination or glare. Before you even think about cutting holes, map out your layout. A critical safety step is to make sure any insulation in your ceiling is at least three inches away from your fixtures. This prevents overheating and is a standard part of any guide on how to lay out recessed lighting.
Key Features to Consider
Once you have a handle on the right size and layout for your can lights, it’s time to think about the features that will make them work for you. Modern recessed lighting has come a long way from the simple, static fixtures of the past. Today’s options are all about customization, efficiency, and control, allowing you to fine-tune the atmosphere of any room with ease. Thinking through these features now will help you create a lighting plan that not only looks great but also adapts to your lifestyle. It’s a bit like designing a personal website; the basic structure is important, but the interactive features are what truly make it your own. Just as you would use a tool like our Airo AI Builder to reflect your personal style online, choosing the right lighting features helps define the unique character and functionality of your home.
From saving money on your energy bill to changing the color of your lights with a voice command, the possibilities are pretty exciting. We’ll walk through the most important features to look for, including the type of bulb, dimming options, adjustable color, location safety ratings, and smart home connectivity. Understanding these elements will help you move beyond just illuminating a space and toward designing an experience. It ensures your investment pays off in both ambiance and practicality for years to come.
Bulb Type and Energy Use
When it comes to bulb type, the decision is simpler than ever: choose LED. Light-emitting diodes, or LEDs, have completely transformed lighting. Compared to the old incandescent bulbs, LEDs are the clear winner for a few key reasons. They are incredibly energy-efficient, using up to 75% less energy, which means you’ll see real savings on your electricity bill. They also have a much longer lifespan, with many lasting for 25,000 hours or more. That means you won’t be climbing a ladder to change bulbs nearly as often. Plus, LEDs produce very little heat, making them a safer option, especially in ceilings with insulation. For these reasons, most new canless fixtures have integrated LEDs built right in.
Dimming Capabilities
The ability to dim your lights is a must-have for creating ambiance and versatility in almost any room. Think about a living room that needs to be bright for game night but soft and relaxing for a movie, or a dining room that needs functional light for homework but a moody glow for a dinner party. This is where dimmers come in. However, not all fixtures are created equal. It’s crucial to ensure the can lights you choose are listed as "dimmable." You also need to pair them with a compatible dimmer switch. Mismatched fixtures and switches can lead to annoying flickering or buzzing, so always check for compatibility before you buy.
Adjustable Color Temperature
One of the most exciting innovations in recessed lighting is the ability to adjust the color temperature. Measured in Kelvins (K), color temperature determines whether light appears warm (yellowish) or cool (bluish-white). Many modern LED fixtures now offer adjustable settings, so you can change the light to suit your mood or activity. You might want a crisp, cool light (around 4000K) in your home office for focus, but a cozy, warm glow (around 2700K) in the bedroom to wind down. Some lights even feature "dim-to-warm" technology, which automatically makes the light warmer as you dim it, perfectly mimicking the intimate feel of a classic incandescent bulb or a candle.
Wet vs. Dry Location Ratings
This feature is all about safety, and it’s not one you can overlook. Every light fixture comes with a location rating that tells you where it can be safely installed. There are three main types: dry-rated, damp-rated, and wet-rated. Dry-rated fixtures are for indoor spaces that never get wet, like living rooms and bedrooms. Damp-rated fixtures can handle moisture and condensation, making them suitable for bathrooms (but not directly in the shower). Wet-rated fixtures are built to withstand direct contact with water, so you’ll need these for your shower enclosure or any outdoor lighting. Always check the UL rating on your can lights to ensure you’re installing them in an appropriate and code-compliant location.
Smart Home Integration
If you love convenience, you’ll want to consider can lights with smart home integration. These fixtures connect to your home’s Wi-Fi, allowing you to control them through a smartphone app or with voice commands via assistants like Amazon Alexa or Google Assistant. You can turn lights on and off, dim them, and even change their color without ever touching a switch. Smart lighting also lets you set schedules, so your lights can turn on automatically when you wake up or dim in the evening to help you relax. This level of smart home automation offers incredible control and helps you tailor your home’s environment perfectly to your lifestyle.
Pick the Perfect Can Lights for Your Space
The best can light for your project really depends on the room you’re putting it in. A cozy bedroom has completely different lighting needs than a busy kitchen or a professional office. Thinking about how you use the space is the first step to getting your lighting just right. Let's walk through how to select the perfect fixtures for the most common areas of your home and even for commercial settings.
In Living Rooms and Bedrooms
In spaces meant for relaxation, the goal is to create a warm and inviting atmosphere. You want soft, even light, not harsh spotlights. A common mistake is installing can lights without thinking through the lighting design, which can cause uncomfortable glare or dark corners. To avoid this, focus on a layout that provides general ambient light. Use dimmers so you can adjust the brightness for movie nights or quiet evenings. When planning your layout, a good rule of thumb is to ensure any insulation in your ceiling is at least three inches away from the fixtures to prevent overheating, unless you're using IC-rated lights.
In Kitchens and Bathrooms
Kitchens and bathrooms are all about function, and your lighting should reflect that. Good recessed lights can make or break your kitchen layout, defining the flow of the room and showing off your beautiful countertops and cabinets. Here, you’ll want to combine general lighting with focused task lighting over sinks, prep areas, and vanities. You can also get creative with trim kits. Consider an adjustable gimbal trim that you can aim directly at your workspace or a decorative one to highlight a piece of art. This targeted approach ensures you have bright, clear light exactly where you need it most.
In Commercial Spaces
For offices, retail stores, or other commercial environments, the priorities shift toward efficiency, longevity, and control. This is where modern LED can lights truly shine. LEDs offer fantastic energy efficiency, produce less heat, and have much longer lifespans than older incandescent bulbs, which means lower utility bills and less maintenance. Many modern recessed lighting systems also integrate with smart technology, giving you total control over brightness and scheduling. This allows you to create a productive and welcoming environment while keeping operational costs down.
What to Know Before You Install Can Lights
Installing can lights is a fantastic project that can completely change the feel of a room. While it’s a job you can definitely tackle yourself, a little prep work goes a long way. Getting a handle on a few key details before you start cutting into your ceiling will make the entire process smoother and safer. Think of it as creating a solid plan before you build. Knowing what’s behind your drywall and having the right fixtures on hand is the secret to a frustration-free installation and a result you’ll be proud of.
Cutting Holes and Working with Joists
Before you cut that first hole, you need to know what’s above the ceiling. Your ceiling joists are the structural beams that hold everything up, so you want to treat them with respect. Your installation plan should work around them as much as possible. If you need to run wires across joists, you can drill small holes, but follow this critical rule: never drill a hole that is more than one-quarter of the joist’s width. Making too many holes can compromise your home's structure. A good stud finder will help you map out your joists and plan your light placement accordingly.
Wiring Best Practices
Working with electricity requires your full attention, and safety is always the top priority. Before you do anything else, shut off the power to the room at the circuit breaker. Once the power is off, you can run your electrical cable from the power source to the switch and then to each light location. A pro tip is to leave yourself at least 16 inches of extra cable at each fixture. This slack makes it much easier to connect the wires inside the can light’s junction box without struggling in a tight space. Following basic home wiring practices ensures your connections are secure and your new lights work perfectly from day one.
Meeting Insulation and IC Rating Codes
Not all can lights are created equal, especially when it comes to insulation. If your lights will be installed in a ceiling with insulation, you must use fixtures with an "IC" rating, which stands for "Insulation Contact." These are specially designed to be safely buried in insulation without creating a fire hazard. For ceilings with limited vertical space (less than eight inches), look for low-clearance or "shallow" can models. Using the wrong type of housing can not only be a safety risk but can also prevent the fixture from clamping tightly to your ceiling, leaving you with a loose, unprofessional finish.
Checking for Air Leaks Post-Installation
An often-overlooked detail is how can lights can affect your home's energy efficiency. Older or improperly installed cans can create small gaps that allow heated or cooled air from your living space to leak into the attic. This air leakage can lead to drafts and higher energy bills over time. To prevent this, look for fixtures that are "Air-Tight" (AT) rated. After installation, it’s still a good idea to do a quick check. On a cool, breezy day, you can carefully hold a lit incense stick near the trim of the light to see if the smoke flickers, indicating a draft. Sealing air leaks is a simple way to make your home more comfortable and efficient.
How to Maintain Your Can Lights
Keeping your can lights in top shape is simpler than you might think. A little bit of routine care will ensure they stay bright, functional, and efficient for years to come. By tackling cleaning, troubleshooting common hiccups, and knowing when it’s time for an upgrade, you can keep your home beautifully lit without much fuss. Here’s how to handle the basic maintenance.
Cleaning and General Upkeep
To keep your can lights looking their best, a bit of regular cleaning goes a long way. Dust and grime can build up on the trim and bulb, dimming the light over time. For a quick clean, just turn off the power at the switch and use a duster or a dry microfiber cloth to wipe down the visible parts of the fixture. For a deeper clean every six months, turn off the power at the circuit breaker. Carefully wipe the trim and bulb with a slightly damp cloth, then follow up with a dry one to prevent streaks. This simple cleaning schedule helps prevent significant buildup and keeps your lights shining brightly.
Troubleshooting Flickering and Dimmer Problems
A flickering light is incredibly distracting, but the fix is often straightforward. The most common culprits are a loose connection or an incompatible dimmer switch. First, turn off the power and check that the bulb is screwed in tightly. If the flickering continues, the issue might be the dimmer. Not all dimmer switches work with all types of bulbs, especially LEDs. If you recently switched to LED bulbs, you may need to install a compatible dimmer to get smooth, flicker-free performance. If neither of these steps solves the problem, it might be time to check the fixture’s wiring for a loose connection.
Repair or Replace: How to Decide
When a can light stops working, you have to decide whether to repair it or replace it. Your choice often comes down to the age of the fixture and the nature of the problem. If you have a newer fixture and the issue is something simple like a burnt-out bulb, a repair is the obvious answer. However, if your can lights are old and you’re dealing with frequent problems like buzzing, flickering, or failing sockets, replacement is usually the more cost-effective route. Upgrading to modern, energy-efficient models can also lower your electricity bills and give you access to better features, making it a smart long-term investment.
Common Mistakes to Avoid
Getting your can lights right can completely transform a room, but a few common slip-ups can leave you with a less-than-perfect result. The good news is that these mistakes are easy to sidestep with a little bit of planning. Think of it like creating a blueprint before you build. Whether you're launching a new website with a tool like our Airo AI Builder or installing new lights, a solid plan is your best friend. Let's walk through the most frequent missteps so you can get your lighting right the first time.
Poor Layout and Spacing
This is probably the number one mistake. It’s easy to think that a simple grid pattern will work, but a thoughtless layout can create a "runway" effect or leave important areas in the dark. A good lighting plan considers how you actually use the room. Think about where your furniture sits, where you need focused task lighting (like over a kitchen counter), and what features you might want to highlight, such as artwork or architectural details. Installing lights without thinking about brightness or beam angle can also lead to uneven spots or uncomfortable glare. Take the time to map it out on paper first.
Choosing the Wrong Fixture Type
Not all can lights are created equal, and picking the wrong one can ruin the whole effect. It’s about more than just the size of the can. You need to consider the trim, which is the visible part of the light. A trim that doesn't match your ceiling color or texture will stick out and look unfinished. More importantly, you need to select the right kind of fixture for the job. Do you need a fixed light for general illumination, an adjustable "eyeball" trim to spotlight your favorite painting, or a wall wash trim to gently graze a textured wall with light? Choosing the wrong fixture type or brightness level is a frequent issue that can leave a room feeling off.
Overlooking Safety and Location Ratings
This one is non-negotiable because it’s all about safety. You have to know what’s in your ceiling before you buy. If you have insulation, you must use fixtures with an IC (Insulation Contact) rating. These are designed to be safely buried in insulation without creating a fire hazard. If your fixture is not IC-rated, you must keep all insulation at least three inches away. You also need to check the location rating. A light intended for a dry living room is not safe for a steamy shower. For bathrooms, covered porches, or any area exposed to moisture, you must use fixtures with a damp or wet location rating to prevent short circuits and damage.
Ignoring Ceiling Height in Your Plan
The height of your ceiling plays a huge role in how your lighting will look and feel. It’s a detail that’s often forgotten in the planning stage. A light installed in a high, vaulted ceiling will cast a much wider and more diffused pool of light than the same fixture in a room with standard eight-foot ceilings. For taller ceilings, you might need a fixture with higher lumens (more brightness) or a narrower beam angle to ensure enough light reaches the floor. Conversely, using a very narrow, focused beam in a room with low ceilings can create harsh "hot spots." Always check the product specifications to see how the light performs at different heights.
Top Can Light Brands to Check Out
Once you know what you need, it’s time to choose a brand. The right company will offer reliable products and a good selection of fixtures and trims to match your vision. While many great options exist, a few names consistently stand out for their quality, innovation, and variety. Think of this as your short list to get your search started.
Halo, by Cooper Lighting Solutions, is a name you’ll see everywhere for a reason. It’s a trusted workhorse brand popular with both contractors and DIYers. Halo offers a huge range of housings for new construction and remodels, along with plenty of versatile trim kits to fit any style, from simple baffles to adjustable gimbals for accent lighting.
If you’re focused on smart home features, Philips Hue is the leader of the pack. While they offer complete fixtures, their specialty is smart LED bulbs that can be retrofitted into existing cans. With Philips Hue, you can control brightness, set schedules, and even change colors from an app on your phone. It’s one of the easiest ways to get started with modern recessed lighting that you can customize on the fly.
For those who prioritize cutting-edge performance and design, Juno is a fantastic choice. Often specified by architects and lighting designers, Juno products are known for their superior LED technology and sleek, minimalist aesthetic. They offer high-quality fixtures that deliver excellent light output and color rendering, making the investment worth it for key spaces like kitchens and living rooms. After putting so much care into your home's lighting, you'll want a beautiful way to share the results. Whether you're a designer building a portfolio or a homeowner documenting your reno, you can create a website in minutes with our Airo AI Builder to showcase your project.
Where to Find the Best Can Lights
Once you have a clear idea of the can lights you need, the next step is finding where to buy them. You have plenty of options, from your local hardware store to specialized online retailers. Where you shop often depends on whether you value seeing items in person, having a massive selection, or getting expert advice on the latest tech.
For a hands-on approach, you can’t beat big-box stores like The Home Depot or Lowe's. Walking the aisles lets you compare fixtures side-by-side and pick up all the necessary tools for installation in one trip. These stores are also a great resource for practical guidance. For instance, you can find detailed instructions on how to lay out recessed lighting to ensure your project goes smoothly from the start.
If you prefer endless variety, online marketplaces are your best bet. Amazon’s recessed light fixtures section, for example, features thousands of options from countless brands. The user reviews, combined with perks like free shipping and returns for Prime members, make it easy to compare products and find a great deal without leaving your home. This is a fantastic way to explore different styles and price points all at once.
For those looking for the latest in lighting technology, specialty online stores are the way to go. Retailers like Lumens focus on modern designs and smart home integration, offering curated collections of high-end fixtures. You can also buy directly from brands like Sunco Lighting, which is a great source for energy-efficient LEDs and all the matching components. These specialists are often the first to carry innovations like tunable white lighting, giving you access to cutting-edge features for your space.
Frequently Asked Questions
Should I choose traditional can lights or the newer canless LEDs? The best choice really depends on your ceiling and your priorities. If you have plenty of space above your ceiling and you like the idea of easily swapping out bulbs in the future, traditional can lights are a great, time-tested option. However, if you're working with a shallow ceiling, want a super simple installation, and are focused on maximum energy efficiency, canless LEDs are probably the way to go. They offer a sleek, modern look and are perfect for renovation projects.
Is there a simple rule for how far apart to space my can lights? A great starting point is to take your ceiling height in feet, divide it by two, and use that number as your spacing guide in feet. For example, with an 8-foot ceiling, you would place your lights about 4 feet apart. This is just a general guideline, so you should also consider the room's purpose. For task-heavy areas like kitchens, you might place them a bit closer, while in a living room, you might space them a little farther apart for softer, ambient light.
Why are my dimmable LED can lights flickering or buzzing? This is a super common issue, and it almost always comes down to an incompatible dimmer switch. Older dimmer switches were designed for incandescent bulbs and just don't play well with the low energy draw of LEDs. To fix it, you'll need to replace your current switch with one that is specifically rated for LEDs, often labeled as a "C.L" or "LED+" dimmer. Always make sure both your light fixture and your switch are listed as dimmable and compatible with each other.
What happens if I use a light that isn't IC-rated next to insulation? This is a major fire safety issue you can't ignore. A fixture that is not IC-rated (which stands for Insulation Contact) generates too much heat to be safely touched by insulation. If you install one in direct contact with insulation, it can overheat and create a serious fire hazard. You must always keep insulation at least three inches away from a non-IC rated fixture. If your ceiling is insulated, the safest and simplest solution is to only use IC-rated lights.
Can I use a 'new construction' can light in my existing ceiling? Technically, you could, but it would be a huge amount of unnecessary work. New construction housings are designed to be mounted directly to exposed ceiling joists before the drywall is installed. To use one in an existing ceiling, you would have to cut away a much larger section of drywall to access the joists for mounting. A remodel housing is designed specifically for this situation. You just cut a hole the size of the light, and clips secure it directly to the drywall, saving you a lot of time and patching work.