
2026-10-13
Best LED Tube Light Retrofit Kits: 5 Key Comparisons
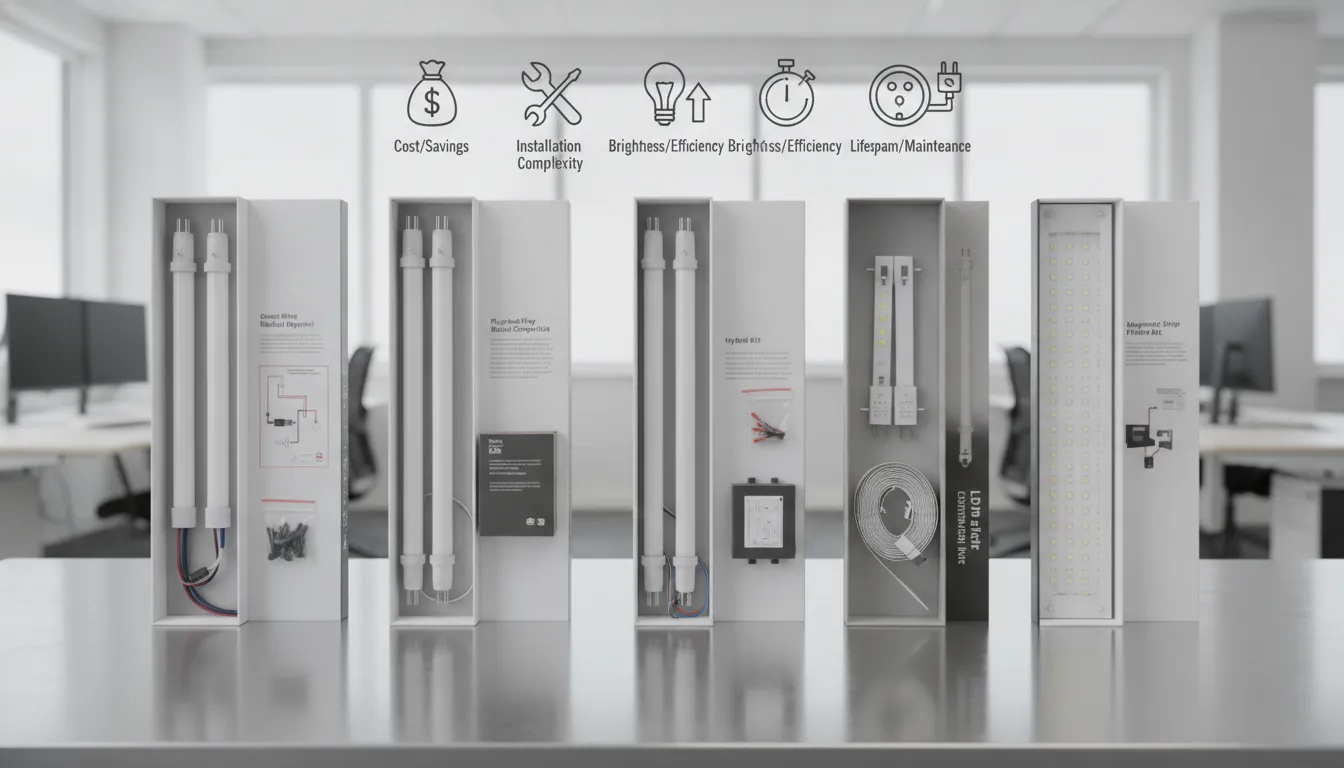
Switching from fluorescent to LED sounds simple, until you discover that tubes with the same size can use different wiring and ballast setups. Choosing the wrong product may lead to flickering, poor performance, or extra installation work. Before you shop for the best led tube light retrofit kits, identify your tube type, pin style, sockets, and ballast model. Then compare plug-and-play, ballast-bypass, and hybrid options against your fixture and lighting needs. This guide breaks down the details in plain language, including when electrical work calls for a licensed electrician. You’ll have a clearer checklist for choosing a compatible kit and planning the project’s full cost.
Key Takeaways
- Check compatibility first: Match the kit to your fixture, sockets, ballast, and wiring, and follow the manufacturer’s instructions.
- Compare total costs and performance: Consider installation, energy use, light quality, maintenance, and rebate requirements before choosing.
- Match the solution to your lighting goal: Tube retrofit kits update compatible indoor fixtures; Lit 365’s professionally installed outdoor lighting adds customizable year-round accents and holiday displays.
What Is an LED Tube Retrofit Kit?
An LED tube retrofit kit updates a fluorescent fixture to use LED lighting while keeping some or all of the existing fixture in place. The term can refer to different products: some kits replace fluorescent tubes with LED tubes, while others replace internal components with a purpose-built LED light engine and driver. Before comparing products, check what the kit includes and whether it’s designed for your specific fixture.
Compatibility depends on more than tube length. You’ll also need to identify the tube type, pin style, sockets, ballast, and wiring. Some LED tubes work with a compatible fluorescent ballast; others require the ballast to be bypassed or removed. A full retrofit kit may replace more internal parts, which can affect light distribution and efficiency. Some purpose-built kits can reach higher efficacy than LED tubes, but results vary by product. Jarvis Lighting’s retrofit guide compares common options, and Waveform Lighting’s tube guide explains tube sizes and form factors.
Before buying, look for the manufacturer’s compatibility list and installation instructions. If the product calls for rewiring, treat the work as an electrical project, not a simple bulb change. The right choice depends on your fixture’s condition, the type of lighting you need, and whether you want to keep the existing ballast or replace more of the fixture’s components.
Know the tubes, drivers, sockets, and ballasts
LED tubes often use the same size labels as fluorescent tubes, such as T8 or T12, and may have matching lengths and pin styles. But a tube that looks like a physical fit may not be electrically compatible. Check its base and pins, the fixture’s sockets (also called tombstones), and the manufacturer’s ballast compatibility information. Waveform Lighting’s guide offers a helpful overview of tube formats.
The LED driver regulates power to the LEDs. It may be built into the tube or included in a retrofit kit. A fluorescent ballast, meanwhile, controls current for fluorescent lamps. Depending on the LED product, the ballast may remain in place, need to be bypassed, or be replaced. Confirm the fixture setup before ordering, and follow the product’s wiring diagram rather than relying on appearance alone.
Compare plug-and-play Type A, ballast-bypass Type B, and hybrid Type A/B kits
Type A LED tubes are plug-and-play products that use a compatible existing ballast. They can make replacement straightforward, but the ballast must appear on the product’s compatibility list. Using an unsupported ballast can lead to flicker, poor performance, or early failure.
Type B tubes are ballast-bypass, or direct-wire, products. The ballast is removed or disconnected, and the fixture is rewired to send power directly to the LED tube. This changes the fixture’s wiring, and some configurations require non-shunted sockets. Follow the manufacturer’s diagram and use a licensed electrician when needed.
Type A/B tubes can operate with a compatible ballast or in a ballast-bypass setup. That flexibility may suit projects with different fixture conditions, but each setup must be wired correctly. Compare the retrofit types and check the exact product instructions before choosing.
Distinguish retrofit kits from replacement tubes and full fixture upgrades
A replacement LED tube is a lamp made to fit a fluorescent fixture. Depending on its type, it may use the existing ballast or require a ballast bypass. In most cases, the fixture housing stays in place.
A retrofit kit can replace more of the fixture’s internal components, such as the ballast and lamps, with a purpose-built LED light engine and driver. This design may offer improved optical control and efficiency, though performance depends on the product. Check what the kit contains, how it installs, and whether it is listed for the fixture.
A full fixture upgrade replaces the entire unit, including its housing. That can be the better option if the existing fixture is damaged, outdated, or unsuitable for the space. Tubes often cost less upfront per fixture, while kits and new fixtures have different installation and maintenance costs. Compare the total project cost and check whether the specific product qualifies for a local utility rebate.
Why Choose LED Tube Kits Over Fluorescent?
Replacing fluorescent lamps with LED tube kits can lower electricity use and reduce how often you need to change lamps. The exact benefits depend on the kit, the condition of your existing fixture, and how long the lights run each day. A plug-and-play kit may work with a compatible ballast, while a ballast-bypass kit requires rewiring but removes the ballast from the circuit.
Look beyond the purchase price when comparing options. Factor in energy use, installation, maintenance, and any rebate you may qualify for. Also check the light itself: brightness, color temperature, color rendering, and dimming support all affect how a room looks and functions. A kit that fits the fixture but produces the wrong light may not be a good match.
The comparisons below can help you assess whether an LED retrofit suits your existing fixtures. If the housing or wiring is damaged, or the kit is incompatible, replacing the fixture may be a better choice. Always follow the manufacturer’s specifications, and use a licensed electrician for electrical work when required.
Compare energy use, efficacy, and potential savings
LEDs generally use less electricity than fluorescent lamps to produce comparable light. Compare lumens, which describe light output, with watts, which measure energy use. Efficacy, listed in lumens per watt, makes it easier to compare how efficiently products convert electricity into light.
The fixture design also matters. A purpose-built retrofit kit may control light more effectively than an LED tube installed in an existing fluorescent fixture. Jarvis Lighting’s comparison cites retrofit-kit efficacy of up to 160 lumens per watt, compared with about 120 lumens per watt for tubes. These are reference figures, not a guarantee for every product, so check each kit’s specifications.
To estimate potential savings, compare the wattage of your current lamps and the proposed kit, then account for operating hours and your electricity rate. Fixtures used for long stretches may offer more opportunity for energy savings.
Weigh lifespan, maintenance, and total cost
LED kits can mean fewer lamp changes, which is useful in spaces where fixtures run for many hours or are difficult to reach. Check the product’s rated life, but remember that it is an estimate. Heat, fixture condition, installation, and daily use can all affect service life.
Consider whether the kit relies on the existing ballast. A plug-and-play option needs a compatible, working ballast. A ballast-bypass kit removes it, but requires rewiring. As ProLamp Sales explains, removing the ballast eliminates it as a component that could fail during the LED tube’s service life.
Compare equipment and installation costs with possible energy and maintenance savings over time. A basic replacement may suit an accessible fixture, while a more extensive retrofit may be worth considering where lamp changes interrupt work or require special access.
Compare light quality, color temperature, startup, and flicker
LED kits are available in different color temperatures, from warm white to cooler white. Warm tones can feel comfortable in shared or relaxed spaces, while cooler light may suit task areas. Check the Kelvin rating and color rendering index (CRI) to understand how the light may look and how clearly it shows colors.
Brightness and distribution are important, too. Compare lumen output and the manufacturer’s information about light distribution, especially if the fixture has a lens or reflector. If the appearance matters across a large room, try a sample before replacing every lamp.
LEDs usually reach full brightness quickly, but flicker or uneven output can occur when a tube is paired with an incompatible ballast, driver, or dimmer. Confirm that each component supports the intended setup. A dimmable label alone does not mean a tube will work with every dimmer.
Consider upfront costs, fixture condition, and possible rebates
A retrofit kit may cost more upfront than replacement tubes, particularly when the work requires rewiring or an electrician. Include labor, repairs, and disposal in your estimate. For a larger project, ask for an itemized quote so you can compare equipment and installation costs.
Inspect the existing fixture before choosing a kit. Damaged sockets, wiring, or housing may make a retrofit impractical, and replacing the fixture could be the better long-term choice. If the fixture is in good condition and the kit is listed as compatible, keeping the existing housing may make sense.
Some projects may qualify for utility rebates, but requirements vary by location and program. Jarvis Lighting’s guide notes that retrofit kits are more commonly DLC listed than LED tubes. Check current program rules before buying, and confirm that the specific product and installation meet the requirements.
Clear up myths about compatibility, dimming, and installation
LED tubes do not fit or function in every fluorescent fixture. A product may require a particular ballast, direct wiring, or socket configuration. Check the manufacturer’s compatibility list, wiring diagram, tube length, base, and pin type before placing an order.
Dimming also depends on the full setup. The tube, ballast or driver, and dimmer must all support the same configuration. Even compatible products may vary in how smoothly they dim, so review the specifications if dimming is important.
Treat ballast-bypass installation as electrical work, not a routine lamp change. Incorrect wiring can create a shock hazard, including if someone later inserts a fluorescent tube into a modified fixture. Jarvis Lighting’s troubleshooting guide explains one risk: wiring both ends of a socket to line voltage. Follow the kit’s instructions, label modified fixtures, and hire a licensed electrician when needed.
Which LED Tube Retrofit Kits Are Best?
There isn’t one best LED tube retrofit kit for every fixture. The right choice depends on your existing ballast and sockets, whether you’re willing to rewire the fixture, and the light quality and controls you need. Start by identifying the fixture and checking the kit’s compatibility information. A tube that fits physically may still be incompatible electrically.
Use the comparisons below to narrow your options, then verify the details for the exact product you’re considering. Compare the full cost, including installation and future maintenance, rather than choosing by purchase price alone. If a project involves changing fixture wiring, consult a licensed electrician.
Find the best plug-and-play kits for compatible electronic ballasts
Plug-and-play, or Type A, LED tubes work with compatible electronic ballasts. They’re a convenient option when your ballast is in good condition and the tube manufacturer lists its model as compatible. Before you buy, check the fixture’s ballast model and the tube’s compatibility list. Matching tube length and pins is not enough to confirm that the two will work together.
Keeping the ballast can make installation simpler, but the fixture still depends on that component. If the ballast fails, you may need to replace it or convert the fixture. Compare the installation requirements and performance claims for each option, and use this guide to LED T8 retrofit approaches to understand the trade-offs.
Find the best ballast-bypass kits for direct-wired fixtures
A ballast-bypass, or Type B, kit is designed for a fixture that has been rewired to send line voltage directly to the LED tubes. Removing the ballast eliminates it as a component that could fail or require replacement. This option may suit a fixture with a failed ballast or a project where you want a direct-wire setup.
Installation involves changing the fixture’s wiring, so it’s not a simple tube swap. Wiring can vary by product and fixture. Follow the kit’s exact diagram, and don’t assume the sockets are wired in a particular way. This Type B retrofit guide explains the direct-wire approach. If you’re not qualified to do the work, hire a licensed electrician.
Find the best hybrid kits for compatible setups
Hybrid, or Type A/B, tubes can operate with compatible ballasts or in a direct-wire configuration, depending on the product. That flexibility can be helpful if you want to keep a compatible ballast now but may choose a direct-wire setup later. Still, “hybrid” doesn’t mean the tube works with every fixture. Check the ballast, wiring method, sockets, and installation instructions for the specific model.
Look for clear manufacturer guidance on how to configure each operating mode. Moving from ballast operation to direct wire may require rewiring, and the tube must be set up for the selected method. Review this comparison of Type A, Type B, and hybrid options before purchasing. If you’re considering a complete retrofit kit rather than replacement tubes, confirm exactly which fixture components the kit replaces.
Compare fit, brightness, efficacy, dimming, warranty, and price
First, confirm the tube length, base, pin configuration, and clearance inside the fixture. Then compare light output in lumens and efficacy in lumens per watt. Check color temperature and color rendering, too, especially in work areas where accurate color matters. Wattage alone won’t tell you how bright a tube will appear.
If you need dimming, verify that the tube works with the specific ballast or driver and dimmer. Some LED tubes aren’t dimmable. Compare warranty terms, rated lifespan, energy use, and installation costs alongside the purchase price. A complete retrofit kit replaces more of the fixture’s lighting components with an LED light engine and driver, which can affect light distribution and performance. This retrofit guide outlines design factors to consider.
Check listings, safety certifications, specs, and rebate eligibility
Before ordering, review the product documentation for installation steps, wiring diagrams, ballast compatibility, dimming details, and operating limits. Check for a recognized safety certification, such as UL or ETL, and verify that it applies to the exact model you plan to install. A general claim that a tube is “LED compatible” doesn’t provide enough detail to confirm it suits your fixture.
If you’re counting on a rebate, check the current rules with your utility or program administrator. Eligibility can depend on the product model, fixture, installation method, and required listing. Some programs specify complete retrofit kits rather than replacement tubes. Search the DesignLights Consortium’s qualified product resources, then confirm the program’s requirements directly before you buy.
How Do You Choose an LED Tube Retrofit Kit?
Start by identifying the fluorescent lamp and fixture you have, then compare those details with the retrofit kit’s specifications. A tube can fit inside a fixture and still be incompatible with its ballast, sockets, or wiring. Check the lamp type, length, base, pin arrangement, and ballast model before you buy.
Next, decide how you want the kit to work. Plug-and-play kits use a compatible ballast, while ballast-bypass kits require the ballast to be removed or disconnected and the fixture rewired. Hybrid kits can support both configurations, but only when installed according to the manufacturer’s instructions. Don’t assume a kit is compatible simply because it shares the same tube size.
Then consider the light you need. Compare lumen output, color temperature, color rendering, and light distribution for the room and tasks at hand. Check whether the kit supports dimming and whether it is rated for your fixture type. Finally, review its safety certifications, warranty, lifespan, and full installation cost. These checks can help you avoid buying a kit that won’t fit, won’t perform as expected, or requires electrical work you hadn’t planned for.
Match tube length, type, base, pins, sockets, and ballast
Check the markings on your existing lamp and fixture. Note the tube type, such as T5, T8, or T12, along with its length, base, and pin arrangement. These formats differ in size and pin spacing, so they are not automatically interchangeable. Make sure the retrofit kit also matches the fixture’s sockets, sometimes called tombstones.
Identify the ballast model as well. A plug-and-play kit typically needs a compatible electronic ballast, while a ballast-bypass kit uses a different wiring setup. Read the fixture label and compare the details with the kit specifications. Waveform Lighting’s tube guide explains common tube types and why matching dimensions and components matters.
Check socket type and the manufacturer’s compatibility list
Find out whether your fixture has shunted or non-shunted sockets. Shunted sockets connect their contacts together, while non-shunted sockets keep them separate. The correct type depends on the LED tube and wiring method. This is especially important for ballast-bypass installations, where the sockets may carry line voltage.
Don’t guess based on appearance. Check the fixture documentation or ask a qualified electrician to inspect the sockets. For a plug-and-play kit, look up the exact ballast model on the LED manufacturer’s compatibility list. A matching brand name alone does not confirm compatibility. If your ballast model isn’t listed, contact the manufacturer before ordering. Following the kit’s instructions helps reduce the risk of poor performance or an unsafe installation.
Choose brightness for the space, not by wattage alone
Wattage tells you how much power a lamp uses, not how much light it produces. Compare lumen ratings to understand light output, then consider room size, ceiling height, fixture condition, and the tasks performed in the space. A replacement tube with lower wattage may still provide enough light, while a tube chosen as a one-for-one replacement may leave a work area too dim.
Think about the fixture’s lens or reflector, too, since it affects how much light reaches the room. A garage workbench may need brighter, focused illumination than a hallway. The U.S. Department of Energy’s LED lighting guide explains how to use lumens when choosing a lamp. Compare the new tube’s output with your current lighting and select a level that suits the space.
Compare color temperature, color rendering, beam angle, and light distribution
Color temperature, measured in kelvins, describes whether light appears warm, neutral, or cool. Choose a tone that suits the room and works well with nearby fixtures. Color rendering, often listed as CRI, indicates how accurately a light source shows colors. A higher CRI can be useful in workshops, retail areas, or anywhere color detail matters.
Check the beam angle and light distribution as well. Many fluorescent tubes spread light around the lamp, while some LED tubes direct most of their light in one direction. That difference can affect coverage, especially in a fixture with a lens or reflector. Review the product specifications and any available photometric data to see how light is distributed. If consistent, even illumination matters, check whether the tube is designed for your specific fixture style.
Confirm dimmer, driver, ballast, and enclosed-fixture compatibility
If your fixture uses a dimmer or lighting control system, confirm that the exact LED tube and ballast combination supports it. A “dimmable” label does not guarantee compatibility with every dimmer, and some tubes have a limited dimming range. Check the manufacturer’s approved combinations before purchasing.
For a direct-wire kit, follow its wiring diagram and verify that the existing sockets suit the specified configuration. Never assume two kits use the same wiring method. Also check whether the tube is rated for enclosed fixtures. A closed lens or housing can trap heat, which may shorten the life of a lamp not designed for that environment. If you cannot confirm compatibility from the product documentation, ask the manufacturer or have a qualified electrician assess the setup before installation.
Review lifespan, warranty, safety listings, and total cost
Compare the rated lifespan and warranty, and read the warranty conditions carefully. Check what components are covered, whether professional installation is required, and whether the warranty applies to your fixture type. Actual lifespan can depend on operating temperature, switching frequency, and the condition of the fixture.
Look for recognized safety certification marks and confirm the product is listed for its intended use. You can check products in the UL Product iQ directory, or review eligible commercial lighting products in the DesignLights Consortium’s qualified products list. When comparing prices, include lamps, any socket or ballast work, labor, and disposal. Your utility may offer rebates for qualifying products, so check eligibility before you buy.
Weigh drawbacks such as rewiring, limited dimming, and fit issues
Retrofits can work well when the fixture is in good condition and the kit is a confirmed match. But ballast-bypass kits require fixture rewiring, so they involve more than changing a lamp. Electrical work should be completed by a qualified professional, and converted fixtures should be labeled to show that they use LED tubes and indicate the wiring configuration.
There can also be differences in fit and light quality. A tube may not sit securely in the sockets or may distribute light unevenly behind a fixture lens. Dimming may be limited or unavailable. If the sockets are damaged, the housing is corroded, or parts are difficult to replace, a new fixture may be a better long-term option. Compare the full cost and expected performance of both approaches before choosing a kit.
How Do You Install an LED Tube Retrofit Kit Safely?
Installing an LED tube retrofit kit can involve more than replacing a fluorescent tube. Plug-and-play Type A kits work with compatible ballasts, while ballast-bypass Type B kits require changes to the fixture’s wiring. Hybrid kits may support either setup, but only when the tube, ballast, sockets, and wiring match the manufacturer’s specifications.
Before starting, read the kit instructions and confirm they apply to your exact fixture. Check the tube type, socket configuration, ballast compatibility, and any dimmer requirements. Don’t assume two kits with similar-looking tubes use the same wiring. If the instructions don’t match your fixture, stop and ask the manufacturer or a licensed electrician for guidance.
Electrical work can cause shock, fire, or equipment damage if done incorrectly. Turn off power at the breaker and verify the fixture is de-energized before opening it or handling wiring. If the job calls for rewiring, you can’t identify the socket type, or you find damaged components, hire a licensed electrician. After installation, test the fixture and keep an eye out for flicker, dimming, unusual heat, or other changes.
Turn off power at the breaker and verify the fixture is de-energized
Switch off the circuit breaker before opening the fixture or handling its wiring. A wall switch may not disconnect power from every part of the fixture, so don’t rely on it as the only safety measure. If you’re unsure which breaker controls the fixture, get help identifying it before you begin.
Power should also be verified off with a properly rated voltage tester. Use the tester according to its instructions, and check that it works on a known live source before and after testing. If you’re not trained to use a tester or can’t confirm the fixture is de-energized, stop and call an electrician.
This step is especially important for a Type B, or ballast-bypass, conversion because the ballast is removed and the fixture is rewired. The LED retrofit safety guide emphasizes shutting off power before conversion work.
Follow the wiring diagram; never guess at socket wiring
Use the wiring diagram included with your specific kit. LED tubes may receive power from one end or from both ends, and socket wiring can vary by fixture. A diagram for another tube model or fixture may not apply, even if the products look alike.
Don’t guess based on wire color, the existing setup, or an online diagram for a different product. Incorrect wiring can damage the tube or create a shock hazard. For example, wiring both ends of a socket to line voltage can leave contacts energized if someone later inserts an incompatible fluorescent tube. The retrofit troubleshooting guide explains why the correct wiring configuration matters.
If the kit diagram doesn’t match the fixture, don’t proceed. Contact the manufacturer or a licensed electrician to confirm the right setup.
Treat ballast bypass as rewiring and hire a licensed electrician when needed
A ballast-bypass kit is not a simple tube swap. The ballast must be disconnected or removed, and the fixture wiring must be changed so the LED tube receives power correctly. The work may also require confirming whether the sockets are shunted or non-shunted, and replacing sockets that aren’t compatible.
If you’re unfamiliar with electrical work, hire a licensed electrician for a ballast-bypass conversion. Get professional help if the wiring is unclear, the fixture has damaged insulation, or you can’t identify the socket type. Some kits require specific sockets or socket replacement, as the fluorescent-to-LED retrofit guide explains.
A plug-and-play kit may be a better fit when the existing ballast is in good condition and appears on the kit’s compatibility list. Confirm compatibility before buying or installing any kit.
Inspect sockets and housing, then label converted fixtures
With power off and verified, inspect the fixture before installing the tubes. Look for cracked or loose sockets, damaged wire insulation, corrosion, burn marks, or a bent housing. A retrofit kit won’t repair a worn fixture, and damaged parts can keep a tube from seating securely. Replace faulty components or ask an electrician to assess the fixture before continuing.
After a ballast-bypass conversion, label the fixture to show that it has been rewired for LED tubes. Include the compatible tube type if the kit instructions specify one. This can help prevent someone from installing a fluorescent tube or an incompatible LED tube later. The retrofit troubleshooting guide recommends labeling converted fixtures.
Make the label easy to see and durable. If you’re converting several fixtures, keep a record of which ones were changed and what tube type they require.
Test fit, brightness, dimming, flicker, and heat
Before restoring power, confirm that each tube has the correct length, base, and socket configuration. Install it as the manufacturer directs, and don’t force it into place. If it feels loose or doesn’t align with the sockets, stop and recheck compatibility.
Once the fixture is closed and safe to energize, check that the tubes start reliably and provide even light. Test dimming only when the tube, driver, and dimmer are listed as compatible. Flicker, buzzing, delayed startup, or uneven brightness may indicate a compatibility or wiring problem. Turn off the breaker before investigating, and don’t open an energized fixture.
During initial use, watch for unusual heat, odor, or repeated flickering. Switch off power and contact the manufacturer or an electrician if something seems wrong. The comparison of LED tube retrofit options outlines differences between retrofit approaches.
Check for loose connections, flicker, or dimming during maintenance
Add the fixture to your regular lighting checks. Flickering, intermittent operation, or a sudden drop in brightness can point to a loose connection, a failing component, or a compatibility issue. Don’t ignore changes just because the light still turns on.
Before cleaning or inspecting the fixture, switch off the breaker and verify that power is off. Never adjust wiring or sockets while the fixture is energized. If a tube feels loose, follow the manufacturer’s instructions for reseating it. If the problem returns, stop using the fixture and have it checked.
Ballast-bypass systems remove one potential point of failure, but the sockets, wiring, and housing still need attention. Check for visible damage and make sure sockets remain secure. The LED tube retrofit comparison describes how different designs affect the components in a fixture.
Do LED Tube Retrofit Kits Suit Every Lighting Project?
LED tube retrofit kits can be a useful way to update existing fluorescent fixtures, but they are not the right fit for every space or lighting goal. Consider the fixture’s condition, how often it’s used, the project’s total cost, and whether you’re upgrading indoor lighting or improving your property’s exterior.
Choose retrofits for frequently used spaces with compatible, sound fixtures
A retrofit may be worth considering in spaces where lights stay on for long periods, such as offices, workshops, and utility rooms. It can replace components inside an existing fixture with an LED light engine and driver, which may offer better optical control and higher efficacy than a tube-only upgrade. First, confirm that the fixture housing is sound and that the kit matches its sockets, wiring, and other specifications. Some products may qualify for rebates, but eligibility varies by product and project. Review the differences between retrofit types and check rebate requirements before you buy.
Compare retrofit costs with replacing damaged or outdated fixtures
A retrofit can extend the useful life of a fixture that is still in good condition, but repairing or upgrading an old fixture is not always the best value. If the housing is damaged, sockets are worn, or the fixture no longer provides the light your space needs, compare the cost of a retrofit with the cost of replacement. Include materials, installation, energy use, maintenance, and any applicable rebates. A retrofit may suit projects focused on long-term savings, but the actual value depends on your existing setup and how often the lights operate. Get estimates for both options so you can compare the full project cost, not just the price of the kit.
Separate indoor tube upgrades from permanent outdoor accent and holiday lighting
LED tube kits are intended for compatible fixtures, usually indoors. They do not replace a purpose-built outdoor system for highlighting architectural details, adding color, or creating holiday displays. Outdoor lighting must be designed for exterior conditions and the look you want across seasons and occasions. If you’re planning an indoor fluorescent upgrade, check local requirements and product availability as part of your research. Rules can affect the sale of certain fluorescent lamps, so it may help to review current information about fluorescent lighting regulations before deciding which fixtures to update.
For year-round exterior color and curb appeal, consider Lit 365’s professionally installed outdoor lighting system
If you want to enhance curb appeal or avoid putting up and taking down holiday lights, an indoor tube retrofit will not address that goal. Lit 365 installs low-profile outdoor LED lighting for homes and businesses, with customizable colors, patterns, and schedules. Use one professionally installed system for subtle everyday accents, holiday displays, and special events. Think about which areas of your property you want to highlight and how you’d like the lighting to look throughout the year. Then talk with Lit 365 about placement, controls, and design options to see whether permanent outdoor lighting is a good fit.
Frequently Asked Questions
Can I use an LED tube in any fluorescent fixture?\ No. A tube can fit the fixture but still be incompatible with its ballast, sockets, or wiring. Check the tube’s size and pin type, then confirm the ballast model appears on the manufacturer’s compatibility list.
What’s the difference between an LED tube and a retrofit kit?\ An LED tube replaces a fluorescent lamp and usually leaves the fixture housing in place. A retrofit kit may replace more internal components, such as the ballast and lamps, with an LED light engine and driver. Check the product details to see exactly what’s included.
Do LED tube retrofit kits require an electrician?\ Some plug-and-play tubes work with a compatible ballast and may not require rewiring. Ballast-bypass kits change the fixture’s wiring, so hire a licensed electrician if you’re not qualified to do electrical work or the instructions don’t clearly match your fixture.
Should I keep the ballast or bypass it?\ That depends on the kit and the condition of your fixture. Keeping a working, compatible ballast can make installation simpler. Bypassing it removes the ballast from the circuit but requires rewiring. Follow the manufacturer’s instructions and compare installation costs before deciding.
Can an LED tube retrofit kit provide outdoor holiday lighting?\ No. These kits are designed to update compatible fluorescent fixtures, not to light a home’s exterior. For year-round accent lighting and seasonal displays, Lit 365 offers professionally installed outdoor LED systems with customizable colors, patterns, and schedules.